
Most home offices are built around leftover space: a corner in the bedroom, a niche beside a window, or the gap between a radiator and a wardrobe. When that corner becomes your full-time workstation, layout matters as much as the desk itself. A good corner desk layout can turn a cramped nook into a focused, ergonomic workspace; a poor one locks in neck strain, cable mess, and constant distraction.
This guide walks through practical corner and L-shaped desk layouts for small spaces, focused on ergonomics, cable routing, and clear movement paths. It draws on leading ergonomics standards and field-tested installer tips so you can plan a WFH nook that feels compact but not cramped.

1. Start with Ergonomics, Not Furniture Placement
Before deciding where the corner desk goes, it helps to understand the body positions you are trying to support.
Neutral posture in a corner setup
According to the OSHA Computer Workstations guidance on neutral working postures, a healthy workstation should allow:
- Elbows roughly 90–110° with upper arms close to the body
- Wrists straight, not bent up, down, or sideways
- Hips and knees around 90–110° with feet supported
- Head balanced over the torso with minimal forward lean
Corner layouts can make these angles harder to maintain if the desktop is too shallow or the monitors are shoved into the deepest part of the corner.
A key practitioner rule is that desk depths below about 60 cm often force people to lean forward, especially with laptops or larger monitors. For dual-monitor corner setups, experienced installers aim for 60–80 cm of desktop depth plus another 20–30 cm via a monitor riser or arms so the screens can sit back without crowding the keyboard.
Sitting, standing, and movement
A corner desk layout should support posture variation, not just sitting. The World Health Organization’s Guidelines on Physical Activity and Sedentary Behaviour recommend that adults reduce sedentary time and regularly interrupt long periods of static sitting.
Sit-stand corner desks help with this, but they work best when the layout makes switching easy. The Canadian Centre for Occupational Health and Safety’s sit/stand desk guide stresses that users should be able to switch position without reconfiguring the whole workspace each time.
In practice, that means:
- No storage blocks under the sit-stand surface
- Cables with enough slack to handle the full height range
- A chair that rolls out cleanly from under the corner without hitting legs or filing units
Why corner depth and monitor distance matter
Research-based guidance for a 24-inch monitor suggests a viewing distance of roughly 20–30 inches (about 50–75 cm). According to Best PC Monitor’s viewing distance rule of thumb, many small corner units under about 22 inches deep simply cannot place a monitor in the true corner without forcing you to lean in.
That leads to a common problem: users push the monitor into the corner to “maximize workspace” and then crane their neck forward all day.
Practical rule: size the corner desk so that your main monitor can sit 50–70 cm away while your elbows still rest at 90–110° on the surface. If that means upsizing the desk slightly, you will usually gain comfort and usable space.
2. Planning the Corner: Room, Person, and Desk Size
Step-by-step layout checklist
Use this checklist before buying or rearranging anything:
-
Measure the room corner
- Wall A and Wall B length from the corner
- Locations of doors, radiators, windows, and wall sockets
-
Mark the minimum clearances
- 80–90 cm behind the chair for rolling back and standing up
- 60–80 cm in front of any drawers or cabinets you plan to open
-
Account for your body size
- Taller users typically need more legroom and a higher desk range
- If multiple people share the nook, plan for adjustability rather than a fixed-height built-in
-
Choose your primary working axis
- Decide which direction you will face most of the time: along Wall A, along Wall B, or diagonally into the room
-
Place power and data
- Map where cables can run without crossing leg paths or being pinched by moving desk frames
Standards such as BIFMA G1-2013 are designed to fit roughly the 5th to 95th percentile adult population. While you may not have the full standard on hand, its intent is clear: adjustable furniture ranges are more inclusive than fixed heights. In tight corners, this adjustability is especially important because wall positions limit how far you can move your chair and monitor instead.
Common corner orientations (and when they work)
Use the table below as a decision aid when choosing how to orient the L-shaped or corner desk.
| Layout orientation | Description | Works best for | Watch out for |
|---|---|---|---|
| Diagonal facing into the room | Chair centered on the corner; you face diagonally with both wings stretching left/right | Visual openness, video calls, flexible monitor placement | Requires enough floor space behind chair; risk of overloading deep corner with monitors |
| Wall A main, Wall B side | Chair faces wall A; wall B wing used for storage or secondary tasks | Narrow rooms, single primary monitor setups | Neck twist if you put main screen on wall B; drawers on wall B can hit chair base |
| Wall B main, Wall A side | Mirror of above | Same as above, mirrored | Same considerations, plus window glare if wall B has a window |
| Floating L near corner | L-shaped desk pulled slightly away from the corner, leaving a small gap behind | Cable access, radiator clearance, flexible CPU and power placement | Gap can collect dust; need careful cable routing and wall anchoring if shelves above |
A counterintuitive but very practical insight from field installers is that going up one size category on the long side of the desk (for example, from 36 to around 47 inches) often makes a small room feel less cramped in daily use. With the larger surface, you can keep monitors and input devices within a comfortable reach radius, so you move less awkwardly and pile fewer items on the floor.
3. Building an Ergonomic Work Triangle in a Corner
A productive WFH nook works like a small kitchen: the essentials form a compact triangle. In ergonomics, we think in reach zones rather than appliances.
Defining your reach zones
Based on installer heuristics and OSHA’s desk component guidelines:
- Primary zone (high frequency): within about 50–65 cm (20–25 inches) of your body, where your elbows can stay close to your sides. This is where the keyboard, mouse, and primary monitor controls should live.
- Secondary zone (medium frequency): full arm’s reach without raising your shoulder more than ~30°. This is ideal for a phone, notebook, or small reference documents.
- Tertiary zone (low frequency): anything that requires a stretch, twist, or standing reach. Use this only for storage or rare-use items.
An easy mistake is to fill the corner and upper shelves with items you use daily. Experienced consultants recommend the opposite: anything you touch weekly should fit within a sweep of the forearm without shrugging your shoulder. Higher shelves are best reserved for rare-use items to protect both joints and your head when you stand up.
Where the monitor really belongs in a corner
A widespread misconception is that pushing the monitor into the very corner “saves space.” In reality, this often forces the user to sit offset and twist the neck or torso more than 30°, especially if there are dual monitors.
Installers consistently find better results when:
- The primary monitor’s centerline is directly in front of the nose
- The screen is 50–70 cm away, depending on screen size and vision
- Any secondary monitor is angled 15–30° to the side in a shallow V configuration, instead of being isolated on a far wing
This matches the spirit of ISO and human factors guidelines such as ISO 9241-5:2024, which emphasize workstation layouts that minimize awkward neck rotation.
Keyboard, mouse, and tray placement in a corner
Keyboards and mice should let the shoulders relax and the wrists stay neutral. The OSHA keyboard guidance recommends keeping the keyboard at or slightly below elbow height with the wrists straight.
A pull-out tray helps achieve this in a corner, especially when the desktop is thick or loaded with equipment. A product like the Pull-out Keyboard Tray lets you:
- Adjust pull-out length so the home row sits directly under your shoulders
- Choose between two mounting heights to fine-tune wrist angles
- Slide the keyboard away when you need the corner surface for writing or sketching
In corner layouts, installers also check that the tray can travel fully without hitting the L-joint underside or desk legs. A rule of thumb is to maintain 10–12 cm of clear knee space behind any tray or crossbar so the user does not bang their knees when rolling closer.
4. Three Corner Desk Layouts That Work in Real Homes
Layout 1: Minimalist single-monitor corner for compact bedrooms
Scenario: You have a small bedroom with one free corner and need a dedicated WFH nook without overwhelming the room.
Key choices:
- Desk orientation: Face diagonally into the room, with the L or corner desk snug into the corner.
- Monitor position: Single monitor centered directly in front of you, pulled slightly out from the deepest point of the corner so the viewing distance is around 55–65 cm.
- Input devices: Keyboard and mouse either on the main surface or on a pull-out tray to keep elbows at 90–110°.
- Chair: An ergonomic office chair with adjustable lumbar support, such as the Exis, Ergonomic Office Chair, helps maintain a neutral spine while working in a confined space.
The Exis chair’s 4-level lumbar support and 3D armrests allow the user to bring support to the body rather than pushing the chair closer than the corner allows. This matters in tight rooms where the desk depth is fixed.
Why this layout works:
- Facing into the room reduces the “boxed-in” feeling and makes video call framing easier.
- Keeping the monitor slightly off the deepest point of the corner allows a proper viewing distance without leaning.
- The free wing (left or right) can host a lamp, notebook, or docking station without entering the primary reach zone.
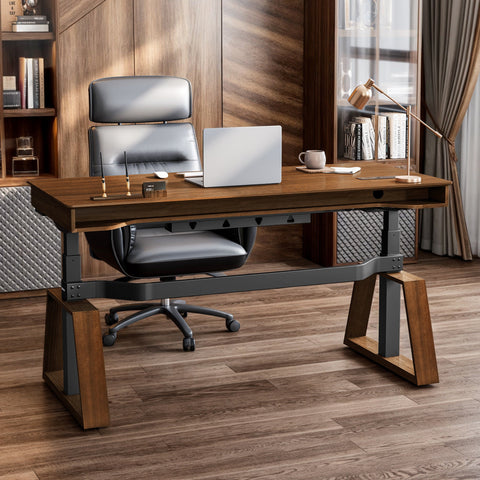
Layout 2: Dual-monitor L-shaped productivity station
Scenario: You work with spreadsheets, design tools, or code and need dual screens, but only have one corner in the living room.
Key choices:
- Desk orientation: Choose one wall as the main axis (typically the one with fewer windows) and use the other wing for secondary tasks.
-
Monitor configuration:
- Primary monitor directly in front of you
- Secondary monitor angled 15–30° toward you, both forming a shallow V
- Screens mounted on a riser or arms so the bezels sit just below eye level as recommended by CCOHS workstation guides, which advise that the top line of text be at or slightly below eye height
- Desk depth: Target 60–80 cm on the main axis with the monitors positioned toward the rear; a dual monitor stand, such as the Carbon Fiber Dual Monitor Stand, can add effective depth and under-stand storage.
The Carbon Fiber Dual Monitor Stand raises both displays together and creates a space underneath for the keyboard when not in use. In a small living room corner, that reclaimed space makes the area look less cluttered when work is done for the day.
Why this layout works:
- Both monitors stay within the primary and secondary reach zones, so your eyes and trunk rotate only modestly.
- The side wing can host reference materials, a printer, or a document holder aligned beside the monitor. OSHA’s document holder guidance highlights that placing documents close to the monitor reduces neck bending and head turning.
- Cable management is simpler because most devices cluster near the back edge of the main axis.
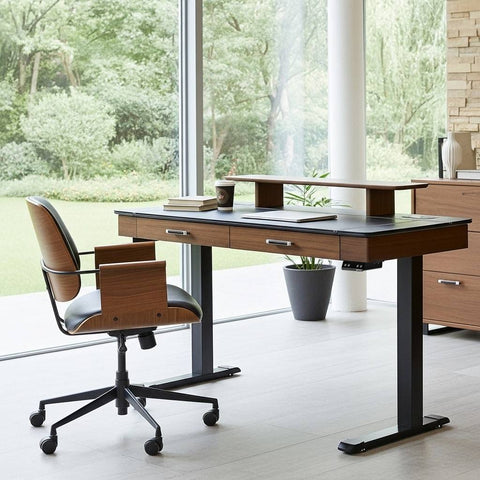
Layout 3: Sit-stand corner workstation with clean cable routing
Scenario: You have an electric L-shaped sit-stand desk and want to use it in a corner without cable strain or blocked movement.
Key choices:
- Desk placement: Consider a “floating L” a few centimeters off the walls to allow cables to run behind the frame and avoid pinch points.
-
Cable routing:
- Use an underside cable tray running along the outer frame, not across the corner joint.
- Leave 50–70% of the cable length as slack when the desk is at maximum height so height changes do not pull on ports.
- Anchor cables both to the desk and to a fixed point (wall or leg) to guide movement.
- CPU placement: Mount a CPU holder under the outer wing at least 50 mm from the desk edge. This reduces cable tension and keeps ports reachable without twisting or crawling under the desk.
The Cochrane review of sit-stand interventions found that sit-stand desks can reduce workplace sitting time by around 84–116 minutes per day, although evidence on long-term health outcomes is still emerging. To get that benefit at home, the sit-stand transitions must be frictionless—meaning no cables catching, no need to rearrange devices, and no risk of screens flickering when you move the desk.
Why this layout works:
- The frame has space to move without hitting walls or radiators.
- Cable slack is designed in from the start, avoiding intermittent failures that sometimes appear after repeated height changes.
- The CPU and peripherals can stay within reach even while you stand.
Pro Tip: Avoid the “Corner Monitor Trap”
A recurring installer warning is what could be called the “corner monitor trap.” The usual advice is that corner desks save space if you push everything deep into the corner. In practice, that often creates three issues:
- The main monitor ends up 30–40 cm from your eyes instead of the recommended 50–70 cm.
- You sit off-center to the screens to avoid the corner post, twisting your neck and torso.
- There is no room for a document holder or task light without blocking part of the screen.
A better approach is to treat the corner as reserve depth rather than the primary monitor location. Rotate the primary monitor so its centerline aligns with your nose, even if that “steals” some of the deepest corner space. Any secondary screen should sit in a shallow V next to it, not on a far wing that requires you to turn more than about 30°.
This small change dramatically reduces asymmetric neck rotation and usually leads to a more stable, focused working posture.
5. Lighting, Acoustics, and Storage in a Corner Nook
Getting light right in deep corners
Dark corners can make screens glare and strain the eyes. A common mistake is to rely on a single bright task lamp in the corner, which creates strong reflections on the monitor.
Experienced layout designers get better results by:
- Using two lower-output light sources: one bounced off the side wall to soften shadows, and one focused gently on the work surface
- Positioning windows to the side of the monitor when possible, not directly behind or in front
- Choosing matte, non-reflective desktop finishes and monitor bezels where possible
The UK’s HSE guidance on display screen equipment also notes that glare and reflections are a key risk factor in eye strain at computer workstations, reinforcing the need for thoughtful lighting placement.
Making corners feel bigger with vertical storage
Shelving and pegboards above the desk can keep the work surface clear, but in corners it is easy to overdo it. Practical limits often come not from the shelf brackets but from the walls themselves, especially in rentals where the construction is unknown.
To keep the nook feeling open and safe:
- Reserve the area directly above the monitor for light items like photos or corkboards, not heavy storage
- Use the higher sections of the side walls for rarely accessed items, staying mindful that you will reach them while seated or standing at the desk
- Consider freestanding or tension-pole storage near the corner to avoid overloading unknown wall structures
Soft items such as plants, fabric panels, or cork boards along the side walls also help reduce echo, which is noticeable in small, hard-surfaced apartments during video calls.
Chair, foot support, and lower limb comfort
Corner nooks often trap the lower body, with legs colliding with desk legs, cable baskets, or storage boxes. This is not just inconvenient—over time, awkward lower limb postures can contribute to discomfort, as discussed in OSHwiki’s overview of musculoskeletal lower limb disorders.
Key practices include:
- Ensuring at least 10–12 cm of knee clearance from any underside obstacles
- Keeping the main leg path free of cables and power strips
- Using an adjustable footrest when the chair height is set to keep the elbows level with the keyboard but the feet cannot reach the floor comfortably
An accessory such as the Adjustable Ergonomic Footrest can help maintain circulation by letting you alter ankle angle and pressure points. Its 0–20° tilt range encourages micro-movements rather than static foot positions.
6. Sit-Stand Rhythm and Daily Use in a Corner Nook
A well-laid-out corner desk is only part of the story; how you use it through the day also matters.
How often to switch between sitting and standing
ISO 11226, which addresses static working postures, emphasizes limiting the duration of fixed joint angles. In practice, ergonomists translate this into advice to change posture regularly rather than aiming for a single “correct” position.
Cornell University’s ergonomics group suggests a “20-8-2” rhythm for intensive computer work: in each 30-minute block, roughly 20 minutes sitting, 8 minutes standing, and 2 minutes moving. For home offices, a simpler starting heuristic is to:
- Switch between sitting and standing every 30–60 minutes
- Aim for at least 2–4 full sit-stand cycles during a workday
- Insert short micro-breaks for walking, stretching, or refilling water
Sit-stand desks make this easier, but they do not replace the need for general physical activity. The WHO guidelines still recommend 150–300 minutes per week of moderate-intensity activity for adults, beyond simply standing more at the desk.
Using height presets effectively
If your corner desk has programmable memory presets, using them well reduces daily friction:
- Preset 1: Primary sitting posture (elbows at 90–110° on keyboard tray or desktop)
- Preset 2: Primary standing posture (wrists neutral, shoulders relaxed)
- Preset 3: “Focus” mode for handwriting or drawing, often slightly lower than typing height
- Preset 4: “Call” mode for video calls, optimized for camera level and framing
Installers often program these heights during initial setup with the user standing in their natural posture, then fine-tune by 1–2 cm over the first week as the user notices strain or comfort changes.
7. Quick Configuration Templates for Common Corner Nooks
The following templates summarize practical dimensions and priorities for three typical home situations. Use them as starting points and adjust based on your body size and equipment.
| Scenario | Desk depth (main axis) | Monitor distance | Key accessories | Layout priorities |
|---|---|---|---|---|
| Small bedroom corner (single monitor) | 60–70 cm | 55–65 cm | Keyboard tray, ergonomic chair, small lamp | Diagonal facing into room, monitor centered, free wing for secondary items |
| Living room office (dual monitor) | 70–80 cm | 60–70 cm | Dual monitor stand, document holder, under-desk cable tray | One wall as primary axis, shallow V monitor layout, side wing for printer/storage |
| Dedicated WFH nook with sit-stand L-desk | 70–80+ cm | 60–70 cm | Cable tray, CPU holder, footrest, anti-fatigue mat | “Floating L” for cable clearance, 50–70% cable slack at max height, programmed presets |
These ranges reflect common ergonomic recommendations (for example, the 20–30 inch viewing distance for a 24-inch monitor) and field experience fitting L-shaped desks into compact rooms. They are starting points, not rigid rules.
Wrapping Up: Turning a Corner into a High-Performance Nook
A productive WFH corner is less about squeezing the smallest desk into the smallest space and more about aligning surfaces, screens, and supports with how the body works.
Key takeaways:
- Start with posture and reach zones, then choose desk size and orientation that support them.
- Treat the deepest part of the corner as reserve space; center your main monitor on your body, not on the corner itself.
- In dual-monitor setups, aim for a shallow V configuration so both screens stay within a modest neck rotation.
- Plan cable routing and CPU placement from day one, especially with sit-stand L-shaped desks.
- Use adjustable accessories—chairs, keyboard trays, monitor stands, and footrests—to fine-tune comfort without rebuilding the nook.
With a thoughtful layout, a corner that once felt like leftover space can become a compact, health-conscious workstation that genuinely supports focus and productivity.
FAQ: Corner Desk Layouts for Small Home Offices
Q1. Are corner desks really better for small rooms?
Corner and L-shaped desks can make excellent use of tight rooms by opening up a central floor area, but only if they still allow proper monitor distance and legroom. If the desk is too shallow or traps your chair, a slightly larger but better-proportioned desk often feels more comfortable and even visually lighter in daily use.
Q2. How do I avoid neck pain with a corner desk and two monitors?
Align the primary monitor with your nose, about 50–70 cm away, and angle the secondary monitor 15–30° toward you in a shallow V. Avoid putting one monitor on each wing of the L, which forces larger neck and trunk rotations.
Q3. Where should the PC tower go in a corner layout?
A practical spot is under the outer wing of the L, mounted in a CPU holder or placed on a small stand with at least 50 mm of clearance from the desk edge. This shortens cable runs, keeps ports accessible, and prevents you from twisting or crawling into the corner whenever you need to access the machine.
Q4. Is standing at a corner desk enough to offset long sitting hours?
Standing more can reduce static sitting time, and studies such as the Cochrane review of workplace sit-stand interventions show meaningful reductions in daily sitting with height-adjustable desks. However, standing is not a substitute for regular physical activity. Follow the WHO guidelines for weekly movement and use sit-stand transitions as one tool among many.
Q5. How can I make a corner nook feel less cramped visually?
Face diagonally into the room if possible, keep the monitor area clear, use vertical storage sparingly on the side walls, and hide cables in trays or behind legs. Choosing a monitor stand that lets you tuck the keyboard away after work also helps the nook visually “disappear” when you are off the clock.
Disclaimer: This article is for informational purposes only and does not constitute medical, occupational health, or safety advice. Individuals with existing musculoskeletal conditions, mobility limitations, or other health concerns should consult a qualified healthcare or ergonomics professional before making significant changes to their workstation or activity patterns.
Sources
- OSHA eTools: Computer Workstations
- World Health Organization – Guidelines on Physical Activity and Sedentary Behaviour
- CCOHS – Office Ergonomics and Sit/Stand Desk Guide
- BIFMA G1 Ergonomics Guideline for Furniture
- HSE – Working Safely with Display Screen Equipment
- Cochrane Review – Workplace Interventions for Reducing Sitting at Work
- Best PC Monitor – How Far to Sit from a 24 Inch Monitor


Leave a comment