
The Ergonomic Challenge of the Modern Home Office
The shift to remote work has permanently transformed our homes into offices. While the convenience is undeniable, it has also surfaced a widespread physical cost. Many remote professionals experience persistent neck strain, nagging lower back pain, or wrist discomfort that worsens through the workday. These are not just minor annoyances; they are symptoms of poor ergonomic design and are often classified as Work-Related Musculoskeletal Disorders (MSDs). According to the U.S. Occupational Safety and Health Administration (OSHA), risk factors like awkward postures and static positions are primary contributors to these injuries.
For professionals using multiple monitors—traders, developers, designers, and content creators—the L-shaped desk appears to be the perfect solution, offering expansive surface area. However, this configuration introduces its own unique ergonomic pitfalls.
The Myth of the "Corner Command Center"
A common mistake I often see is treating the deep corner of an L-shaped desk as the primary work area. It feels intuitive to place your keyboard and main monitor in that 90-degree apex, creating a cockpit-like "command center." In reality, this is one of the worst ergonomic habits. Working from the corner forces your wrists into an unnatural outward angle (ulnar deviation) to type and pushes your shoulders into an asymmetrical, hunched position. This static, awkward posture is a direct path to repetitive strain injuries (RSI) and shoulder pain. The corner should be reserved for passive items like speakers, a lamp, or decorative plants—not for active input devices.
The Science of Static Loading
Our bodies are not designed to hold a single position for hours. When you remain static—whether sitting or standing—your muscles are under a constant, low-level load. This "static loading" restricts blood flow, leading to muscle fatigue, stiffness, and pain. International standards like ISO 11226:2000 on the evaluation of static working postures provide frameworks for assessing these risks, emphasizing the need to change postures frequently. An ergonomic setup is not about finding one "perfect" posture, but about creating a workstation that allows for effortless, frequent movement and maintains neutral body alignment.
Foundational Setup: Your Chair and Desk Height
Before you arrange a single monitor or keyboard, your ergonomic foundation begins with your seated position. The goal is to establish a "neutral posture" baseline, which you can then use to adjust your entire workstation. Always start with your chair, not your desk.
Step 1: Anchor Your Posture in the Chair
An ergonomic chair is a dynamic tool, not just a seat. As outlined in OSHA's eTools for computer workstations, proper adjustment is critical to reducing stress on your spine.
- Feet Firmly Planted: Adjust your chair height so your feet are flat on the floor. Your thighs should be roughly parallel to the floor, with your knees at or slightly below the level of your hips.
- Engage Lumbar Support: Sit back fully in the chair so your lower back is pressed against the lumbar curve. This maintains the natural "S" shape of your spine and prevents slouching.
- Relax Your Shoulders: Adjust your armrests so they just support the weight of your forearms, allowing your shoulders to relax. Your elbows should be at a 90- to 110-degree angle.
Once you have established this neutral seated posture, you are ready to bring the desk to you.
Step 2: Adjust Your Desk to Your Body
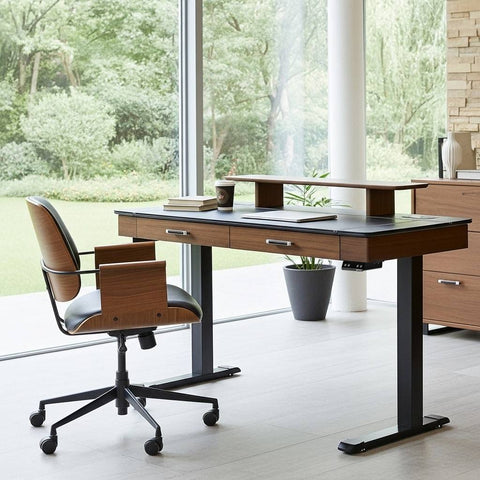
A height-adjustable desk is a powerful engineering control that adapts the work environment to you, rather than forcing you to adapt to it. This is a core principle in OSHA's hierarchy of hazard controls, which prioritizes eliminating risks at their source. A high-quality L-shaped standing desk, such as the Eureka Ergonomic Ark Pro L-Shaped Standing Desk, provides the flexibility to set precise heights for both sitting and standing.
- For Sitting: With your chair position set, lower or raise the desk until the surface is just below your elbow height. When you place your hands on the keyboard, your forearms should be parallel to the floor.
- For Standing: Stand with your feet shoulder-width apart. Raise the desk until it meets the same 90- to 110-degree elbow angle. Your wrists should remain straight, not bent up or down, when typing.
Getting this right is crucial, and you can find more detailed guidance in our article on Finding Your Ideal Ergonomic Standing Desk Height. Industry standards from organizations like the Business and Institutional Furniture Manufacturers Association (BIFMA) ensure that quality adjustable desks can accommodate a wide range of body types, typically from the 5th percentile female to the 95th percentile male.
Mastering the L-Shape: Strategic Zone and Monitor Placement
With your desk at the correct height, the next step is to strategically organize your L-shaped surface to promote neutral postures and efficient workflow. This involves zoning your space and correctly positioning your monitors.
Zone Your Workspace: Primary vs. Secondary Surfaces
Think of your L-shaped desk as two distinct wings. Don't straddle the corner.
- Primary Wing: This is where you will spend most of your active work time. It should house your primary monitor, keyboard, and mouse. You should be able to sit or stand directly in front of it, facing it squarely.
- Secondary Wing: This surface is for supporting tasks. Use it for your laptop, reference documents, a second computer, or other less frequently used equipment. This separation prevents you from twisting or reaching awkwardly during your main tasks.

The Ultimate Multi-Monitor Setup Guide
Incorrect monitor placement is a leading cause of neck and shoulder pain. The goal is to minimize head and neck rotation while keeping the screen at a comfortable viewing height and distance. According to the Canadian Centre for Occupational Health and Safety (CCOHS), your monitor and keyboard should be positioned directly in front of you.
Here is a practical, step-by-step guide for a multi-monitor L-desk setup:
- Position the Primary Monitor: Place your main monitor on your primary wing, directly centered with your body. It should be about an arm's length away (typically 50-70 cm). Adjust its height so the top third of the screen is at or just below your horizontal eye level. You should be looking slightly down at the center of the screen, not craning your neck up or hunching down.
- Add Secondary Monitors: Place your secondary monitor(s) to one or both sides of the primary screen. They should be angled inward at approximately 15-30 degrees, forming a gentle cockpit curve around you. This minimizes neck rotation to a comfortable glance rather than a full head turn.
- Ensure Height Consistency: All monitors should have their vertical centers aligned as closely as possible. Mismatched heights cause your eyes and neck to constantly readjust, leading to strain. A high-quality accessory like the Carbon Fiber Dual Monitor Stand can help elevate screens to the correct eye level while also creating valuable storage space underneath for a cleaner desktop.
Configuration Checklist
| Item | Checkpoint | Rationale |
|---|---|---|
| Primary Monitor | Centered, arm's length away, top 1/3 at/below eye level. | Minimizes neck and eye strain for main tasks. |
| Secondary Monitors | Adjacent to primary, angled 15-30° inward. | Reduces neck rotation to a comfortable glance. |
| Keyboard & Mouse | On primary wing, 10-20 cm from edge. | Allows forearms to rest and prevents corner-induced wrist strain. |
| The Corner | Reserved for passive items (e.g., speakers, lamp). | Avoids forcing the body into an asymmetrical, harmful posture. |
Optimizing Your Workflow and Environment
An ergonomic setup is only half the battle; how you use it determines its long-term effectiveness. Building healthy habits into your workday is essential for fighting a sedentary life.
Adopt a Dynamic Sit-Stand Rhythm
Standing all day is not the goal and can lead to its own set of issues, such as lower limb fatigue. The key is movement and variation. A proven strategy is the "20-8-2" rule promoted by researchers at Cornell University: for every 30 minutes, sit for 20, stand for 8, and move around for 2. If you're new to standing, start gradually. Begin with 15 minutes of standing every hour and slowly increase the duration as your body adapts. Setting reminders on your phone or using the memory presets on your desk can help build this habit.
Cable Management: The Hidden Ergonomic Hazard
With a height-adjustable desk, proper cable management is a safety and functional necessity. A tangled mess of cables can snag, pull expensive equipment off your desk, or become a trip hazard.
- Create a Service Loop: For every device on your desk, ensure there is enough slack in the cable to accommodate the full range of motion from the lowest sitting to the highest standing position. A service loop of 30-50 cm (12-20 inches) is a reliable rule of thumb to prevent tension and unplugging.
- Organize and Secure: Use cable trays, sleeves, or ties to bundle cables together and guide them along the desk frame. Simple tools like a Magnetic Cable Tie are excellent for keeping wires neat and preventing them from catching on objects. This small detail makes height adjustments seamless and safe.

Stability and Load Capacity
An L-shaped desk with multiple monitors and peripherals carries a significant amount of weight. Always ensure your desk's rated load capacity exceeds the total weight of your equipment by at least 20% to ensure motor longevity and stability. When mounting heavy items like monitor arms, attach them directly to the desk frame if possible, rather than just the desktop, for maximum stability. After assembly, perform a quick "wobble test" by applying 5-10 kg of lateral force to ensure all connections are secure.
Key Takeaways: Your L-Shaped Desk Ergonomics Checklist
Optimizing your corner desk setup is one of the highest-impact investments you can make in your long-term health and productivity as a remote worker. By following ergonomic principles, you transform your workspace from a source of strain into a foundation for well-being.
Here is a final checklist to help you perfect your setup:
- [ ] Chair First: Adjust your chair for a neutral seated posture with feet flat on the floor and your back supported.
- [ ] Desk to Body: Bring your height-adjustable desk to your resting elbow height for both sitting and standing.
- [ ] Zone Your Desk: Use one wing for primary tasks (keyboard/mouse) and the other for secondary items. Keep the corner clear of active work.
- [ ] Center Your Primary Monitor: Position your main screen directly in front of you, an arm's length away, with the top at or below eye level.
- [ ] Angle Secondary Monitors: Place additional monitors beside the primary one, angled inward at 15-30 degrees.
- [ ] Manage Your Cables: Ensure all cables have a 30-50 cm service loop to allow for smooth height adjustments.
- [ ] Move Frequently: Alternate between sitting and standing throughout the day. Start with 15 minutes of standing per hour and gradually increase.
By implementing these evidence-based strategies, you can create a home office that not only supports a complex, multi-monitor workflow but also actively contributes to your daily health.
Frequently Asked Questions (FAQ)
How long should I stand at my desk each day?
There is no single magic number, as the ideal sit-stand ratio is personal. A good starting point is to stand for 15-30 minutes for every hour of sitting. The goal is to reduce long periods of static posture, so alternating frequently is more important than the total time spent standing. Listen to your body and find a rhythm that feels comfortable.
Is standing all day better than sitting all day?
No. Prolonged static standing can also cause health problems, including lower back pain, varicose veins, and foot discomfort, as noted by resources like EU-OSHA's OSHwiki. The most beneficial approach is a dynamic one that balances sitting, standing, and light activity like stretching or walking throughout the day.
Where is the best place for my keyboard and mouse on an L-shaped desk?
Place your keyboard and mouse on one of the straight wings of the desk, directly in front of where you sit or stand. This allows you to maintain a neutral, symmetrical posture with straight wrists. Avoid placing them in the 90-degree corner, as this forces awkward wrist and shoulder angles.
Disclaimer: This article is for informational purposes only and does not constitute professional medical advice. If you have pre-existing health conditions or experience persistent pain, please consult a qualified physician or certified ergonomist for a personalized assessment.
References
- Canadian Centre for Occupational Health and Safety (CCOHS) - Sit/Stand Desk
- ISO 11226:2000 - Evaluation of static working postures
- U.S. Occupational Safety and Health Administration (OSHA) - Ergonomics
- U.S. Occupational Safety and Health Administration (OSHA) - Computer Workstations eTools
- BIFMA G1-2013 - Ergonomics Guideline for Furniture
- EU-OSHA OSHwiki - Musculoskeletal disorders and prolonged static standing


Leave a comment