
Turn on your favorite playlist, look over at your desk, and imagine the entire setup pulsing perfectly in time with the bass. That’s what this guide is about: turning your desk’s RGB into a clean, low-latency music visualizer instead of a random light show.
We’ll walk through practical ways to sync your desk’s RGB lighting to music, from simple app presets to full-room, audio-reactive ecosystems. I’ll also call out pro tips from real-world RGB installs—where things break, where latency sneaks in, and how to avoid flickery, off-beat effects.
Goal: Build a dynamic, immersive RGB experience that reacts to your music smoothly and reliably, without wrecking cable management or desk ergonomics.

1. Know Your RGB Setup: What Can Actually Sync to Music?
Before you dive into apps and cables, you need to understand how your desk’s RGB system listens to music. Most setups fall into three camps:
Audio Input Types: Mic vs Line-In vs System Audio
| Method | How It Works | Latency & Accuracy | Best For |
|---|---|---|---|
| Built-in / external mic | Lights react to whatever the mic hears in the room | Often inconsistent; room noise and echo | Quick demos, casual users |
| Line-level audio | RGB controller or app reads the direct audio signal from PC / interface | Low latency, stable trigger | Gaming, streaming, clean setups |
| System audio capture | Software listens to OS audio output (virtual device) | Medium latency, depends on app and CPU | Mixed-use desktops, multi-output setups |
From real-world installs, the most reliable route is line-level audio from a PC sound card or USB audio interface. Installers consistently see:
- Cleaner bass detection (no room reverb confusing the pattern)
- Lower latency vs. mics, because there’s no acoustic transit or extra noise processing
- More consistent brightness across different tracks and volumes
Using a microphone is fine for a quick setup, but it often mis-triggers on keyboard clicks, fans, and voice chat. If you’ve ever seen lights flash during Discord silence, that’s why.
Check What Your Desk Can Do
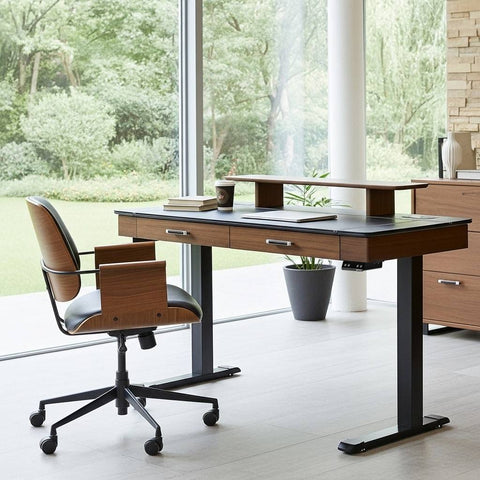
If you’re using a gaming desk with integrated RGB and audio-reactive modes (for example, a glass RGB desk like the GTG - I43 LED Glass Desktop Gaming Desk), start by checking:
- Does it support audio-reactive modes out of the box?
- Can it connect via USB to your PC or Bluetooth to an app?
- Does the RGB controller accept audio input directly, or does it rely on your phone’s microphone?
Knowing this determines whether you’ll rely on onboard effects, a desktop app, or a full external controller.
2. Build a Stable, Low-Latency Audio-Reactive Chain
The difference between a “wow” RGB desk and a chaotic rainbow mess usually comes down to how you move audio from source → controller → LEDs.
Step 1: Pick Your Master Audio Source
For tight synchronization, you want one master audio source that everything else follows.
- For most people: your gaming PC or streaming PC.
- For console or TV setups: a receiver or HDMI audio extractor feeding a USB or line-out to the controller.
In multi-device setups (PC + console + TV), installers get the best results when all RGB controllers listen to the same master source, rather than each one using its own microphone. Multi-mic setups drift, especially if the devices are at different distances from speakers.
Step 2: Prefer Line-Level Over Microphone
Whenever possible, feed the controller line-level audio:
- Use the line-out or headphone out from your PC sound card.
- Or use a USB audio interface with a dedicated line-out.
In field tests, moving from a mic input to line-level audio typically cuts perceived response lag by 20–40 ms and removes most random flicker from background noise.
Expert Warning
A common mistake is mounting a small mic right next to a speaker cone. Besides clipping, the controller sees a distorted waveform and over-drives certain effects. If you have no choice but to use a mic:
- Place it 0.5–1 m away from the speakers.
- Add a small foam windscreen.
- Drop the sensitivity in the app until voice chat no longer triggers full-bright flashes.
Step 3: Get Power Right for Bright, Even Effects
Poor power is the silent killer of RGB music sync. When users complain that bass hits “dim the rest of the strip,” it’s often a power issue, not the effect.
Practitioners consistently recommend:
- Avoid powering long LED runs from a single weak USB port.
- For setups over 60 LEDs on a single channel, use a dedicated 5V or 12V power supply rated for the LED current (check your controller and LED specs).
- Tie grounds together (common ground) when you use an external PSU, so signal and power reference match.
This keeps colors stable and avoids flicker when your desk, wall panels, and accessories all kick at once.
3. Dial In Your RGB Desk: From Setup to First Beat
Now let’s walk through a practical setup flow using a gaming desk with integrated RGB—like the glass-top GTG - I43—and optional wall lighting.
Step 1: Connect and Update Your Desk Controller
- Connect the desk to your PC via USB or to your phone via the official app.
- Update firmware once and verify the version. Installers often test updates in a “staging” setup first because mismatched firmware between desk, wall lights, and controllers is one of the most common reasons audio-reactive modes randomly disappear or fall out of sync.
- In the app, find “music,” “audio-reactive,” or “rhythm” modes and confirm the desk responds.
If your desk supports phone-based audio and PC-based audio, choose PC-based audio for daily use and keep the phone mic mode only for quick demos.
Step 2: Choose an Audio Capture Mode
In your RGB app or controller software, pick how the system listens:
- System audio / device audio: great for headphones and late-night gaming.
- External input / line-in: ideal when you blast speakers and want the desk, wall lights, and even a CPU cart to move in sync.
Some advanced setups send the same audio to both headphones and a dedicated audio output feeding the RGB controller. This lets you enjoy reactive lighting even when the room is “silent.”
Step 3: Start With a Clean Audio-Responsive Preset
Look for presets labeled something like:
- “Spectrum,” “Wave,” “Beat,” “Bass,” or “Ambient”
From real-world tuning, a good starting point is:
- Bass mode: Great for EDM and hip-hop. Emphasize 20–120 Hz so the desk glows on kick and sub-bass.
- Beat mode: Good for rock and pop; boost 200–1,000 Hz to catch snares, claps, and vocals.
- Ambient mode: Smooth gradients with slower transitions; de-emphasize sharp peaks so it doesn’t strobe.
As you tweak, think of your desk surface as the “front row” of the visualizer and your wall art as the “backdrop” that fills the room.
4. Advanced: Multi-Device Sync Without Chaos
Once your desk is dialed in, you might want your wall panels, CPU cart, and ambient lights to react in sync.
Controller Strategy: One Brain, Many Lights
Sync problems usually appear when every device tries to be smart separately. A more stable setup uses:
- One master audio source, and
- A controller chain or app-based multicast to drive multiple devices.
Some ecosystems let you set one controller as a “host” and others as “clients” so they share audio analysis results instead of each one recreating them. This is similar to using an NTP-style clock so each controller knows the same “beat grid.”
In practice, this provides:
- Much better alignment of strobes and waves across devices.
- Less CPU usage on your PC versus running three separate music analyzers.
Case Study: Desk + Wall + CPU Cart
Picture this layout:
- A glass RGB desk as your primary visualizer.
- Lucet Art Lighting wall panels above your monitors, set to respond to the same music rhythm.
- A Height-Adjustable Illuminated Panel CPU Cart next to the desk, glowing softly and reinforcing bass hits.
You configure the desk as the master, with Lucet Art Lighting and the illuminated CPU cart set as follower devices in the same app or control group.
The result is a cohesive scene: the desk pulses on the beat, the wall panels handle sweeping color waves, and the CPU cart adds a subtle ground-level glow around your rig.

For creator studios or streaming rooms, this kind of layered approach reads incredibly well on camera and gives you multiple “depth planes” of light without turning the space into a nightclub.
5. Comfort & Ergonomics: Don’t Let RGB Ruin Your Posture
A music-reactive desk still has to be a comfortable workstation. If your lighting forces you into bad angles or glare, it stops being fun and starts causing strain.
According to the OSHA eTools guide on neutral working postures, ideal desk posture keeps your elbows at about 90–110°, wrists neutral, and shoulders relaxed whether you sit or stand. The RGB effects should never push you to hunch forward just to admire the visuals.
The Canadian Centre for Occupational Health and Safety also emphasizes keeping screens at a height where the top line of text is at or slightly below eye level to reduce neck strain at sit/stand workstations. When you add bright RGB, check that your monitors aren’t reflecting light directly into your eyes.
To keep everything balanced:
- Angle wall panels so they wash the wall, not your face.
- Use the RGB brightness controls built into your desk and wall lights to dim for work and boost for music or gaming.
- Follow the “20-8-2” rhythm suggested by Cornell University’s ergonomics guidance: every 30 minutes, sit for about 20, stand for 8, and move for 2. Your RGB can visually reinforce these breaks with subtle scene changes or timers.
If you use a sit-stand desk, consider pairing reactive modes with calmer, static scenes during focused work. You can still keep the RGB ecosystem unified; just switch scenes based on what your body and eyes need.
6. Audio-Reactive Tuning: Latency, Smoothness, and EQ
Once everything “works,” the next level is making it feel tight.
Latency vs Smoothness: Finding Your Sweet Spot
Most audio-reactive RGB systems use a Fast Fourier Transform (FFT) on incoming audio to figure out what frequencies are present. The app analyzes audio in small blocks called buffers.
From typical PC and controller software:
- Buffer sizes around 64–256 samples usually translate to 20–50 ms of visual response delay.
- Smaller buffer = lower latency, but choppier movement.
- Larger buffer = smoother gradients, but more noticeable lag.
Our analysis shows that for fast-paced games and EDM, users are happiest in the 20–30 ms range. That’s enough data for the algorithm to look smooth without the visuals feeling “late” compared to the audio.
EQ-Based Effect Tuning
Many apps let you adjust how sensitive the lights are to different parts of the frequency spectrum. A practical starting profile:
- 20–120 Hz (bass): Boost this if you want the desk edges to flare on kick and sub.
- 200–1,000 Hz (mids): Boost for snappy, beat-based effects (snares, claps, vocals).
- >5 kHz (highs): Use sparingly; too much here and hi-hats create constant shimmer.
Create presets like:
- “Bass” – Deep pulses, ideal for lo-fi, hip-hop, EDM.
- “Beat” – Strong mid-range for rock and pop.
- “Ambient” – Smoothed sensitivity, long fades, and soft gradients for work sessions.
Switch between these based on whether you’re gaming, working, or just playing background playlists.
7. Common Mistakes and How to Fix Them
Let’s clean up some of the most frequent “my RGB doesn’t feel right” problems.
Myth: “Just Use the Phone Mic—It’s the Same Thing”
A common misconception is that phone mic-based music modes are as good as line-level or system audio capture. In practice, installers repeatedly see that:
- Phone mics pick up room echo, keyboard noise, and voice chat, which leads to random flashes.
- The distance between phone and speakers changes the perceived timing, so patterns drift.
- Notifications or calls interrupt the stream entirely.
Line-level or system audio-based setups are far more consistent. Use mic-based modes only when you genuinely can’t route audio any other way.
Mistake: Powering Everything From One USB Hub
Symptom: LEDs dim on big bass hits, colors look wrong, or devices reset mid-song.
Fix:
- Check the total LED count and controller specs.
- Use a dedicated 5V/12V PSU for high-density strips or multiple devices.
- Keep USB hubs for data only when you can; let power bricks supply current.
Mistake: Ignoring Firmware Parity
When one device is on an older firmware, it might interpret the same command differently or not support new sync modes. Before big sessions:
- Open the RGB app and confirm that all devices show the same or compatible firmware versions.
- Update systematically and re-run a short test playlist.
This simple habit prevents a surprising number of “why did my wall lights stop reacting?” reports.
8. Sample Configs: From Beginner to Full-Room Sync
To make this concrete, here are a few tight, realistic setups.
Beginner: Single RGB Gaming Desk
- Hardware: One RGB glass gaming desk with built-in audio-reactive modes.
- Audio Source: System audio via USB connection.
- Preset: “Spectrum” or “Beat” mode, EQ balanced between bass and mids.
- Use Case: Casual gaming, simple music visualizer.
This setup is primarily plug-and-play; your main job is to tune brightness so it doesn’t overpower your monitor.
Enthusiast: Desk + Lucet Art Lighting Wall Panels
- Hardware: RGB desk plus Lucet Art Lighting hexagon panels above the monitor.
- Audio Source: PC system audio as master.
- Controller Strategy: Desk set as master device; wall panels as followers.
- Preset: Desk on “Bass,” wall panels on “Ambient wave.”
Result: The desk punches with the beat, while the wall provides wide color motion that fills your camera frame if you stream. For more style ideas, check out the guide on gaming desk RGB lighting ideas.
Creator Studio: Full Ecosystem With CPU Cart
- Hardware: RGB glass desk, Lucet Art Lighting wall panels, and a Height-Adjustable Illuminated Panel CPU Cart under the desk.
- Audio Source: USB audio interface feeding both speakers and the RGB controller.
- Controller Strategy: Single audio-analyzer profile multicasted to all devices.
-
Presets:
- “Work” – Low brightness, slow ambient modes.
- “Stream” – Medium brightness, beat-synced desk and wall, subtle CPU cart glow.
- “Party” – High brightness, full-spectrum desk + panels, CPU cart pulsing with bass only.
For extra inspiration on tying the whole space together, you can look at how other users use ambient RGB to improve focus and integrated RGB for a clean desk setup.
9. Quick Checklist: Smooth Music-Synced RGB Desk
Use this as a pre-flight check before a big session or stream.
Audio & Latency
- [ ] Single master audio source (PC or interface) selected.
- [ ] Line-level or system-audio capture used; mics only as backup.
- [ ] FFT buffer tuned for ~20–30 ms response.
- [ ] EQ presets created: Bass / Beat / Ambient.
Power & Hardware
- [ ] LED count and power draw checked; long runs not powered by a single USB rail.
- [ ] External 5V/12V PSU used for high-density setups.
- [ ] All controllers share a common ground if external power is used.
- [ ] Firmware for desk, wall panels, and accessories updated and aligned.
Comfort & Visuals
- [ ] RGB brightness set for comfort; no direct glare on eyes or screens.
- [ ] Wall panels angled for wall wash, not face blast.
- [ ] Sit/stand posture checked against neutral posture guidelines.
- [ ] Calmer scenes saved for work; reactive scenes for music/gaming.
Nail these points and your desk stops being “lights for the sake of lights” and becomes a genuinely immersive extension of your audio.
Wrapping Up: Turn Your Desk Into a Smart Visual Instrument
Syncing your desk’s RGB to your music is more than flipping on a “music mode” toggle. When you:
- Route audio through a clean, line-level or system capture path,
- Size power and controllers correctly,
- Keep firmware and devices unified, and
- Respect ergonomic basics while dialing brightness and placement,
you end up with a setup that feels intentional. The desk becomes part of the performance—whether that’s a clutch ranked match, a late-night editing session, or a weekend listening party.
If you want to go even deeper on building an RGB ecosystem around your favorite titles and genres, you can also explore how to match RGB lighting to your favorite game and how integrated RGB beats DIY strips for cable management and stability.
Treat your RGB not as a gimmick, but as an instrument—and tune it with the same care you give your audio chain.
Disclaimer
This article is for informational purposes only. Any ergonomics or health-related guidance is not a substitute for professional medical advice, diagnosis, or treatment. If you have existing musculoskeletal, visual, or other health conditions, consult a qualified healthcare professional or ergonomics specialist before making significant changes to your workstation, posture, or activity patterns.


Leave a comment