
Ready to float your screens? This guide walks you through installing dual monitor arms on your gaming desk, ensuring a stable, wobble-free setup with clean cable routing from start to finish. Going from stock monitor stands to a full dual-arm setup is one of the biggest upgrades you can make. It's not just about aesthetics—it's about reclaiming your desk space, dialing in perfect ergonomics, and creating a more immersive gaming and work environment.
But mounting monitor arms, especially on a gaming desk, isn't always as simple as just clamping them on. I've seen countless setups where wobbly screens, damaged desk surfaces, and tangled cables ruin the experience. The culprit is almost always a lack of prep work. This guide is built on lessons learned from years of setting up and troubleshooting these exact systems. We'll cover the critical checks you need to make before you buy, walk through the installation step-by-step, and finish with pro tips for cable management and ergonomics.
Pre-Installation Checklist: Your Blueprint for Success
Before you even add a monitor arm to your cart, a few minutes of planning can save you hours of frustration. Getting this part right is the difference between a rock-solid setup and a wobbly nightmare.
Desk and Mount Compatibility
The single most common point of failure is assuming any arm will work with any desk. Your desk's material, thickness, and underlying frame are critical.
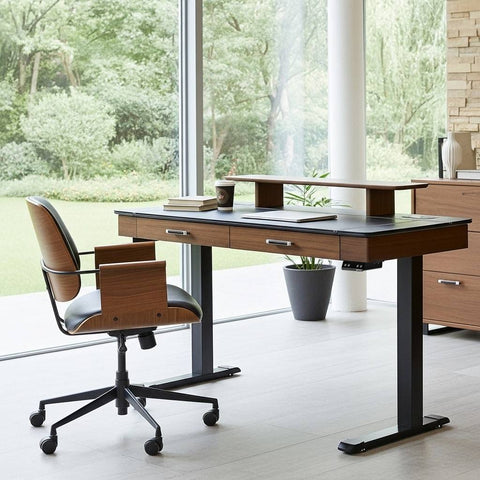
- Desk Surface: A solid wood or thick MDF desk is ideal for the high-pressure grip of a C-clamp. Desks with a full-surface mousepad, like the Full-Surface Mousepad Gaming Desk (60"x27"), offer a great stable base, but I always recommend using a small protective rubber shim under the clamp to prevent any indentation on the pad over time.
- Glass and Veneers: Be extremely cautious with tempered glass or thin-veneer desktops. The pressure from a C-clamp can cause them to crack or deform. For a glass desk like the GTG-G55, Glass Desktop Gaming Standing Desk (55"x23"), a clamp is not a viable option. You must use a grommet mount, which secures the arm through a pre-drilled hole in the desk. This distributes the force safely.
- Underside Obstructions: Before you decide on a mounting spot, run your hand under the desk. Are there support beams, cable trays, or frame components that will block the clamp or grommet bolt? This simple check saves a ton of headaches.

Understanding VESA and Monitor Weight
Not all monitors can be mounted. The VESA Interface Standard defines the mounting hole pattern on the back of your display. The most common patterns for monitors are 75x75 mm and 100x100 mm. Check your monitor's spec sheet to confirm its pattern and ensure the arm you buy supports it.
More importantly, know your monitor's weight. Then, check the arm's weight capacity per arm. A mistake I often see is people forgetting to account for the monitor's stand, which should be removed. From experience, always add a 20-30% safety margin. If your monitor weighs 15 lbs, look for an arm rated for at least 18-20 lbs. This ensures the gas spring or mechanical joint isn’t constantly maxed out, which prevents sagging and makes adjustments smoother.
Clamp vs. Grommet Mount: Choosing Your Method
Your desk will likely dictate your choice, but if you have the option, here’s a breakdown of the trade-offs.
| Feature | C-Clamp Mount | Grommet Mount |
|---|---|---|
| Installation | Easier; attaches to the edge of the desk. | Requires a hole in the desk; more involved. |
| Placement | Flexible along any unobstructed edge. | Limited to where a grommet hole exists or can be drilled. |
| Aesthetics | Visible clamp on the desk edge. | Cleaner, "built-in" look with no visible edge hardware. |
| Best For | Solid wood/MDF desks; renters who can't drill holes. | Glass desks, thin surfaces, or for a permanent, clean setup. |
| Stability | Very stable if installed correctly on a suitable surface. | Extremely stable as it's bolted through the desktop. |
The Step-by-Step Installation Guide
Alright, you’ve done your prep work. You have a compatible arm and desk. Now for the fun part. Let's get this thing built and your monitors flying.
1. Assemble the Base and Choose the Mount Point
First, assemble the main pole and base of the monitor arm on the floor, not on your desk. It’s much easier to handle. Decide if you're using the C-clamp or grommet hardware and attach it.
Now, choose your spot. A common error is mounting the arm too far to one side. This creates uneven torque and can introduce wobble. For a dual-monitor setup, the ideal position is usually centered behind where you sit. As the U.S. Occupational Safety and Health Administration (OSHA) notes, proper workstation layout is key to avoiding strain. Placing the arm centrally gives you the most flexibility to position both monitors ergonomically.
2. Secure the Mount to Your Desk
- For C-Clamps: Slide the clamp onto the edge of your desk and tighten it until it’s snug. Then, give it another quarter-turn. Do not go full Hulk-mode and overtighten, especially on MDF or particleboard, as this can crush and permanently damage the desktop. If you have a full-surface mousepad, make sure the clamp has a firm grip on the desk itself.
- For Grommet Mounts: If your desk has a pre-drilled cable grommet, you’re in luck. If not, you’ll need to drill one. Feed the bolt through the arm’s base and the desk, then attach and tighten the plate and nut from underneath. A key "gotcha" to watch for: make sure any built-in USB hubs or RGB controllers on the desk don't block access to the grommet hole.
3. Attach Monitors and Adjust Tension
With the base secure, attach the arms to the central pole. Next, attach the VESA plates to the back of your monitors. Most VESA plates are designed to hook onto the arms, letting you easily lift and set the monitors in place before securing them.
This next step is the one everyone gets wrong. Your monitors will either shoot up or sag down until you adjust the counterbalance tension. Look for a screw or bolt on the arm joint (usually marked with +/- symbols). If the monitor sags, turn the screw towards '+' to increase tension. If it’s hard to push down, turn it towards '-'. A great tip from professional installers is to start at the median tension setting and fine-tune from there. Adjust it until the monitor stays perfectly level at your typical working height, movable with just a light touch.
Perfecting Your Ergonomics and Cable Management
Installation is only half the battle. A truly elite setup is defined by its ergonomics and clean cabling. This is where you turn a functional setup into a comfortable and inspiring command center.
Dialing in Your Ergonomic Sweet Spot
Your goal is to achieve a neutral posture. According to the Canadian Centre for Occupational Health and Safety (CCOHS), your monitor should be positioned so the top line of text is at or slightly below eye level, and at about an arm's length away. This prevents you from hunching over or craning your neck.
Here are some field-tested heuristics for a dual-monitor setup:
- Screen Height: The top edge of your primary monitor should be 2-3 cm below your direct line of sight.
- Viewing Distance: A good starting point is a distance of 1 to 1.5 times the diagonal size of your screen.
- Monitor Angle: Angle your two monitors inward to form a slight curve, with the inner bezels touching. This minimizes head and eye movement. Your head should be pointed at the space between the two screens when you look straight ahead.
To avoid the risks of a static posture, many experts recommend changing positions regularly. The "20-8-2" rhythm recommended by Cornell University's Ergonomics Web is a great model: for every 20 minutes of sitting, stand for 8 minutes and move or stretch for 2 minutes.
The Art of Cable Management
Clean cables are the final boss of any desk setup. Most monitor arms come with built-in cable channels. Use them. Route your power and display cables along the arm and down the main pole.
For a standing desk, this is non-negotiable: you must leave enough cable slack. I always recommend leaving at least 6-8 inches (15-20 cm) of extra vertical slack. Route all the cables from the arms into a flexible sleeve or a large cable tray mounted under the desk. This ensures that when you raise the desk from sitting to standing height, you don't snag or unplug a critical cable. For even more organization, a desk-mounted pegboard system like the Aegispeg Board can help you organize power bricks, hubs, and peripherals off your desktop entirely.

Debunking a Common Myth: More Monitors ≠ Better Productivity
A common myth in the gaming and streaming world is that more screens automatically make you better. I've seen four- and five-monitor setups that were an ergonomic disaster, forcing the user to constantly twist their neck.
In reality, research and ergonomic principles show that two or three well-positioned monitors are far superior to a larger number of poorly placed ones. The goal is to keep your primary displays within a comfortable field of view to minimize neck rotation. An arm-based setup is the best way to achieve this, allowing you to bring screens closer or angle them in ways that fixed stands never could. Don't chase a monitor count; chase a comfortable, immersive, and strain-free viewing arc.
Key Takeaways
Transforming your gaming desk with dual monitor arms is a project that pays dividends in comfort, space, and style. If you remember nothing else, remember these core principles:
- Check Compatibility First: Your desk surface, thickness, and monitor weight are the most important factors. Don't guess—measure and verify before you buy.
- Position for Stability: Mount the arm near your centerline to prevent wobble and torque. Don’t overtighten the clamp.
- Tune the Tension: Adjust the counterbalance for each arm so your monitors float effortlessly. This is the key to a high-end feel.
- Leave Cable Slack: For standing desks, 6-8 inches of vertical slack is essential to prevent cables from snagging when you change height.
- Ergonomics Over Everything: Use the arm's flexibility to position your screens at the right height and distance. Your neck and back will thank you.
Frequently Asked Questions (FAQ)
Can I mount a monitor arm on a glass desk? Yes, but you should not use a C-clamp. The focused pressure can shatter the glass. The correct and safe method is to use a grommet mount that passes through a pre-existing hole in the desk, like those found on the GTG-G55 Glass Standing Desk. If no hole exists, you would need to use a different desk.
How can I stop my monitors from wobbling? Wobble is usually caused by one of three things: the clamp isn't tight enough, the arm is mounted too far to the side, or the desk itself isn't stable. First, check that your clamp is secure. Second, ensure the arm is mounted as close to the center as is practical. Finally, if the desk itself is shaking, the monitor arm will amplify it. Improving your desk's stability is the only true fix. You can explore this topic further by reading about desk stability in standing vs. fixed-height desks.
How much cable slack do I really need for a standing desk? From my experience, 6-8 inches (15-20 cm) is the minimum safe amount of vertical slack. This gives the cables enough room to move freely as the desk travels from its lowest to highest setting without pulling tight or disconnecting.
What if my monitor doesn't have VESA mounting holes? If your monitor isn't VESA compliant, you're not completely out of luck. You can purchase a VESA adapter kit. These kits use clips that grip the top and bottom or sides of your monitor, providing a VESA-compatible plate to attach to the arm.
Disclaimer: This article is for informational purposes only and does not constitute professional medical advice. The ergonomic suggestions provided are based on general guidelines. You should consult with a qualified healthcare professional or certified ergonomist for advice tailored to your specific needs, especially if you have pre-existing health conditions.


Leave a comment