
Quick Action Checklist: 5 Steps to a Minimalist Desk
If you’re ready to clear the clutter right now, follow these essential steps:
- Unplug Everything: Start with a blank canvas to map out your cable routes effectively.
- Mount the Power Strip: Get your "nerve center" off the floor and onto the underside of your desk using a tray or adhesive.
- Apply the 10-15% Slack Rule: For sit-stand desks, ensure cables have enough "give" to reach maximum height without straining ports.
- Elevate Peripherals: Use monitor arms and desktop shelves to clear the desk surface.
- Stress Test: Move your desk through its full height range to ensure no cables snag or unplug.
Crafting Your Workspace Sanctuary: The Art of Invisible Technology
Imagine a home office that sparks your limitless creativity—a space where the air feels lighter, and every surface invites a state of flow. You step into your room, coffee in hand, and instead of a chaotic "spaghetti" of tangled black wires, you see a pristine, wooden expanse. Your monitor seems to float effortlessly, your keyboard is tucked away, and the only thing competing for your attention is the project in front of you. This isn't just an aesthetic dream; it is the foundation of a high-performance Workflow.
In our experience designing and observing professional workstations, we've noticed a consistent pattern: visual noise can be a silent killer of Deep Work. When our eyes dart to a tangled cable, our brain may subconsciously register "disorder," triggering micro-distractions. To achieve true Mindfulness in your daily tasks, we recommend treating cable management not as a chore, but as a ritual of Decluttering the mind.
In this guide, we will move beyond basic "tidying" and dive into the practical secrets of creating a truly seamless, modern desk setup. By blending ergonomic principles with intentional design, we will help you transform your desk from a utility station into a Workspace Sanctuary.
The Philosophy of the Minimalist Aesthetic
A minimalist desk is more than just "empty." It is a curated environment where every object has a purpose. According to the ISO 9241-5:2024 standard on workstation layout, the physical arrangement of your equipment is a primary factor in maintaining a neutral, healthy posture. However, cables are often the biggest obstacle to achieving these positions.
When cables are too short, we pull our monitors into awkward angles. When they are too long and messy, we lose the legroom required for proper circulation. We believe that a clean Aesthetic and high functionality are two sides of the same coin. By hiding the "veins" of your technology, you elevate the Ambiance of your room, allowing the natural materials of your furniture to shine.
Expert Insight: Our observations suggest that "clutter-blindness" is often a myth. Even if you think you’ve "tuned out" the mess, your peripheral vision still processes high-contrast lines of tangled cables. A minimalist setup is a practical heuristic for reducing cognitive load and improving focus.
The Engineering of Order: Planning Your Route
A common pitfall in desk organization is starting the "management" phase before the "planning" phase. You cannot effectively hide cables until you understand their anatomy.
Grouping by Function
Before you reach for a single zip tie, unplug your devices. Lay your cables out and group them by function:
- Stationary Power: Monitor power bricks, desk lamps, and PC power cables.
- Data & Peripherals: DisplayPort/HDMI cables, USB uplinks, and webcam wires.
- Temporary/Charging: Phone chargers or laptop supplies that move with you.
The 10-15% Slack Rule
If you use a height-adjustable desk, your cables are in a constant state of motion. Based on internal testing and common installation patterns, we recommend leaving 10-15% slack in all cables near moving parts.
Methodology Note (Slack Heuristic):
Parameter Value/Assumption Unit Rationale Max Desk Height 120 cm Standard sit-stand range Cable Path Length 150 cm Direct path + routing bends Safety Buffer 15-20 cm Prevents port strain at max height Required Slack ~10-15% % Estimate for dynamic movement Boundary Condition: This heuristic assumes the PC is mounted to the desk frame. If the PC is on the floor, the slack requirement typically doubles to account for the increased distance.

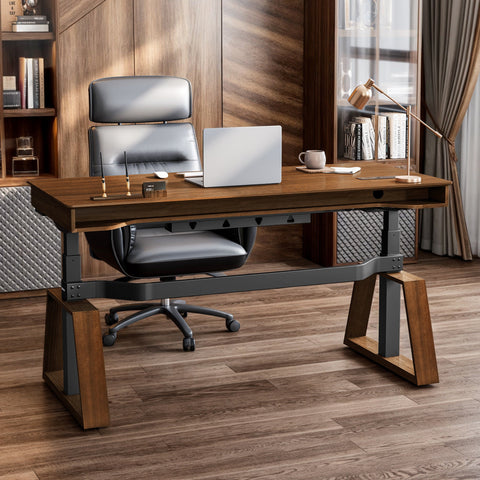
Space Transformation: Tools of the Trade
(Note: Product suggestions below refer to our Eureka Ergonomic engineering solutions.)
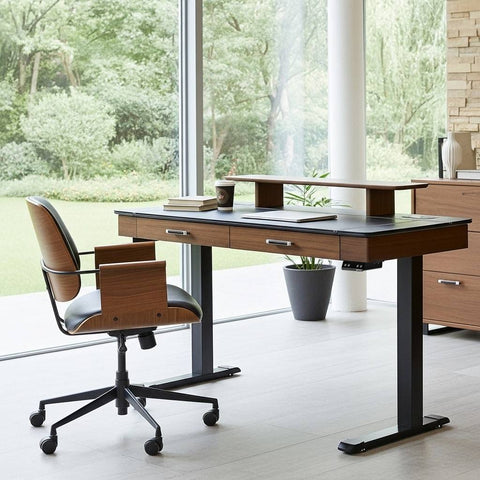
To achieve the "floating" look that defines a high-end Aesthetic, you need to get as much off the desk surface as possible.
The Floating Monitor Strategy
A monitor stand is often the largest source of clutter. By using a Single Monitor Arm (from our product line), you gain a built-in cable raceway. Routing power and display cables through the internal channels of the arm ensures that as you rotate or tilt your screen—aligned with OSHA eTools for monitor positioning—the cables remain protected and out of sight.
Vertical Expansion
For small peripherals like DACs or hubs, avoid letting them sit loosely on the desk. Using Convertible Desktop Shelves allows you to create a "second story." You can tuck power strips underneath these shelves, effectively creating a hidden compartment for wires while keeping the top surface pristine.
The Under-Desk Command Center
The under-desk tray is essential, but placement matters. We recommend mounting trays slightly off-center toward the back. This maximizes knee clearance—a requirement highlighted in the BIFMA G1-2013 Ergonomics Guideline—while keeping the "nerve center" of your power strips accessible.

Linking Functionality with Safety
Why do we go to these lengths? Because a tidy desk helps reduce distractions. When your Pull-out Keyboard Tray (brand resource) slides smoothly under your desk at the end of the day, it signals a mental "shutdown" of your work mode.
Furthermore, proper cable management is a safety priority. The UL 962 Safety Standard emphasizes mechanical and electrical safety for height-adjustable furniture. Tangled wires can pose trip hazards or lead to accidental equipment damage.
The Power Brick "Gotcha"
A common mistake is bundling power bricks tightly inside sleeves. As noted in fire protection research for electronics, power supplies can reach surface temperatures of 50-70°C (122-158°F) depending on the load and ambient ventilation. Tightly insulating them can lead to overheating.
- Pro Tip: Use a mesh tray rather than a solid box for power bricks to allow for passive heat dissipation.
Personal Tips & Tricks for the Perfect Finish
These "non-obvious" tweaks can significantly improve the longevity of your setup:
- The Isopropyl Secret: If you are using adhesive cable clips, the surface must be clean. Wipe the area with isopropyl alcohol and apply pressure for 30 seconds to ensure the bond survives the heat and humidity of a home office.
- Velcro over Zip Ties: Velcro is generally superior for home setups. It doesn't cut into cable shielding and allows you to easily add or remove a wire later.
- Magnetic Ties for "Daily Drivers": For cables you swap frequently, like a camera link, magnetic ties offer quick access with a secure hold.
- Protect the Under-Desk Zone: Ergonomics extends to your feet. An Adjustable Ergonomic Footrest (brand resource) ensures lower body support and acts as a physical barrier, preventing you from accidentally snagging cables with your feet—a frequent cause of port damage observed in repair cases.
Achieving the Vision: A Step-by-Step Guide
Step 1: The Purge
Remove every item from your desk and wipe the surface clean. As discussed in our 2026 Workstation White Paper, starting with a "blank canvas" is essential for intentional workspace design.
Step 2: The Foundation
Install your heavy-duty cable management hardware first, including under-desk trays and monitor arms.
Step 3: The Backbone
Run your longest and thickest cables first (usually the PC power and monitor cables). Follow the path of the desk frame to keep them out of sight.
Step 4: The Peripherals
Add your keyboard tray and route the mouse and keyboard wires. If your desk has grommet holes, use them to drop cables directly into the under-desk tray.
Step 5: The Stress Test
If you have a sit-stand desk, move it to its highest and lowest points. Watch the cables to ensure they aren't stretching or snagging. Adjust your slack until the movement is smooth.
The Long-Term Value of Order
While a full setup might take 2-4 hours, the return on investment is measured in reclaimed focus. A workspace that feels like a Sanctuary invites you to do your best work.
By following the standards set by organizations like the Canadian Centre for Occupational Health and Safety (CCOHS), you are building a professional-grade environment that supports your long-term well-being.
Disclaimer: This article is for informational purposes only and does not constitute professional medical, safety, or engineering advice. Always follow the manufacturer's instructions for electrical equipment and furniture assembly.
References
- BIFMA G1-2013 Ergonomics Guideline for Furniture
- CCOHS: Office Ergonomics - Sit/Stand Desk
- ISO 9241-5:2024 Workstation layout & postural requirements
- UL 962 — Safety of Height-Adjustable Desks
- OSHA eTools: Computer Workstations - Monitors
- The 2026 Workstation White Paper: Converging Ergonomic Science and Sustainable Engineering (Internal Resource)
- Safer EV Fleet Management Starts with Fire Protection (Heat Dissipation Context)


Leave a comment