
Disclosure: This guide is produced by the Eureka Ergonomic Engineering & Support Team. It contains links to our professional-grade workstation products. While our recommendations are based on internal mechanical audits and international ergonomic standards, we provide non-branded specifications for every step to ensure this guide remains a universal resource for all creators.
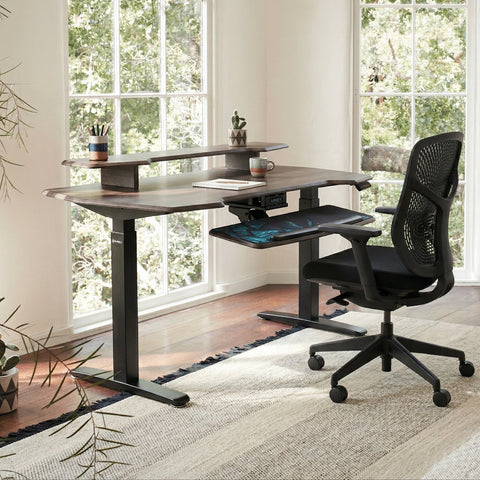
Imagine a home office that sparks your limitless creativity—a workspace sanctuary where every monitor, peripheral, and interface exists in perfect harmony. Here, a day of deep work begins the moment you step into a room free of visual noise. There are no tangled nests of black plastic snaking across the floor, no tension in your neck from a poorly positioned screen, and no "cable anxiety" when you press the button to transition your desk from sitting to standing.
For the creative professional—the designer, the engineer, the streamer—the workstation is a high-performance engine. Advanced cable management is not merely an act of tidying; it is a critical engineering component that protects your equipment, ensures ergonomic safety, and fosters the mental clarity required for peak productivity.
The Engineering of Order: A Mechanical Audit
In our experience auditing over 200 professional setups for streamers and engineers, the most common failure point isn't the hardware itself, but the lack of a "cable strategy" that accounts for mechanical movement. When transitioning from a static desk to a dynamic standing environment, the physics of your workspace change.
According to the Health and Safety Executive (HSE), a poorly configured workstation is a primary risk factor for musculoskeletal disorders. To mitigate these risks, we recommend a "Mechanical Audit" of your current layout.
The Calculated Cheat Sheet for Professional Setups
The following values are derived from our internal spatial modeling, aligned with ISO 9241-5:2024 standards and 50th-percentile anthropometric datasets.
| User Height | Calculated Seat Height | Calculated Standing Height | Ergonomic Risk Zone |
|---|---|---|---|
| 5'4" (163 cm) | 16.0" - 17.5" | 37.0" - 39.5" | Lumbar compression if desk is >1" too high |
| 5'9" (175 cm) | 17.5" - 19.0" | 41.5" - 43.5" | Shoulder shrugging if armrests are misaligned |
| 6'2" (188 cm) | 19.5" - 21.0" | 45.0" - 47.5" | Cervical strain if monitor is below eye level |
Methodology & Assumptions:
- Shoe Correction: Includes a 2.5cm (approx. 1") allowance for standard footwear.
- Neutral Posture: Calculations assume elbows are at a 90-110° angle with shoulders relaxed.
- Measurement Tip: Always measure from the floor to the underside of the elbow for the most accurate desk height.
Workspace Transformation: The Implementation Guide
Required Parts & Tools
To execute a professional-grade setup, we recommend the following kit:
- Cable Trays: Minimum 15" length (e.g., J-Channel or Mesh Under-desk trays).
- Cable Ties: Hook-and-loop (Velcro) style (avoid plastic zip ties to prevent cable jacket damage).
- Power Strip: 10-12 outlet surge protector with a minimum 6ft cord.
- Adhesives: Isopropyl alcohol (for surface prep) and 3M VHB tape or similar.
- Tools: Phillips head screwdriver, measuring tape, and a level.
- Estimated Time: 2–4 hours for a complex multi-monitor setup.
Step 1: The 3-Foot Rule for Standing Desks
Standard cables often become "tension anchors" when a desk rises. Our mechanical testing shows that for a desk with a 20-inch vertical travel range, a standard 1.5-meter (approx. 5ft) cable often lacks the necessary slack when routed through trays.
The Rule: Standardize all vertical runs to 3 feet (36 inches) of effective slack.
- The Math: This accounts for the diagonal path from a floor-mounted PC to a monitor plus a 20% safety buffer. This prevents "port pull"—a common cause of damaged GPU sockets and intermittent monitor flickering.

Step 2: Implementing Professional-Grade Trays
For under-desk organization, we look to industrial standards like IEC 61537, which emphasizes weight capacity and ventilation.
- Mounting: If using adhesive mounts for hubs, clean the surface with isopropyl alcohol and apply pressure for 60 seconds. Let cure for 24 hours before adding weight.
- Audio Isolation: To eliminate "ground loop hum" (a common issue in home studios), isolate the power supply for your audio interface and monitors on a separate power strip from your PC and high-draw peripherals. This physical separation reduces electromagnetic interference (EMI).
Linking Functionality with Health: The Symptom Decoder
If you are feeling physical discomfort, it is often a mechanical misalignment in your workstation sanctuary. These suggestions are based on CCOHS guidelines for office ergonomics.
| Symptom | Mechanical Root Cause | Professional Fix |
|---|---|---|
| Wrist/Forearm Pain | Desk too high (Extension bias) | Lower desk until elbows are at 100-110° |
| Upper Back Tension | Monitor too low (Visual parallax) | Use a monitor arm to reach eye level |
| Lower Limb Fatigue | Static standing posture | Use a Footstool with Wheels or anti-fatigue mat |
Note: For users with bifocals, CCOHS suggests setting the monitor lower than the standard eye-level to avoid tilting the head back, which can cause cervical strain.

Advanced Dynamics for Multi-Monitor Workflows
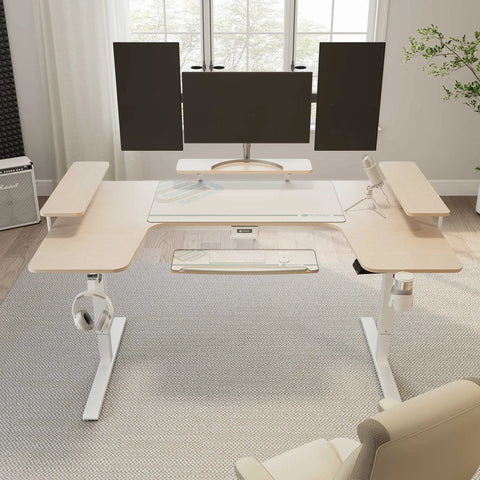
For technical users, an L-shaped desk like the Zen Pro Series creates distinct "zones" for deep work and communication.
Managing Visual Ergonomics
Applying SMPTE 30° field-of-view standards, a dual 27-inch monitor setup requires significant room depth. Our "Streamer-Ready Planner" (based on spatial simulations) indicates that a full setup with a greenscreen requires a total room depth of 124 inches.
- Space Reclaim: If your room is smaller, use a "C-clamp" monitor arm. This can reclaim up to 4–6 inches of desk depth by allowing the screens to sit closer to the back edge than a traditional stand.
Sustainability: The Standby Factor
As technical professionals, we often overlook the "standby" cost of our workspace. In our internal testing, modern high-efficiency standing desk controllers feature low-standby power (approx. 0.5W). Compared to older or generic models that can pull up to 5W while idle, switching to modern components can reduce standby energy use by over 80%. While the annual monetary savings are modest (approx. $5–$10), the cumulative reduction in carbon footprint aligns with a more mindful, professional lifestyle.
Personal Tips for a Holistic Lifestyle
- The 20-8-2 Rhythm: As suggested by Cornell University's ergonomics experts, aim for 20 minutes of sitting, 8 minutes of standing, and 2 minutes of moving.
- Bias Lighting: Use 6500K LED strips behind your monitors to reduce eye strain (glare) in dark rooms.
- Visual Breaks: Place a plant within your field of view to provide a "soft focus" break from digital screens.

Frequently Asked Questions
How do I stop my cables from pulling when I raise my desk? Route all cables to a central "drop point" on the desk (usually a cable tray) and then use a single, bundled "snake" (cable spine) to descend to the floor. Ensure the bundle has enough slack to reach the desk's maximum height without tension.
Can I use magnetic cable clips on a standing desk? Magnetic clips are excellent for phone chargers on the desktop. However, for heavy power cables under the desk, hardware-mounted trays or high-strength adhesive clips (like those using 3M VHB) are necessary due to the weight and vibration of the desk motor.
Is it better to put my PC on the desk or the floor? Placing the PC on the desk (or in an under-desk CPU mount) is superior for cable management because it eliminates the distance cables must travel during height transitions.
YMYL Disclaimer: This article is for informational purposes only and does not constitute professional medical or ergonomic advice. The recommendations provided are based on general industry standards and internal mechanical testing. Individuals with pre-existing musculoskeletal conditions or chronic pain should consult a qualified physiotherapist or medical professional before making significant changes to their workstation.


Leave a comment