
Building your own ergonomic workstation is more than a DIY project; it’s an investment in your health and productivity. A custom-built setup allows you to tailor every component to your body and workflow, addressing issues like neck strain and afternoon back pain before they start. Our checklist guides you through each decision, from the foundational frame and desktop to the essential accessories that complete your space.

Section 1: The Foundation - Choosing Your Desk Frame and Desktop
The desk is the centerpiece of your workstation. Its stability, size, and material dictate not only your comfort but also the longevity of your investment. A common mistake is choosing a frame based on looks alone, only to find it wobbles or strains under the weight of multiple monitors and equipment.
Step 1: Calculate Your Total Load Requirement
Before selecting a frame, you must calculate the total weight of your setup. A frame struggling with its maximum load is prone to motor strain and instability. As a professional heuristic, choose a frame with a lift capacity rated 1.3 to 1.7 times higher than your estimated total weight. This buffer ensures smooth operation and long-term durability.
Use this checklist to estimate your total equipment weight:
| Item | Typical Weight (lbs) | Your Equipment Weight (lbs) |
|---|---|---|
| Desktop (e.g., 60"x30" Laminate) | 40 - 60 | |
| Monitor (per screen) | 10 - 20 | |
| Monitor Arm (per arm) | 5 - 15 | |
| Laptop & Docking Station | 5 - 10 | |
| PC Tower (Mid to Full) | 25 - 50 | |
| Speakers, Keyboard, Mouse | 5 - 10 | |
| Other Peripherals (mic, stream deck) | 5 - 10 | |
| Total Estimated Weight | (Your Sum) |
Once you have your total, multiply it by 1.5 to get a safe minimum lift capacity for your desk frame.
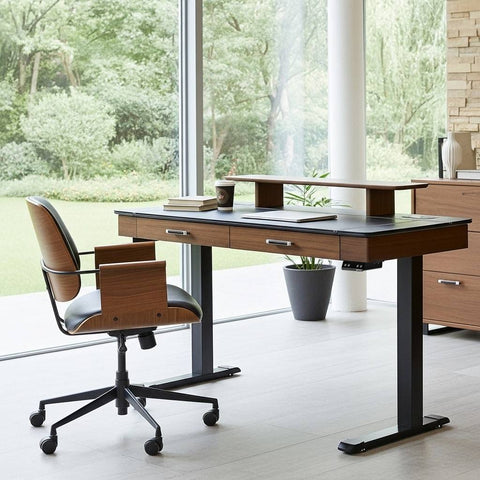
Step 2: Select Your Desktop Material and Size
The desktop material affects aesthetics, function, and stability. Heavy materials require stronger, wider frames to maintain stability, especially at standing height.
- Laminate/Wood Veneer: The most common choice, offering a balance of durability, weight, and aesthetics. Look for products with certifications like those from the Forest Stewardship Council (FSC) to ensure sustainable sourcing.
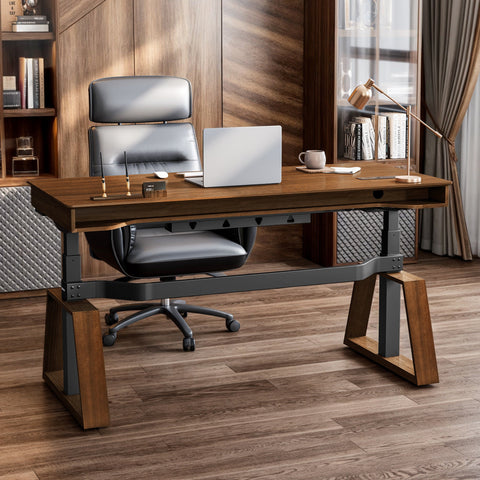
- Solid Wood: Offers premium feel and durability but is heavier and requires more maintenance.
- Tempered Glass: Provides a clean, modern look but requires a highly stable frame and anti-slip pads for monitors and peripherals.
- Sintered Stone: Extremely durable and resistant to scratches and heat, but its significant weight demands a heavy-duty frame with a wide base for stability.
For size, measure your available space and consider your workflow. An L-shaped desk can be excellent for separating work and gaming zones, while smaller offices may benefit from more compact designs. For more ideas, explore some stylish standing desk designs for small home offices.
Section 2: Achieving a Neutral Posture
A custom desk is only ergonomic if it’s adjusted correctly. The goal is to achieve a "neutral posture," where your joints are naturally aligned, minimizing stress on muscles and tendons. According to the U.S. Occupational Safety and Health Administration (OSHA), maintaining these neutral positions is key to preventing musculoskeletal disorders (MSDs).
Step 3: Set Your Chair and Desk Height
Always start by adjusting your chair, not your desk.
- Sit with your feet flat on the floor and your knees at roughly a 90-degree angle. If your feet don't reach, use a footrest.
- Adjust your chair height until your thighs are parallel to the floor.
- Adjust your armrests so your shoulders are relaxed and your elbows are bent at a 90- to 100-degree angle.
- Bring the desk to you. Adjust the desk height until your forearms are parallel to the floor when typing. Your wrists should be straight, not bent up or down.
If your desk cannot be adjusted low enough for a proper seated position, a high-quality accessory like a Pull-out Keyboard Tray can position your keyboard and mouse at the ideal ergonomic height.
Step 4: Position Your Monitor
A common mistake is placing the monitor too high, forcing the neck to tilt backward. This leads to neck and shoulder strain. The correct placement, according to guidelines from institutions like the Canadian Centre for Occupational Health and Safety (CCOHS), is crucial.
- Height: Position the monitor so the top line of text is at or slightly below your horizontal eye level. A downward viewing angle of 0 to 20 degrees is ideal.
- Distance: Place the monitor about an arm's length away. You should be able to read text comfortably without leaning forward or backward.
- Tilt: Tilt the monitor screen back slightly (10-20 degrees) to reduce glare and maintain a comfortable viewing angle.
Step 5: Adopt a Sit-Stand Rhythm
Standing all day is not the goal; movement is. Prolonged static standing can cause discomfort in the lower back and legs. The key is to alternate between sitting and standing. A study published in the Cochrane Library found that sit-stand desks can reduce sitting time by over an hour and a half per day.
When starting, don't force yourself to stand for long periods. Ease into it to allow your body to adapt.
- Week 1-2: Start with 20-40 minutes of standing for every 60-90 minutes of sitting.
- Week 3 onwards: Gradually increase your standing time as you feel comfortable. Many people find success with Cornell University's "20-8-2" guideline: for every 30 minutes, sit for 20, stand for 8, and move/stretch for 2.
Section 3: Accessories and Organization
Accessories are not just add-ons; they are critical components for refining your ergonomic setup and keeping it organized.
Step 6: Integrate Ergonomic Supports
Even with a perfect desk and chair, small supports can make a big difference.
- Footrest: An Adjustable Ergonomic Footrest is essential if your feet cannot rest flat on the floor while seated. It provides a stable surface, promoting healthy circulation and reducing pressure on the lower back.
- CPU Holder: Getting your PC tower off the floor protects it from dust and makes cleaning easier. A Mobile Height Adjustable CPU Cart allows you to move your tower with your desk, preventing cables from being pulled or disconnected during height adjustments.

Step 7: Master Your Cable Management
With a height-adjustable desk, proper cable management is a matter of safety, not just aesthetics. Snagged cables can damage equipment or pull items off your desk.
- Leave Slack: Ensure all cables have 20-30% extra length to create a "slack loop." This allows them to move freely as the desk rises and falls.
- Use Sleeves and Trays: Route cables through a flexible sleeve and secure them in an under-desk cable tray. This keeps everything contained in a single, neat bundle.
- Secure with Ties: Use simple ties to group cables together. For frequently adjusted cables, a Magnetic Cable Tie offers a reusable and dust-resistant solution compared to traditional velcro.

Section 4: Final Assembly and Safety Checks
Proper assembly ensures the stability and longevity of your desk. Rushing this final step is a common pitfall that can lead to an uneven desk or premature motor wear.
Assembly Pro-Tip Checklist
- Loosely Assemble: During initial assembly, do not fully tighten the leg bolts.
- Test Cycle: With a moderate load (e.g., just the desktop), cycle the lift mechanism up and down 3-5 times.
- Check for Symmetry: Watch to ensure both legs travel at the same speed and the desk remains level.
- Final Tightening: Once you confirm the movement is symmetric, move the desk to a mid-height position and securely tighten all bolts. This process helps the frame settle and avoids locking in uneven stress.
Wrapping Up: Your Personalized Workstation
Building your own ergonomic workstation puts you in control of your comfort and well-being. By following this checklist, you can create a space that is perfectly tailored to your body and tasks. Remember the core principles: calculate your load, choose materials wisely, set your equipment to achieve a neutral posture, and manage your cables for safety and neatness. A well-planned desk is the foundation for a healthier and more productive workday.
Frequently Asked Questions (FAQ)
How much weight can a standing desk hold? This varies widely by model. Entry-level frames may support 150-200 lbs, while heavy-duty, dual-motor frames can lift 350 lbs or more. Always check the manufacturer's specifications and use our load calculation checklist to ensure you have an adequate buffer.
Is standing all day healthier than sitting? No. The goal is to avoid any single static posture for too long. According to ergonomic guidelines from sources like OSHA-EU, prolonged standing can lead to its own set of musculoskeletal issues, such as lower back and leg pain. The healthiest approach is to alternate between sitting and standing throughout the day.
How do I know what size desk I need? Measure the physical space you have available, leaving at least 3 feet of clearance for movement around the desk. Then, lay out your essential equipment (monitors, laptop, keyboard) on a flat surface to measure the minimum surface area you need. Common desk sizes range from 48x30 inches to 72x30 inches.
Disclaimer: This article is for informational purposes only and does not constitute professional medical advice. If you have pre-existing health conditions, such as chronic back pain or a musculoskeletal disorder, consult with a qualified physician or certified ergonomist to determine the best setup for your specific needs.
References
- U.S. Occupational Safety and Health Administration (OSHA) - Computer Workstations eTool
- Canadian Centre for Occupational Health and Safety (CCOHS) - Sit/Stand Desk
- Cochrane Library - Workplace interventions for reducing sitting at work
- Cornell University Ergonomics Web - Workstation Guides
- Forest Stewardship Council (FSC)


Leave a comment