
Before You Clamp: Why a Desktop Assessment is Crucial
A monitor arm is a cornerstone of an ergonomic workstation. It frees up desk space and allows you to position your screen at the perfect height and distance, reducing strain on your neck and eyes. However, before you tighten that clamp, it’s critical to ask: can my desk actually support it? I've seen firsthand how a simple oversight here can lead to a cracked desktop, a perpetually wobbly monitor, or even a complete setup failure. A heavy monitor and a powerful mounting arm exert significant, focused pressure on a small area of your desk.
Ignoring your desktop's material, thickness, and edge design is a common mistake that can cause irreversible damage. This guide provides a professional methodology to evaluate your desk's compatibility. We will cover how to assess its core structure, identify high-risk materials, and apply best practices for a secure installation, ensuring your ergonomic investment is built on a solid foundation.
Section 1: Decoding Your Desktop—Material Matters Most
The first step in a safe installation is identifying what your desktop is made of. Different materials have vastly different structural properties, especially when it comes to handling the concentrated force of a C-clamp. What might be a simple task for one material could be destructive to another.
Solid Wood vs. Engineered Wood (Particleboard, MDF)
Solid wood desktops are generally the most robust option for supporting a monitor arm. Their dense, fibrous structure distributes pressure effectively, making them highly resistant to crushing or splitting. If you have a solid wood desk, you are starting from a strong position.
However, the majority of modern desks are made from engineered woods like Medium-Density Fiberboard (MDF) or particleboard, often finished with a thin veneer. While excellent for general use, these materials have a critical vulnerability: their core is composed of compressed wood particles and glue. When you overtighten a monitor arm clamp on a thin or low-density particleboard top, you can easily crush the core. I’ve seen clamps sink into the surface or, in worse cases, cause the wood to split and delaminate.
For any engineered wood desktop, especially one that feels light or is less than 0.6 inches (about 15 mm) thick, using a steel reinforcement plate under the desk is a wise precaution. This plate distributes the clamping force over a much wider area, drastically reducing the risk of damage.
High-Risk Materials: Glass, Marble, and Thin Composites
Certain materials are simply not suited for clamp-based monitor arms. Tempered glass is the most common and dangerous culprit. While strong against surface impact, its edges are a weak point. Applying the focused pressure of a clamp can cause the entire sheet to shatter unexpectedly. Never clamp a monitor arm directly onto a glass desktop.
For glass or other brittle surfaces like marble, you have a few safer alternatives:
- Grommet Mounting: If your desk has a pre-drilled cable management hole (a grommet), you can use a monitor arm that mounts through it with a bolt. This is a far more secure method.
- Freestanding Risers: Instead of a clamp arm, a freestanding riser can achieve similar ergonomic benefits. For instance, a product like the Carbon Fiber Dual Monitor Stand elevates your screens without attaching to the desk itself.
- Wall Mounting: Attaching the monitor arm directly to the wall behind the desk completely bypasses the desktop, offering maximum stability.

Section 2: The Critical Dimension—Measuring Desktop Thickness
Once you’ve identified the material, the next critical factor is thickness. A clamp needs sufficient surface area and mass to grip securely. Too thin, and the desk will flex or break; too thick, and the clamp may not fit at all.
How to Get an Accurate Measurement
Use a reliable tape measure or ruler to measure the exact thickness of your desktop. Don't estimate. Measure at the edge where you intend to place the clamp. Be sure you are measuring only the desktop itself, not including any supporting frame elements that might be set back from the edge.
The Desktop Thickness Decision Framework
Based on countless installations, a clear pattern of success and failure emerges at different thickness levels. This table serves as a practical guide for assessing your setup. It reflects real-world stability, not just whether a clamp will fit.
| Thickness Range | Imperial (in) | Metric (mm) | Compatibility & Professional Notes |
|---|---|---|---|
| Very Thin | < 0.6" | < 15 mm | High Risk. Not recommended for clamping without a steel reinforcement plate on both the top and bottom surfaces. Prone to crushing and flexing. |
| Ideal Range | 0.6" – 1.2" | 15 – 30 mm | Excellent. This is the sweet spot for most standard monitor arm clamps. Provides a secure grip and good stability without needing modifications. |
| Thick | 1.2" – 2.0" | 30 – 50 mm | Conditional. The desk is strong, but you must verify the clamp’s maximum opening. Some arms may require an extended clamp kit. |
| Very Thick | > 2.0" | > 50 mm | Grommet or Wall Mount Required. Unsuitable for nearly all standard clamps. The lever action on such a thick surface can also be unstable. |
Debunking a Common Myth: "Any Sturdy Desk Will Do"
A prevalent misconception is that if a desk feels solid, it can automatically support a monitor arm. This is dangerously inaccurate. Many desks, particularly those with honeycomb-style internal structures (common in lightweight, affordable furniture), have hollow cores. They feel rigid but have no internal mass to resist the crushing force of a clamp. As the U.S. Occupational Safety and Health Administration (OSHA) notes, a workstation must provide adequate stability for all equipment. A clamp mount on a hollow-core desk is a gamble that often ends with a damaged desktop.
Section 3: Beyond Flat Surfaces—Edge Design and Clamp Placement
The final physical check involves the shape of your desk's edge and where you plan to attach the clamp. A flat, square edge is the ideal, but many modern desks feature designs that can complicate installation.
The Challenge of Beveled and Rounded Edges
Desks with beveled, rounded, or "bullnose" edges look great but are problematic for clamps. These shapes dramatically reduce the flat contact area for the clamp’s top and bottom pads. This not only creates an unstable mount but also concentrates all the clamping force on a very small point, increasing the risk of denting or splitting the wood. My field experience has shown this is a frequent cause of wobbly monitors.
If your desk has a profiled edge, search for a section that is perfectly flat and square, even if it’s not in your ideal location. If no such section exists, a reinforcement plate can sometimes bridge the curved edge, but a grommet mount is a more reliable solution.
Center of Gravity and Torque: Where to Place the Clamp
Where you place the clamp along the desk edge is just as important as the edge shape. To minimize torque and ensure maximum stability, position the clamp as close as possible to the monitor’s centerline. Furthermore, the clamp should be located within 4-6 inches (10–15 cm) of the spot where the monitor arm’s main pivot will be. Placing it too far to one side creates a long lever, which amplifies wobble and puts unnecessary stress on the desktop.
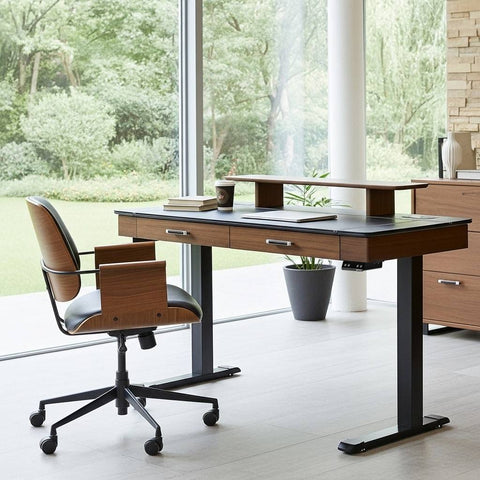
Section 4: Special Considerations for Height-Adjustable Desks
Height-adjustable or standing desks introduce dynamic forces that fixed-height desks do not. The movement, however smooth, can affect the security of a clamped monitor arm over time.

Managing Dynamic Loads and Cable Slack
When a standing desk moves up and down, it generates subtle vibrations that can cause a clamp to loosen over weeks or months. It’s a good practice to check and re-tighten your monitor arm clamp about once a month.
Cable management is also critical. All cables connected to your monitor must have enough slack to accommodate the desk’s full range of vertical travel. A taut cable can pull on the monitor during adjustment, destabilizing the arm or, worse, pulling other equipment off your desk. This is also why securing your PC tower is important. Using a product like the Adjustable CPU Stand, Mobile, Black ensures your computer moves with your desk, preventing cable strain.
The Importance of a Stable Frame
Any instability in the monitor arm will be amplified by a wobbly desk frame. This is why choosing a desk built to high stability standards is essential. Industry standards from organizations like the Business and Institutional Furniture Manufacturers Association (BIFMA) define testing protocols for the safety and durability of office furniture. A stable frame is the foundation for everything you place upon it. For a deeper understanding of this topic, our article on Desk Stability: Standing vs. Fixed-Height Desks provides a detailed comparison.
The Professional Installation Checklist
Follow these steps to ensure a safe, secure, and stable monitor arm installation.
- Assess Your Desktop Material: Is it solid wood, engineered wood, glass, or something else? Proceed with caution if it's not solid wood.
- Measure the Thickness: Use the table above to determine if your desk’s thickness is in the ideal range.
- Inspect the Edge Profile: Locate a flat, square section at least as wide as your clamp.
- Use a Protective Pad: Place a thin piece of rubber or felt between the clamp screw and the underside of your desk to prevent surface damage.
- Position for Balance: Align the clamp with the monitor's center of gravity and near the arm’s pivot point.
- Tighten with Finesse: Hand-tighten the clamp until it is snug. Then, use a wrench for a final, controlled quarter-turn. Do not over-torque, especially on engineered wood.
- Manage Your Cables: Confirm all monitor cables have sufficient slack for the arm's and the desk's full range of motion.
- Perform a Stability Test: Once mounted, gently push and pull on the monitor. Cycle the standing desk up and down. If you detect any significant wobble, creaking, or loosening, re-check your installation and tighten as needed.
Key Takeaways
Mounting a monitor arm is a simple process, but doing it safely requires a few minutes of due diligence. By verifying your desktop's material, measuring its thickness, and checking the edge design, you can prevent costly damage and ensure a stable, ergonomic setup. A properly mounted monitor arm is a key component of a healthy workspace, helping you maintain a neutral posture as recommended by ergonomic guidelines from authorities like the Canadian Centre for Occupational Health and Safety (CCOHS).
Investing in an ergonomic setup is an investment in your well-being. Taking these small steps ensures that your investment is secure for years to come.
Frequently Asked Questions (FAQ)
Can I mount a monitor arm on an IKEA desk? It depends entirely on the model. Many popular IKEA desktops (like some LINNMON or LAGKAPTEN series) use a paper honeycomb filling. These are not suitable for clamps, which can easily punch through the thin surface. For these desks, you must use a robust steel reinforcement plate or opt for a grommet installation if the desk is thick enough. Always check the product details for material composition.
What is a grommet mount? A grommet mount is an alternative to a clamp. It involves drilling a hole through the desktop and securing the monitor arm’s post with a bolt from underneath. This method provides superior stability and is the preferred solution for very heavy monitors or desktops made of weaker materials, provided you are comfortable with permanently modifying your desk.
How do I know if my monitor is too heavy? Every monitor arm has a specified weight capacity, which you should never exceed. You can find your monitor's weight (without its original stand) in its product manual or online specifications. Remember, a heavier monitor exerts more force, making your desktop's integrity even more critical.
How should I position my monitor after mounting it? According to Cornell University's Ergonomics Web, the top of the monitor's viewable screen should be at or slightly below your eye level, and the screen should be about an arm's length away. This helps maintain a neutral neck posture. Our guide, Finding Your Ideal Ergonomic Standing Desk Height, offers more detailed setup advice.
Disclaimer: This article is for informational purposes only and does not constitute professional engineering or safety advice. Always consult your desk and monitor arm manufacturer's instructions. If you have any doubts about your setup, especially with pre-existing health conditions, consult a qualified professional.


Leave a comment