
The Science of the Afternoon Slump: Why Your Back Pain Peak at 3 PM
Many professionals experience a predictable phenomenon: the morning begins with focused energy, but by mid-afternoon, a dull ache radiates from the lower back, often accompanied by tightness in the neck and shoulders. This is not merely a result of a long day; it is the physiological manifestation of static load.
When we sit, our musculoskeletal system shifts from dynamic movement to a state of sustained contraction. Unlike walking, which promotes blood circulation and varied muscle engagement, sitting forces the muscles of the trunk and spine to maintain a fixed position. Over time, this leads to reduced blood flow and the accumulation of metabolic waste products in the muscle tissue, a primary contributor to Work-related Musculoskeletal Disorders (WMSDs).
A common misconception is that "ergonomic" furniture is a passive cure. In reality, a high-performance chair is a tool that requires precise calibration. Without proper adjustment, even the most advanced seating can exacerbate spinal compression. According to the ISO 11226:2000 standard for evaluating static working postures, the duration and angle of a posture are the critical determinants of physical strain. To alleviate back pain, we must move beyond the "out of the box" setup and transition to a scientifically grounded, personalized workstation.
The Physiology of the Seated Spine: Understanding Neutral Position
To understand why adjustment matters, we must look at the anatomy of the lumbar spine. The lower back has a natural inward curve called lordosis. When we sit without adequate support or in a slouched position, the pelvis tilts backward, flattening this curve. This "C-shape" posture increases intervertebral disc pressure by up to 40% compared to standing.
The goal of ergonomics is to achieve a Spinal Neutral Position. This is the posture where the spine is naturally aligned, the joints are not under undue stress, and muscle activity is minimized. As noted in the OSHA eTools on Neutral Working Postures, this involves keeping the head level, arms close to the body, and the back fully supported.
However, achieving this is difficult because the "ideal" height is a moving target. It depends on your anthropometric measurements—the specific proportions of your limbs and torso. For instance, a chair height that works for someone in the 50th percentile of height will cause significant popliteal (behind the knee) pressure for a shorter user or inadequate thigh support for a taller professional.
Step 1: Establishing the Foundation - Seat Height and Foot Placement
The first step in alleviating back pain is setting the correct seat height. Many users mistakenly adjust their chair relative to the floor. Instead, you should adjust it relative to your elbows and the desk surface, then solve for the floor.
- The Elbow Rule: With your shoulders relaxed, your elbows should form a 90-to-100-degree angle, and your forearms should be parallel to the desk surface.
- The Floor Connection: Once your elbows are set, check your feet. They must be flat on the floor to distribute weight away from the lower back.
- The Circulation Gap: If your desk is non-adjustable and forces you to raise your chair so high that your feet dangle, you are restricting blood circulation in your lower limbs.
For users whose feet do not comfortably reach the floor after aligning with the desk, the Adjustable Ergonomic Footrest is an essential intervention. It allows for a 0-20 degree tilt, which not only supports the feet but encourages active "micro-movements" that help prevent lower limb MSDs, as discussed in EU-OSHA research on lower limb disorders.
Adjustable Ergonomic Footrest, promoting healthy circulation and posture under a desk.
Logic Summary: Seat height adjustment follows the "System Integration" principle. Because many home office desks are fixed at a standard 29 inches, the chair must be raised to meet the desk, often necessitating a footrest to maintain a neutral lower-body posture.
Step 2: Seat Depth and the "Three-Finger Rule"
Seat depth is perhaps the most overlooked adjustment in the home office. If the seat pan is too deep, it hits the back of your knees, forcing you to slide forward and lose contact with the backrest. This "perch sitting" eliminates lumbar support and places the entire load of your upper body on the lower vertebrae.
To check your seat depth, sit as far back as possible. There should be a gap of approximately 2 to 3 fingers (roughly 1.5 to 2.5 inches) between the edge of the seat and the back of your knees.
- Too shallow: You may feel like you are falling off the chair, leading to increased pressure on the ischial tuberosities (sit bones).
- Too deep: This restricts blood flow and can lead to swelling or "pins and needles" in the legs.
The Flex, Dual-Backrests Ergonomic Office Chair addresses this through a pressure-relieving seat design that complements its unique lumbar system. By ensuring the seat depth matches your femur length, you allow the chair's backrest to do its job: maintaining the lumbar curve.

Step 3: Calibrating Lumbar Support - The Belt Line Heuristic
The most common mistake we observe in workstation audits is setting the lumbar support too high. Many users place the support in the middle of their back, which actually pushes the spine into an unnatural extension, increasing muscle tension in the erector spinae.
The firmest point of the lumbar support should align with your belt line. This is where the inward curve of your spine is deepest. By filling this gap, the chair takes over the work of your muscles, allowing them to relax.
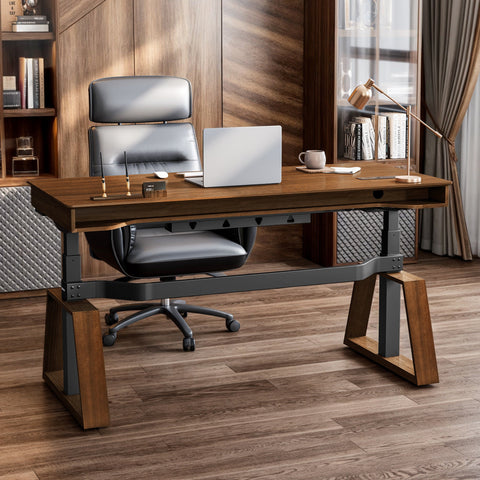
For those in leadership roles who require both aesthetic refinement and technical support, the Royal Slim, Executive Office Chair provides a high-back design that stabilizes the entire thoracic and lumbar region. In executive settings, where meetings can lead to long periods of static sitting, the integration of high-density support is vital for preventing the onset of chronic discomfort.
Professional Insight: Based on common patterns from customer support and returns handling, we find that users who complain of "mid-back pain" are often using a chair where the lumbar support is positioned 2-3 inches too high. Lowering the support to the sacral-lumbar junction often provides immediate relief.
Step 4: Dynamic Sitting - Recline and Tilt Tension
The "90-degree" sitting rule is largely outdated. Scientific consensus, including the BIFMA G1-2013 Ergonomics Guideline, suggests that a slightly reclined posture (110 to 135 degrees) is superior for reducing intervertebral disc pressure.
However, the key is Dynamic Sitting. You should not lock your chair in one position all day. Instead:
- Adjust Tilt Tension: Set the tension so that you can recline easily by leaning back, but the chair still supports you when you sit upright. It should feel like a balanced "cradle."
- Use the Lock Sparingly: Only lock the chair in an upright position for tasks requiring intense focus or high-precision mouse work.
- The 20-8-2 Rhythm: Aligned with Cornell University’s Ergonomics Web recommendations, aim for 20 minutes of sitting, 8 minutes of standing, and 2 minutes of moving/stretching.
Scenario Modeling: The Tall Professional (95th Percentile)
Standard furniture is often designed for the "average" user, leaving those at the ends of the height spectrum in pain. We modeled the requirements for a 195cm (6'5") male professional to identify the specific ergonomic gaps they face.
Analysis: Ergonomic Deficits for Tall Users
| Parameter | Recommended (195cm Male) | Standard Fixed Desk/Chair | Gap/Deficit |
|---|---|---|---|
| Seat Height | ~51 cm (20.1 in) | ~45-48 cm | -3 to -6 cm |
| Desk Height (Sitting) | 80.5 cm (31.7 in) | 73.7 cm (29 in) | -6.8 cm (2.7 in) |
| Standing Height | 119.5 cm (47 in) | N/A | Deficit |
| Viewing Distance | ~165 cm (for 49" ultrawide) | ~76 cm (30 in desk) | -89 cm (35 in) |
Methodology Note: This scenario uses a deterministic parameterized model based on ANSI/HFES 100-2007 ratios. It assumes standard office footwear (2.5cm correction) and population-average limb-to-torso ratios. Actual requirements may vary based on individual morphology.
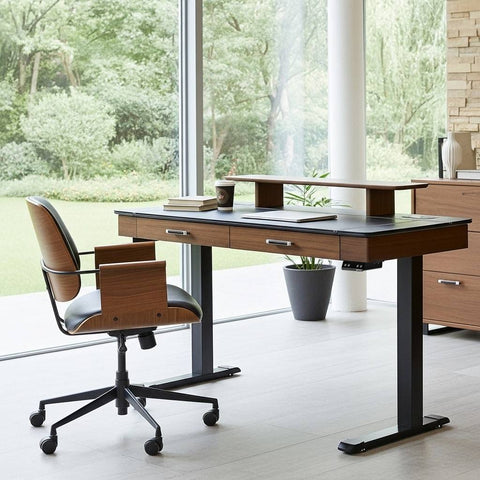
For this persona, a standard desk is physically impossible to use ergonomically. The 2.7-inch deficit in desk height forces the user to hunch forward, causing massive strain on the trapezius and cervical spine. This is where an integrated system, such as the Ark Pro L-Shaped Standing Desk, becomes a medical necessity rather than a luxury. The ability to raise the work surface to exactly 80.5 cm while sitting allows the tall professional to maintain neutral shoulder and wrist alignment.

The Integrated System: Why the Chair is Not Enough
As highlighted in The 2026 Workstation White Paper: Converging Ergonomic Science and Sustainable Engineering, a chair is only one component of a "Human-Centric Workstation." If your chair is adjusted perfectly but your monitors are too low, you will still experience neck pain (cervical strain).
The Calibration Order:
- Adjust the Chair: Set height, depth, and lumbar support relative to your body.
- Adjust the Desk: Bring the desk surface to your neutral elbow height.
- Adjust the Monitor: The top of the screen should be at or slightly below eye level. For tall users with large displays, this often requires a monitor arm to achieve the necessary 30+ inch viewing distance.
Performance ROI: The Financial Case for Ergonomics
Investing in a high-end ergonomic setup is often viewed as a cost, but scenario modeling suggests it is a high-yield investment.
- Metabolic Impact: For a 95kg professional, standing for 4 hours a day instead of sitting burns an additional ~200 calories. Over a 250-day work year, this equates to roughly 50,000 calories, or the equivalent of 14 pounds of fat loss annually.
- Productivity Gains: Conservative estimates from the Texas A&M School of Public Health suggest a 15% increase in productivity when using sit-stand workstations. For a professional earning $65/hour, this represents over $9,000 in recovered value per year.
ROI Logic: These estimates are based on MET (Metabolic Equivalent of Task) constants (1.5 for sitting, 2.0 for standing) and standard work-year assumptions. Productivity gains are derived from reduced discomfort-related distractions and improved cognitive blood flow.
Summary Checklist for Immediate Relief
To recap, if you are experiencing back pain today, follow this adjustment sequence:
- Feet: Flat on the floor or a footrest.
- Knees: 90-degree angle with a 2-3 finger gap from the seat edge.
- Hips: Pushed all the way back into the chair.
- Lumbar: Firmest point at the belt line.
- Elbows: 90-100 degrees, shoulders relaxed, wrists neutral.
- Movement: Change positions every 30-60 minutes.
By treating your chair as a calibrated instrument rather than just a place to sit, you move from managing pain to optimizing performance. Ergonomics is the science of fitting the task to the human; make sure your workstation fits you.
Disclaimer: This article is for informational purposes only and does not constitute professional medical advice. If you have pre-existing musculoskeletal conditions or chronic pain, please consult a qualified healthcare professional or occupational therapist before making significant changes to your workstation or routine.
References
- BIFMA G1-2013 Ergonomics Guideline for Furniture
- Canadian Centre for Occupational Health and Safety (CCOHS): Office Ergonomics
- OSHA eTools: Computer Workstations - Neutral Working Postures
- ISO 11226:2000 Evaluation of Static Working Postures
- World Health Organization (WHO) 2020 Guidelines on Physical Activity and Sedentary Behaviour
- Cornell University Ergonomics Web — Workstation Guides


Leave a comment