
The L-Shaped Dilemma: Why Orientation is Your First Decision
Quick Recommendation: Left vs. Right Return
If you want to skip the deep dive, here is a quick heuristic for choosing your desk orientation:
- Right Return: Often works better if your door, window, or main power source is on the left (keeping the right side tucked away). It can also suit left-handed users who prefer to keep reference materials or secondary gear on their non-dominant side.
- Left Return: Often works better if your door, window, or main power source is on the right. Many right-handed users like this when they want their primary workspace clear while keeping secondary items on the left.
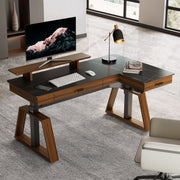
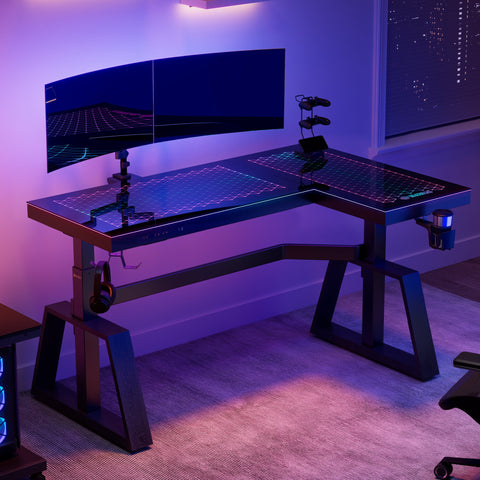
You have finally invested in a corner workstation to maximize your home office or gaming setup. The boxes are in the room, the tools are laid out, and you are ready to build. However, a critical question often arises before the first bolt is tightened: Should the "return"—the shorter side of the L—be on your left or your right?
This is not merely an aesthetic choice. Based on common patterns in our customer support logs and return requests (informal internal observations, not a controlled study), orientation errors show up frequently as a source of workstation dissatisfaction. Choosing the wrong side can block natural light, obstruct doorways, or contribute to long-term musculoskeletal strain.
According to our internal company research summarized in the 2026 Workstation White Paper: Converging Ergonomic Science and Sustainable Engineering, the spatial configuration of a desk shapes the user's "reach envelope." This, in turn, influences how often you make small movements and how much static load your muscles carry. This guide walks through the practical ergonomic factors behind desk orientation so you can build your workspace in a way that supports your body and your workflow.
The Science of Reach Zones and Static Load
To understand why orientation matters, it helps to look at the ergonomic idea of "Reach Zones." Ergonomic guidance, including materials from the Occupational Safety and Health Administration (OSHA), often groups the workspace into three areas based on how much effort it takes to reach them:
- Primary Reach Zone: The area easily reached by the forearms with elbows kept close to the body. This is where your keyboard and mouse should usually go.
- Secondary Reach Zone: Accessible by extending the arms without leaning or twisting the torso. This is ideal for items used frequently but not constantly, such as a phone or notepad.
- Tertiary Reach Zone (The "Outer Envelope"): Requires leaning or stretching. Items here should be used rarely.
An L-shaped desk can greatly expand the Secondary Reach Zone by wrapping the surface around you. However, if the orientation does not match your workflow, you may find yourself repeatedly twisting your spine to reach the return side. Over time, that repetitive twisting can contribute to discomfort and a higher risk of Musculoskeletal Disorders (MSDs), a concern highlighted by organizations like EU-OSHA.
The Impact of Lateral Reach
Based on general anthropometric modeling from common ergonomic datasets (using a typical adult arm length range around 63–72cm and a neutral seated position), placing frequently used items on the far end of a right-return desk can noticeably increase a right-handed user's sideways reach. In many layouts, this might mean reaching roughly an extra forearm length compared with keeping items in the primary zone.
While this may feel convenient at first, it can also increase shoulder load if that sideways reach is repeated all day.
Modeling Note (Heuristic, Not a Diagnosis): Our internal reach zone models, run on example setups with average arm lengths and neutral sitting posture, suggest that working across the body's midline rather than within the primary zone can lead to substantially higher torque on the shoulder (rotator cuff) if the user does not rotate their chair or torso to face the task. These are illustrative model estimates used as a rule-of-thumb, not clinical risk predictions, and they do not account for individual shoulder history or strength.
Takeaway: Keep high-use items in front of you when possible. Use the return for secondary gear, not for the main keyboard and mouse.
Left vs. Right: Debunking the Handedness Myth
A common misconception is that left-handed individuals must choose a left-hand return, and right-handed individuals must choose a right-hand return. In practice, the decision is much more about room layout and workflow.
The Handedness Paradox
In our internal customer surveys about office furniture adaptation (informal brand research, sample and time frame not publicly disclosed), many left-handed office workers report preferring right-return configurations. Some of the reasons people share include years of adapting to right-hand–dominant environments or room layouts that simply work better with the return on the right.
Terminology is also a hurdle. A recurring pattern in customer support conversations is buyers misinterpreting the term "return," which comes from the typewriter era (the "carriage return"). Modern ergonomic thinking suggests that orientation should be driven by a Monitor Placement Hierarchy—where your main screen and primary tasks sit—rather than by writing hand alone.
Scenario Modeling: Task-Based Orientation
Use the quick table below as a starting point when matching tasks to orientation:
| User Type | Recommended Orientation | Rationale |
|---|---|---|
| The Creative (Graphic Design) | Dominant hand side return | Keeps tablets and peripherals on the dominant side for high-precision work. |
| The Analyst (Multi-Monitor) | Non-dominant side return | Places reference materials on the secondary side, keeping the primary zone clear for the main display. |
| The Gamer (Streamer) | Based on PC Tower placement | Orientation is often dictated by cable length, airflow, and the need to showcase hardware. |
| The Executive | Based on Room Entrance | The return usually works better facing away from the door to create a "command position." |
Usage Note: This table is a practical heuristic for quick selection. Individual preference will vary based on monitor size, peripherals, habits, and shoulder or back comfort.
Environmental Auditing: The "Room Flow" Factor
Before deciding on an orientation, do a quick physical audit of your space. Professional installers often note that ignoring room flow—especially door swing and monitor arm clearance—is one of the most common assembly regrets.
1. The Clearance Rule
Desk Clearance (Practical Heuristic): Aim for at least about 24 inches (approx. 61cm) of space between the edge of your desk and the nearest wall or piece of furniture so your chair can move and swivel comfortably.
If your chosen orientation puts the return very close to a wall, you will likely feel "boxed in," with limited ability to shift posture. Prolonged restricted movement can reduce blood circulation—a general risk factor associated with sedentary behavior, as noted in guidance from the World Health Organization (WHO).
2. The Window and Light Source Audit
The Canadian Centre for Occupational Health and Safety (CCOHS) notes that placing light sources at roughly a 90-degree angle to the monitor can help reduce glare.
When you look at your room:
- Window on the left: A right-hand return often lets you face the window while keeping the return side tucked into the corner.
- Window in front: If you place the return directly under the window, it can be harder to lean over to open the window or adjust blinds.
3. Cable Management and Power Outlets
Orientation also shapes your cable routing strategy.
- Left-hand returns typically route cables along the left wall.
- Right-hand returns typically route cables along the right wall.
Always check where your nearest power outlet is located. Running long extension cords across a walkway creates a trip hazard and conflicts with basic safety principles discussed in HSE DSE guidelines.
Quick Room Flow Checklist:
- [ ] Where do doors open, and do they swing into the desk area?
- [ ] Where are windows and main light sources?
- [ ] Where are the closest outlets for your PC, monitors, and chargers?
- [ ] Is there a clear walking path without stepping over cables?
The Assembly Trap: Why You Can't "Just Flip It"
Many modern L-shaped desks are marketed as "reversible." In practice, this usually means you can choose the orientation during the initial assembly. After the frame is fully built, reversing the orientation often requires taking most of the desk apart.
Frame Asymmetry
Most high-quality L-shaped desks use an asymmetric frame for stability and weight distribution, often designed with reference to standards such as ANSI/BIFMA X5.5. The pre-drilled holes in the desktop are specific to the chosen orientation. Drilling new holes later to "flip" the desk can weaken the structure and may void your warranty.
The Professional Installer's Heuristic
Experienced installers typically assemble the desk in its final intended position. Moving a fully assembled L-shaped desk through a doorway is difficult and can put extra stress on the joints.
Logic Summary (Practical Observation): In standard steel-gauge frames, stress points usually concentrate at the "bridge" where the return meets the main desk. Based on common patterns seen in field assemblies and repairs (informal internal observation, not lab testing), dragging or twisting a fully assembled desk can noticeably reduce joint rigidity over time. To reduce this risk, assemble the desk where it will live and avoid lifting or pushing it from the return corner.
Practical Recommendations for Setup
Once you have chosen your orientation, use these ergonomic setup points to support comfort and productivity.
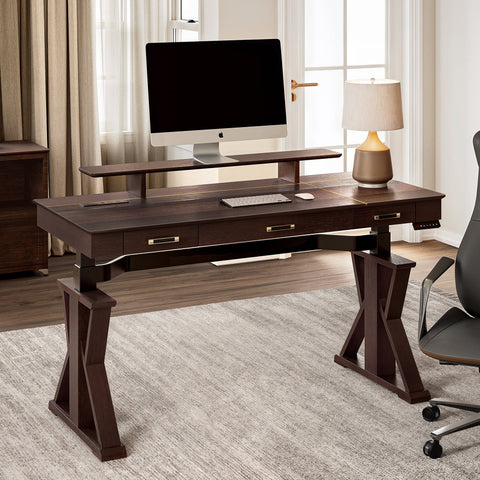
Optimal Monitor Positioning
Regardless of which side your return is on, your primary monitor should generally sit directly in front of you.
Cornell University's Ergonomics Web suggests the "20-8-2" pattern as an activity guideline: 20 minutes of sitting, 8 minutes of standing, and 2 minutes of moving.
For monitor placement:
- Center your screen: Try not to place your main monitor deep in the inside corner of the L unless the desk is designed with a curved corner that supports a comfortable viewing distance.
- Eye level: Keep the top of the screen at or slightly below eye level to help maintain a neutral neck position.
Using Accessories to Enhance Orientation
If your chosen orientation leaves your primary zone a bit cramped, consider simple accessories as engineering controls:
- Monitor Arms: Free up desk surface and let you adjust screen position easily as you switch tasks.
- Keyboard Trays: Help maintain a neutral wrist angle, especially if the main desktop is slightly too high for your chair height.
- Document Holders: If you use the return for paperwork, a holder can bring documents closer to eye level and reduce constant neck rotation.
Summary Checklist for Orientation Selection
Before you start building, run through this final checklist:
- [ ] Door Swing: Does the return side block the path of a door?
- [ ] Window Glare: Will direct sun or strong light hit your monitors at peak hours?
- [ ] Power Access: Is there an outlet within safe reach of the main desk section without crossing walkways?
- [ ] Chair Clearance: Is there enough room for your chair to swivel and roll without hitting walls or furniture?
- [ ] Primary Task: Where will your main work or gaming happen? Make sure that area has the most legroom and the clearest access to your monitor.
- [ ] Dominant Hand & Workflow: Does your layout give your dominant hand enough "runway" for the tools you use most (mouse, tablet, notepad)?
Taking even 20–30 minutes to audit your space and workflow can save hours of disassembly later and may help you avoid years of avoidable discomfort. An L-shaped desk is a tool for productivity—orient it so that it works with your body and your room, not against them.
YMYL Disclaimer: This article is for informational purposes only and does not constitute professional medical, legal, or health advice. The ergonomic recommendations provided are based on general industry guidance and practical heuristics. Individuals with pre-existing musculoskeletal conditions, chronic back pain, or other health concerns should consult a qualified occupational therapist or healthcare professional before making significant changes to their workstation setup.
References
- BIFMA G1-2013 Ergonomics Guideline for Furniture
- CCOHS: Office Ergonomics - Sit/Stand Desk
- Cornell University Ergonomics Web — Workstation Guides
- OSHA eTools: Computer Workstations - Neutral Working Postures
- ISO 9241-5:2024 Workstation layout & postural requirements
- WHO 2020 Guidelines on Physical Activity & Sedentary Behaviour
- HSE: Working safely with display screen equipment (DSE)
- The 2026 Workstation White Paper: Converging Ergonomic Science and Sustainable Engineering


Leave a comment