

A keyboard tray on a small desk can work, but desk size alone does not settle it. Tape or sketch the laptop, monitor, keyboard and mouse, tray, chair, legs, and cable paths before drilling or buying an accessory. The setup is a Pass only when all five zones remain usable, a Conditional pass when one layout change resolves the conflict, and a Fail when the tray causes contact, collisions, forced reaches, or cable strain.

Can Your Small Desk Support a Laptop, Monitor, and Keyboard Tray?
Yes, conditionally. A compact desk can support the full setup when its surface arrangement and open underside work together during your normal seated routine. OSHA workstation guidance treats adequate workspace and clearance as conditional setup requirements, so a crowded tabletop alone is not enough for a pass.
- Map the five zones. Mark the usable tabletop, laptop and monitor footprints, keyboard-and-mouse position, underside mounting area, seated clearance, tray movement, and cable route. Measure inside the desk's actual edges, drawers, apron, and frame instead of relying on its advertised width or depth.
- Choose Pass when the laptop, monitor, and pointing device remain usable, the tray has a suitable mounting position, your chair approaches normally, and the stored and working tray positions leave your knees, feet, and cables clear.
- Choose Conditional pass when the desk works after one defined change, such as moving the monitor off its base, shifting the laptop, changing the tray position, or removing a competing accessory. Rerun the physical test after making that change.
- Choose Fail when the tray blocks your knees or chair, cannot mount in a clear and aligned location, collides with the frame or furniture, forces an off-center reach, or pulls cables taut. Keep the keyboard on the surface or change the desk layout instead.
The result is a compatibility decision, not a universal size category. A shallow desk may pass for a stationary setup and fail for someone who frequently moves the chair or uses a long tray path.

Measure the Surface Zones for the Laptop, Monitor, and Keyboard
Start with the usable desktop, not the desk's listed outside dimensions. The OSHA monitor-placement guidance is a planning reference for keeping the monitor directly in front of you and allowing a workable viewing position, not a universal fit threshold for every person or screen.
For sustained laptop work, separating the screen from the keyboard can make the layout more flexible. Cornell's computer workstation guidance on an external monitor and keyboard supports treating the laptop, monitor, and external input devices as separate zones rather than assuming the laptop can sit anywhere on the desk. A workstation planning guide likewise provides reference measurements for planning monitor position, not a universal pass threshold.
| Zone | What to measure | Failure sign |
|---|---|---|
| Tabletop width and depth | Clear space inside edges, drawers, lips, and other obstructions | A device or cable must sit partly over an edge or block another zone |
| Laptop | Closed and open footprint, ports, charger position, and screen angle | The laptop crowds the monitor, blocks a cable bend, or occupies the primary reach zone |
| Monitor support | Monitor base footprint, screen position, or proposed arm location | The screen is pushed off-center or cannot sit at a workable viewing distance |
| Keyboard and mouse | Keyboard width, mouse area, and reach from the tray's working position | The mouse has no usable surface or the keyboard and pointer are out of alignment |
| Viewing position | The monitor's front-to-back position relative to your chair | You must twist, lean, or place the screen at an awkward angle to keep everything on the desk |
| Cable route | Port locations, bends, and the route from tabletop to tray | A cable crosses the tray path, hangs against a leg, or cannot move with the setup |
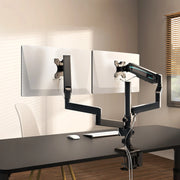
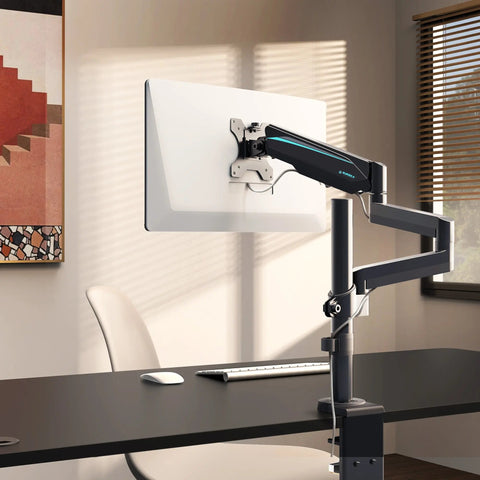
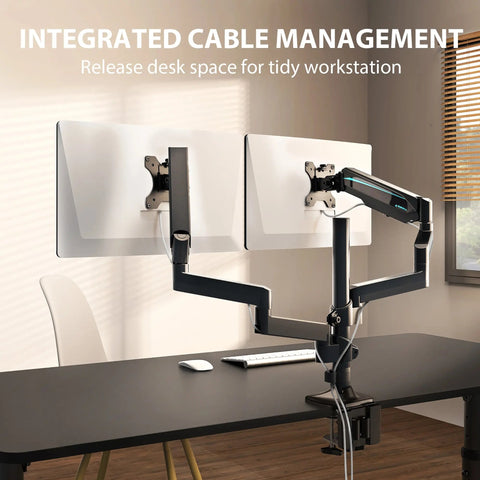
A monitor arm may free the footprint of a monitor base, but it creates a separate mounting decision. The Single Monitor Arm is a browse option for changing the surface map, not proof that an unspecified desk or monitor will accept it. Its clamp or grommet position, desk-edge space, monitor requirements, and cable route still need to match the actual setup.
If the desk passes the surface map only when the monitor, laptop, or mouse is shifted away from your normal position, treat it as a conditional pass at most. The tray does not eliminate the need for a usable mouse zone or a monitor position directly in front of you.
Check Leg Clearance Before Choosing a Mounting Position
The tray passes the under-desk test only when your actual chair, the desk frame, the hardware, and your seated movement share the zone without contact or restriction. OSHA's guidance for keyboard tray space and leg clearance and work-space clearance provides measuring aids, not one universal number for every chair or body.
- Inspect the underside. Look for a front apron, drawer box, crossbar, center leg, modesty panel, and any existing hardware. Note where the tray would occupy space in front of your thighs and knees.
- Mark the open seated zone. Use tape or cardboard to represent the tray's underside envelope. Include both its stored and working positions, not only the area around the proposed fasteners.
- Place the keyboard at working height. Keep the keyboard and mouse together and centered with your seated position. A position that saves tabletop space but pushes your hands or shoulders off-center is not a clean pass.
- Test approach and repositioning. Sit in the chair, approach the desk normally, move your knees and feet, and make the ordinary side or backward adjustments you use during work. Contact with hardware, a blocked chair approach, or a forced off-center reach changes the result to Conditional pass or Fail.
In an apartment office, wall and furniture placement can make chair movement as important as the desk frame. If the tray works only while you remain perfectly still, the under-desk result is conditional rather than fully usable.
Verify the Mounting Area
The mounting area must be structurally clear, aligned with your seated centerline, and compatible with the tray's current installation method. Inspect it from the front and side before drilling or clamping, then compare the proposed tray centerline with the position of your chair and monitor.
The Pull-out Keyboard Tray is one concrete mock-up reference. Its product page lists an overall envelope of 32.24 inches long by 13.35 inches wide by 5.43 inches high, adjustable pull-out length, and two height options. Use those listed dimensions to draw the tray's physical envelope. They do not establish that it fits a particular desk or reveal its mounting hardware, travel distance, tilt range, or required installation clearance.
Before committing to installation, the proposed position should clear the apron, drawers, crossbars, center legs, and knee path. The current product instructions must also match the desk surface and hardware situation. If the instructions or the underside area do not support the proposed position, the mounting result is a Fail even when the tabletop has enough room.
Test Tray Travel and Cable Movement
Test the complete path from stored to working position with the keyboard, mouse, chair, nearby furniture, and connected cables represented. A tray that fits while stationary can still fail when movement pulls on a port, crosses the leg zone, or forces you to reach away from center.
- Mock the stored position. Use removable tape, cardboard, or the tray itself to mark its fully stored envelope. Look for contact with drawers, chair arms, legs, and nearby furniture.
- Mock the working position. Extend or mark the tray as far as your routine requires. Place the keyboard and mouse where you would actually use them, then sit centered at the desk.
- Move the chair and tray together. Test approach, ordinary repositioning, and any side movement you make during work. A fixed tray may need less movement tolerance than a setup you frequently extend, retract, or adjust.
- Trace every cable. Follow laptop, monitor, keyboard, and mouse cables through each intended position. Leave the route free of pinching, taut pulls, sharp bends, and contact with the chair or legs. There is no universal cable-slack amount that proves fit, so use the actual cables.
- Downgrade the result when movement fails. Cable strain, a collision, a blocked chair, or an off-center reach means the layout needs a change before installation. Under-desk cable management can provide organization ideas, but it does not prove that this tray path is compatible.
Frequent chair repositioning calls for a more forgiving layout. A mostly stationary setup may pass with a tighter path, but only if your normal seated routine remains comfortable and unobstructed.
Choose the Simplest Workable Layout
Use the test result to choose the least complicated arrangement that keeps the laptop, monitor, keyboard, mouse, chair, and cables usable. A tray is an option for reclaiming surface space, not a requirement for making every compact desk work.
- Keep the keyboard on the surface when the tray blocks your knees, restricts chair movement, creates an off-center reach, lacks a clear mounting area, collides with the frame, or strains cables. A surface keyboard is the better fit when the tray solves one space problem by creating a larger under-desk problem.
- Modify the layout when one specific change can remove the conflict. Move monitor support off the tabletop, reposition the laptop, change the tray placement or style, or remove a competing accessory. Make one change at a time, then repeat the surface, seated, mounting, and movement tests.
- Choose another desk or accessory when the current frame or underside cannot provide both a workable device arrangement and a clear seated zone. Browse compact computer desks only after identifying the failed condition, such as an obstructed underside or insufficient usable surface. A category page cannot establish fit for your equipment.
For the simplest next step, tape the five zones on the actual desk and run the chair and cable test before installation. Install the tray only if your normal laptop-and-monitor routine remains aligned, clear, and movable.
FAQs
These questions cover the physical checks that determine whether a keyboard tray works with a small desk.
Can a keyboard tray fit on a small desk?
Yes, conditionally. The keyboard and mouse, tray hardware, mounting area, chair path, and cables must fit together at the same time. Tape the tray and device envelopes before drilling or buying an accessory, then test both stored and working positions.
How much leg clearance do I need for an under-desk keyboard tray?
There is no single universal number for every chair and user. Use the actual tray's working and stored positions, then reject or change the setup if your knees or thighs contact the hardware or your chair cannot approach and reposition normally.
Where should a keyboard tray be mounted under a desk?
Mount it only in a clear, structurally suitable underside area that keeps the keyboard aligned with you and leaves the full tray path open. Confirm the current tray installation instructions before drilling or clamping, because a product's listed dimensions do not define its mounting requirements.
Can I use a laptop and monitor with a keyboard tray on a compact desk?
Often, if the monitor support, laptop, keyboard, mouse, and cables remain usable together. Compare the tabletop map with and without a monitor arm, but treat the arm as a separate compatibility check for the desk edge, monitor, mounting method, and cable route.
When should I skip a keyboard tray on a small desk?
Skip it when it blocks your knees, restricts chair movement, forces an off-center reach, lacks a suitable mounting area, collides with the frame, or pulls cables taut. Keep the keyboard on the surface or change the layout instead.
Leave a comment