

A small dorm desk can support a laptop, monitor, console, and even a gaming PC—but only if each device has a defined position and the setup can switch easily between studying and gaming.
The most practical approach is to:
- Keep the center of the desk clear for schoolwork.
- Use vertical space for monitors and frequently used accessories.
- move the keyboard or gaming peripherals out of the way when they are not needed.
- Keep consoles and PCs ventilated and accessible.
- Separate permanent cables from devices that are unplugged regularly.
This guide shows how to build a multi-device dorm desk without overcrowding the work surface, blocking ventilation, or creating a cable tangle that is difficult to troubleshoot.
Start With the Dorm Desk, Not the Devices
Before buying a monitor stand, keyboard tray, or cable organizer, measure the space you actually have.
Record:
- Desktop width and depth
- Distance from the desktop to any fixed shelf
- Desk thickness
- Available floor space beside and beneath the desk
- Location and number of power outlets
- Position of Ethernet ports, if available
- Chair height and available legroom
- Residence-hall rules for drilling, clamping, extension cords, and electrical devices
Many dorm desks are owned by the school and cannot be drilled into or permanently modified. Some also have attached shelves, shallow desktops, rear panels, or thick edges that prevent common monitor arms and clamp-on accessories from fitting.
A product can be useful in a home office but unsuitable for a dorm simply because its clamp cannot open wide enough or its base occupies too much of the desktop.
Make a Device Inventory
List every device that needs a permanent or temporary place.
| Device | Usually Stays on Desk? | Main Space Requirement |
|---|---|---|
| Laptop | Yes | Opening angle, charger access, ventilation |
| External monitor | Usually | Viewing distance and stable support |
| Second monitor | Optional | Additional width or vertical clearance |
| Gaming console | Usually | Ventilation and cable access |
| Desktop PC | Usually | Floor or side storage with airflow |
| Keyboard and mouse | During use | Clear input area |
| Controller and headset | No | Small storage or charging location |
| Textbooks and notebooks | During study | Clear central work surface |
| Dock or USB hub | Usually | Reachable ports and cable routing |
| Speakers | Optional | Stable position without blocking the screen |
This inventory helps distinguish devices that must remain accessible from accessories that can be stored between sessions.
Choose a Primary Use for the Center of the Desk
The center of a dorm desk should normally remain available for whichever activity requires the most flexible space.
For most students, that means:
- Laptop and notebook space during classes and assignments
- Keyboard and mouse space during gaming
- Room for a textbook, calculator, or tablet during study sessions
Avoid placing a console, desktop tower, large speaker, or permanent storage bin in this central zone. Those items are difficult to move and reduce the desk’s ability to serve more than one purpose.
A useful planning principle is:
Fixed devices go above, below, or beside the desk. Temporary work happens in the center.
Build Upward Before Expanding Outward
Because dorm desks have limited width, vertical organization is often more effective than placing every device in a row.
A monitor riser can create a second level for the display while leaving space underneath for:
- A closed laptop
- A dock or USB hub
- Controllers
- A compact console
- A keyboard when it is not in use
- Notebooks and small accessories
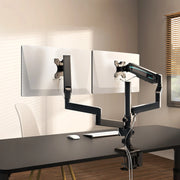
A carbon fiber dual-monitor stand, for example, is designed to elevate displays and create storage space beneath them.
Before choosing a riser, check:
- Total width
- Maximum recommended load
- Height above the desktop
- Available clearance below the platform
- Distance to any fixed dorm shelf
- Whether the monitor bases fit completely on the platform
- Whether the added height places the screen too high
As a starting point, most consoles and keyboards need at least 4–6 inches of clearance beneath the riser platform to slide in and out; if the listed clearance is shorter than that, plan to keep the console beside the desk instead of underneath it.

One Monitor Is Often Better Than Two
A dual-monitor setup can be useful for research, programming, design work, streaming, or gaming with a secondary application open. It is not automatically the best choice for every dorm.
One well-positioned monitor may leave more room for:
- A laptop stand
- A console
- Speakers
- School supplies
- A larger usable writing area
Consider two monitors when you regularly use both screens. Otherwise, a single larger monitor with easy laptop connectivity may be the cleaner solution. As a rough planning guideline, a desktop narrower than about 40 inches or shallower than about 24 inches usually leaves little room for two monitors plus a keyboard and mouse, since two stands typically need close to 44–48 inches of combined width. If your measurements fall short of that and you don't use a second screen daily, a single monitor is usually the more practical choice.
Keep the Main Screen Directly in Front
OSHA recommends placing the monitor directly in front of the user, with the top of the screen at or slightly below eye level. The screen should be positioned so that the user does not need to tilt the head forward or backward.
When using two monitors:
- Center the monitor used most often.
- Place the secondary monitor immediately beside it.
- Angle both screens slightly inward.
- Avoid positioning the main screen far to one side.
- Consider rotating the secondary monitor vertically only when it supports the work you actually do.
A monitor riser should solve a positioning problem, not merely raise the screen as high as possible.
Create Separate Study and Gaming Modes
A multi-device dorm desk works best when switching modes takes less than a minute.
Study Mode
A practical study layout might include:
- Laptop centered or connected to the main monitor
- Keyboard stored underneath the monitor riser or tray
- Controller and headset moved to side storage
- Notebook or textbook placed in the center
- Only the charging cables needed for that session on the desk
Gaming Mode
A gaming layout might include:
- Main monitor connected to the PC or console
- Keyboard and mouse centered
- Controller within reach
- Laptop closed, docked, or moved to one side
- School materials stored vertically or beneath the monitor stand
The objective is not to rebuild the desk twice a day. It is to give every temporary item a nearby storage position.
Use a Keyboard Tray Only When It Improves Fit
A pull-out keyboard tray can free the main desktop for books, writing, and a laptop. It may also help when the fixed desktop places the keyboard too high.
OSHA recommends positioning the keyboard around elbow height, keeping the elbows close to the body, shoulders relaxed, and wrists generally aligned with the forearms. A keyboard tray can help achieve that position when a fixed-height desk cannot.
However, a keyboard tray is not suitable for every dorm desk. Check:
- Whether installation is clamp-based or requires screws
- Minimum and maximum desk thickness
- Clearance around drawers and support beams
- Available knee space
- Tray width for both the keyboard and mouse
- Whether the tray remains stable during gaming
- Whether the school permits attaching it
A tray that is too narrow for the mouse can create more shoulder movement rather than improving the setup. A low tray can also reduce leg clearance. As a general rule, most clamp-style trays are rated for desktops roughly 1–3 inches thick; if your desk falls outside that range, or your knee clearance is already under about 24 inches, check the tray's rated thickness and clearance carefully before buying, since a tray that doesn't fit the frame or further reduces leg room usually isn't worth installing.
Decide Where the Console Should Go
A console needs ventilation, stable support, and access to its power, display, and controller cables.
Possible locations include:
Under a Monitor Riser
This works when the opening is large enough and does not block the console’s air intake or exhaust.
Verify the manufacturer’s placement and ventilation instructions. Do not assume that fitting physically under a shelf means the space is suitable.
Beside the Monitor
This provides easy access but uses valuable desktop width. It may be practical for a compact console or a device that is moved frequently.
On a Separate Side Shelf
A small cart or shelf can keep the console off the main desk. Make sure it does not block a walking path, roommate access, heating equipment, or ventilation.
Vertically, When Supported by the Manufacturer
Some consoles support vertical placement, while others may require a separate stand or have model-specific instructions. Follow the hardware manufacturer’s guidance rather than choosing an orientation based only on available space.
Keep the Desktop PC Off the Main Work Surface
A desktop tower can consume a large portion of a small dorm desk. Moving it beneath or beside the desk usually creates more usable space, provided that airflow and access are maintained.
A height-adjustable CPU cart provides a movable platform for keeping a tower beside or below the desk.
Potential benefits include:
- Easier access to rear ports
- Less desktop crowding
- Reduced direct contact with the floor
- Easier cleaning around the tower
- Space for controllers or a headset on an additional shelf
Before using a PC cart, measure:
- Tower width, height, and depth
- Cart platform dimensions
- Available floor clearance
- Distance from the PC to the monitor
- Required cable length
- Clearance around air intakes and exhausts
- Whether the cart blocks chair movement
Do not enclose the PC tightly between the desk, wall, and storage boxes. Elevating a tower does not improve cooling when its vents remain obstructed. As a quick check, if the space beside or beneath your desk is narrower than the tower itself plus roughly 2–3 inches of clearance on each side for airflow, the cart likely won't fit without blocking ventilation—look for a side-shelf location instead, or confirm the cart's platform dimensions against the tower's exact measurements first.

Connect Multiple Devices Without Constantly Rewiring
A well-organized multi-device desk should make it easy to switch the monitor, keyboard, mouse, audio, and network connection between devices.
Use the Monitor’s Available Inputs
Many monitors include more than one HDMI or DisplayPort input. For example:
- Laptop or dock connected to DisplayPort
- Console connected to HDMI 1
- Desktop PC connected to HDMI 2 or another DisplayPort input
You can then switch inputs through the monitor controls instead of reconnecting the cable.
Check whether each input supports the resolution, refresh rate, HDR mode, or variable refresh-rate feature you intend to use. Different ports on the same monitor do not always provide identical capabilities.
Consider a Dock for the Laptop
A USB-C or Thunderbolt dock can reduce several laptop connections to one cable.
Depending on the laptop and dock, a single connection may handle:
- Charging
- External display
- Keyboard and mouse
- Ethernet
- External storage
- Audio
- Webcam
Confirm compatibility before purchasing. USB-C describes the connector shape, but not every USB-C port supports video output, charging, Thunderbolt, or the same data speed.
Use a USB Switch or KVM When Appropriate
A USB switch can allow a keyboard, mouse, and other USB peripherals to be shared between two computers.
A KVM switch can share both peripherals and a display, but compatibility becomes more complicated when gaming features are involved. Check support for:
- Required resolution
- Refresh rate
- DisplayPort or HDMI version
- Adaptive sync
- USB data speed
- Keyboard and mouse compatibility
- Audio switching
For a laptop-plus-console setup, switching the monitor input and using a controller may be simpler than purchasing a full KVM.
Organize Cables by Function
The biggest cable-management mistake is fastening every cable into one permanent bundle.
That may look tidy initially, but it makes it difficult to remove one device, replace a charger, or identify a failed connection.
A better approach is to create separate cable groups.
Permanent Power Group
This may include:
- Monitor power
- Desktop PC power
- Console power
- Dock power
- Powered speaker or network equipment
Permanent Data Group
This may include:
- HDMI
- DisplayPort
- Ethernet
- USB connection between a dock and peripherals
Frequently Changed Group
This may include:
- Laptop charger
- Controller cable
- Headset cable
- Phone charging cable
- External drive cable
- Temporary USB accessories
Keep frequently changed cables accessible rather than fastening them behind the entire desk.
Label Both Ends
Small labels can save time when several HDMI, USB, or power cables look identical.
Useful labels include:
- PC
- Console
- Laptop
- Monitor 1
- Dock
- Charger
- Ethernet
Reusable hook-and-loop ties are generally easier to revise than permanent zip ties.
Power and Signal Cables
Electromagnetic interference can affect electronic measurement and signal environments, as discussed in this overview of EM Noise & Interference. In a typical dorm setup, however, screen flickering is more often investigated by checking cable quality, damaged connectors, excessive cable length, adapters, input settings, GPU drivers, or port compatibility before assuming that nearby power cables are the cause.
Where practical:
- Avoid tightly coiling excess cable around power adapters.
- Do not crush cables under furniture.
- Keep power bricks uncovered.
- Replace damaged or loose cables.
- Cross power and signal cables rather than running them tightly together for long distances when troubleshooting interference.
- Do not invent a fixed separation distance that the cable or equipment manufacturer does not specify.
Leave Enough Cable Length for Movement
Cable length should be based on the actual route from one port to another, not only the straight-line distance.
Measure:
- Horizontal distance across the desk
- Vertical distance down the rear or side
- Distance to the PC, console, dock, or outlet
- Extra length needed for pulling the device forward
- A modest service loop near movable equipment
A useful planning equation is:
Required cable length = routed distance + movement allowance
There is no universal 12-inch or 18-inch allowance that works for every setup. Add only enough slack to prevent tension while avoiding loose cable on the floor.
For a height-adjustable desk or converter, test the cable path at its highest and lowest positions before securing the bundle. Cables should not pull on:
- Monitor ports
- Laptop connectors
- GPU ports
- Power strips
- Wall outlets
The original example can still be used as a measurement illustration:
- Horizontal route: 20 inches
- Highest desk position: 48 inches
- PC port height: 10 inches
- Approximate routed requirement: 58 inches before movement allowance
In that example, a 6-foot cable may be appropriate, but the final choice depends on the real routing path and connector position.
Mount the Power Strip Safely
A power strip mounted beneath or behind the desk can reduce visible cables, but dorm electrical policies vary.
Before using one:
- Check residence-hall rules.
- Use an approved product suitable for the local electrical system.
- Do not connect one power strip to another.
- Do not cover power adapters or the strip.
- Keep liquids away.
- Do not overload the strip.
- Keep the switch and plug accessible.
- Avoid routing cables where they create a trip hazard.
- Do not use damaged plugs or cables.
High-power appliances such as heaters, kettles, microwaves, refrigerators, or cooking equipment should not be added to a computer power strip unless explicitly permitted by the product instructions and residence rules.
Set Up the Monitor, Keyboard, and Chair Together
Ergonomics is not created by one accessory. The monitor, keyboard, mouse, chair, desk, and foot support must work as a system.
Monitor Position
OSHA recommends:
- Placing the monitor directly in front
- Keeping the top of the display at or slightly below eye level
- Positioning the screen at a comfortable viewing distance
- Avoiding repeated neck rotation
- Reducing glare and reflections
Do not rely on a universal “top third at eye level” rule. Screen size, viewing distance, vision needs, and whether the user wears bifocals can change the appropriate position.
Keyboard and Mouse Position
Keep:
- Elbows close to the body
- Shoulders relaxed
- Wrists generally aligned with the forearms
- Keyboard and mouse at approximately the same level
- Mouse close to the keyboard
OSHA notes that elbows are commonly kept between approximately 90 and 120 degrees rather than at one mandatory 90-degree angle.
Foot Support
Feet should be supported by the floor or a footrest. A footrest may be useful when the chair must be raised to reach a fixed-height desk and the user’s feet no longer rest comfortably on the floor.
The Adjustable Ergonomic Footrest is one option for adding support beneath a fixed dorm desk.
Guidance from Safe Work Australia can also help students review basic workstation positioning.
A footrest should support a comfortable position and allow movement. It should not be presented as a treatment for circulation problems or other medical conditions.
Move Regularly Instead of Searching for One Perfect Posture
A well-positioned desk can reduce unnecessary reaching and awkward postures, but it does not eliminate the need to move.
Cornell’s ergonomics guidance presents the “20-8-2” pattern as a ballpark approach for sit-stand work: approximately 20 minutes sitting, 8 minutes standing, and 2 minutes moving. Cornell also emphasizes that the exact timing is less important than changing posture and moving periodically.
Students with a fixed-height dorm desk do not need to reproduce that schedule exactly. Practical movement breaks can include:
- Standing during a phone call
- Walking to refill water
- Stretching between study blocks
- Looking away from the screen
- Changing seated position
- Taking a brief walk between classes or gaming sessions
The WHO physical activity guidelines recommend limiting sedentary time and replacing it with physical activity where possible. They do not prescribe one specific desk-break schedule for all students.
A 2025 systematic review and meta-analysis by Santos et al. (2025) examined ergonomic interventions for work-related musculoskeletal disorders. Its findings support considering ergonomics as part of a broader prevention strategy, but they do not prove that a particular monitor stand, footrest, or dorm layout will prevent pain for every user.
For a broader discussion of workstation planning and materials, see the 2026 Workstation White Paper; confirm current specifications and conclusions against the source page, since product and research references can be updated after publication.
A Practical Multi-Device Layout
Combining the placements above, most small dorm desks work well with a centered monitor, the laptop and dock to one side, a console or keyboard tucked beneath the riser, and the desktop tower on a ventilated cart beside the desk.
- On the desktop: primary monitor centered, laptop or dock to one side, one frequently used charging cable near the front edge.
- Beneath the riser or desktop: keyboard tray, console (when ventilation permits), controllers, and a closed laptop when not in use.
- Beside the desk: desktop tower on a ventilated cart, headset hook, and a mounted or accessible power strip.

Three Layouts for Different Students
The right starting layout depends mainly on which device you rely on most: a laptop with occasional gaming, a desktop PC used for both school and games, or a console paired with a laptop. Pick whichever matches your setup and adjust individual items based on your own measurements.
Laptop-First Study Setup
Best for students who game occasionally.
- Laptop connected to one external monitor
- Console under or beside the monitor
- Compact keyboard stored beneath the riser
- Central desk area reserved for notes and textbooks
- Controller stored in a side basket or drawer
PC Gaming and Study Setup
Best for students using a desktop for both school and gaming.
- Desktop monitor centered
- PC tower on a ventilated side cart
- Laptop stored vertically or beneath the monitor stand
- Keyboard tray or large desk mat
- USB switch or dock for shared peripherals
- Books stored away from the PC’s airflow path
Console and Laptop Setup
Best when there is no desktop tower.
- Laptop connected to the monitor through HDMI, USB-C, or a dock
- Console connected to a second monitor input
- Input switched through the monitor
- Controller and headset stored beneath the riser
- Laptop moved to the center for classwork or placed on a stand when using the external display
Pros and Cons of Common Space-Saving Accessories
Not every accessory here is necessary for every desk—each one solves a specific space or positioning problem, so the goal is to match an accessory to a constraint you've actually measured rather than buying the full set. Use the table below to check the requirements before purchasing.
| Accessory | Main Benefit | Check Before Buying |
|---|---|---|
| Dual Monitor Riser | Creates storage beneath displays and may improve screen positioning | Width, load capacity, shelf clearance, final screen height |
| Pull-Out Keyboard Tray | Frees the desktop and may lower the keyboard | Desk thickness, mounting method, knee clearance, mouse space |
| CPU Cart | Moves the tower off the desk and improves access | Tower dimensions, ventilation, floor space, cable reach |
| Laptop Stand | Raises a laptop screen and saves some width | Requires an external keyboard and mouse for extended use |
| USB-C Dock | Reduces laptop connections to one cable | Laptop compatibility, display support, charging power |
| USB Switch | Shares peripherals between computers | Number of devices, USB speed, switching method |
| KVM Switch | Shares displays and peripherals | Resolution, refresh rate, HDR, adaptive sync, port standards |
| Hook-and-Loop Ties | Makes cable bundles easy to revise | Avoid overtightening cables |
| Footrest | Supports the feet when the chair is raised | Available legroom and adjustability |
Dorm Desk Setup Checklist
Before considering the setup complete, confirm the following.
Space and Installation
- The desk and shelf dimensions have been measured.
- Clamp widths and mounting requirements have been checked.
- No school-owned furniture has been drilled or altered without permission.
- Monitor bases and devices fit entirely on their supports.
- The chair can move without hitting the PC cart or stored items.
Device Access
- The primary monitor is centered.
- The laptop can be opened or removed easily.
- Console and PC ports remain accessible.
- Air intakes and exhausts are not blocked.
- Frequently used chargers are reachable.
- Temporary devices can be disconnected without undoing the entire cable bundle.
Cable and Electrical Safety
- Power and data cables are organized separately where practical.
- Both ends of important cables are labeled.
- Power adapters are uncovered.
- Cables do not cross walking paths.
- The power strip is not overloaded or daisy-chained.
- Residence-hall electrical rules have been checked.
- Movable equipment has enough cable length without excessive floor slack.
Workstation Fit
- The top of the main monitor is at or slightly below eye level.
- The screen can be viewed without leaning forward.
- Keyboard and mouse are close enough to avoid reaching.
- Shoulders remain relaxed.
- Wrists are not held sharply upward or sideways.
- Feet rest on the floor or a footrest.
- The setup allows regular changes in posture.
FAQs
My dorm doesn't allow drilling or clamps. What are my options?
Look for freestanding accessories that rest on the desktop or floor instead of attaching to it, such as a riser or stand that doesn't require a clamp, a CPU cart that simply rolls into place, and a power strip that sits on or under the desk rather than being mounted. Use reusable hook-and-loop ties instead of permanent cable mounts, and confirm each product's installation method before buying.
What should I buy first for a small dorm setup?
Start with the item that solves the largest confirmed problem:
- Monitor riser when vertical space is unused
- Keyboard tray when the keyboard is too high or occupies needed writing space
- CPU cart when the tower crowds the desktop
- Dock when the laptop requires repeated cable connections
- Cable ties and labels when troubleshooting is difficult
Do not buy all accessories before measuring the room and testing the basic layout.
Final Answer: The Best Way to Manage a Multi-Device Dorm Desk
The best multi-device dorm setup is not the one with the most equipment. It is the one that lets you switch between studying and gaming without moving heavy devices or reconnecting every cable. Use the measurements, layouts, and checklist above to match each accessory to a specific, confirmed problem, and test the setup for a few days before adding anything else.
A clean dorm desk is ultimately a system: every device has a place, every cable has a route, and the central workspace remains available when it is time to study.
Disclaimer: This article provides general workspace-organization and ergonomic information. It is not medical, electrical, or occupational-safety advice. Follow your residence hall’s policies and equipment manufacturers’ instructions. Consult an appropriate professional if you experience persistent discomfort or need advice related to a medical condition.
References
- BIFMA G1-2013 Ergonomics Guideline for Furniture
- OSHA eTools: Computer Workstations – Monitors
- OSHA eTools: Computer Workstations – Keyboards
- Cornell University Ergonomics Web — Workstation Guides
- WHO physical activity guidelines (2020)
- EM Noise & Interference in Measurement Setups
- Safe Work Australia – Workstation Set-Up
- 2026 Workstation White Paper
- Santos et al. (2025) meta-analysis
Leave a comment