

Start a multiple devices desk setup by treating the desk as a set of zones, not one large surface. Inventory every computer, display, charger, peripheral, and cable; center the screen and controls you use most; move secondary devices to defined side, rear, under-desk, or storage zones; then test power and cable paths at both sitting and standing heights. The goal is to keep the primary work, writing, or gaming area usable after everything is connected—not merely to make all devices fit.

Inventory Devices Before You Assign Desk Space
Before moving equipment, make a four-part inventory: list what you own, measure what each item occupies, rank how often you use it, and mark the positions the desk must support. This approach works for a home office setup with multiple devices as well as a gaming or creator workspace.
- List active and occasional-use equipment. Include desktops, laptops, monitors, consoles, keyboards, mice, speakers, webcams, docks, chargers, power bricks, controllers, headsets, and external drives. Separate items that stay connected from accessories that only appear in a particular mode.
- Measure the real footprint. Record the body of each device, but also include monitor stands or arm bases, laptop clearance, keyboard and mouse space, power bricks, ports, and the direction each cable exits. Measure the desk surface, display support, input area, and legroom with the workstation evaluation checklist before deciding that the desk has capacity.
- Rank daily access. Identify the display, keyboard, mouse, notebook, or controller used most often. That group belongs in the primary operating zone. A device used once a week can live farther away or off the active surface.
- Mark task and movement zones. Check the desk in its sitting and standing positions. Mark the area needed for writing, typing, gaming, chair movement, foot movement, and access to outlets or storage. If the primary keyboard and mouse have no clear position after secondary devices are assigned, the layout is not a fit yet.
Do not turn example workstation dimensions into universal desk requirements. Screen size, stand design, laptop position, and the user's movement needs change the result. For a useful related planning reference, see our large desktop planning resource.

Choose a Layout for a Multiple-Device Desk Setup
Center the primary display and inputs, then move secondary equipment to a defined side or rear zone. Adjust that starting arrangement for screen size, visibility, reach, and the task you perform most often. Workstation setup guidance supports placing the most frequently used monitor directly in front of you, while University of Washington guidance supports keeping the keyboard and mouse in the primary operating position.
Use the scenario that matches your actual mode changes rather than centering every device equally.
One Desktop Computer Plus a Laptop
For one desktop and one laptop, let the desktop own the primary zone when it handles most work. Place its display, keyboard, and mouse in the center, then give the laptop a side or rear position with a defined charger route.
- Primary zone: Desktop display and main keyboard and mouse.
- Laptop zone: Side or rear, on a stand only if the stand's fit and stability match the laptop.
- Charger path: Route the laptop charger toward nearby power without crossing the main typing area.
- Mode reset: Decide where the laptop and charger go when you switch from work to personal use. If they have no home, they will return to the center and consume the task zone.
If the laptop becomes the primary computer for part of the day, swap the active input and display arrangement deliberately instead of leaving both sets of controls scattered across the desk.
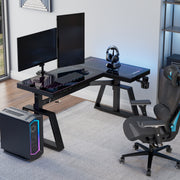
Dual-PC Desk Setup for Work and Gaming
A dual PC desk setup needs separate routes even when the computers share some accessories. Assign each computer a display, input path, power destination, and data route before deciding what can be shared. Organizing two computers on one desk is easier when shared controls are treated as a separate handoff point rather than assumed to work automatically.
| Setup element | Work PC | Gaming PC | Shared-control check |
|---|---|---|---|
| Display | Center or place in the work zone | Side, second display, or alternate input | Check inputs, resolution behavior, and switching hardware |
| Keyboard and mouse | Keep together in the primary work position | Duplicate or switch only if supported | Verify that the switch supports the actual peripherals |
| Power | Map to its adapter and outlet location | Map separately | Keep plugs and switches reachable |
| Data | Label monitor, network, storage, and accessory cables | Label gaming display and accessory cables | Confirm connector types before buying a switch |
| Reset check | Return work controls to the primary zone | Return gaming controls to their marked position | Test whether both systems need simultaneous access |
A shared monitor, keyboard, mouse, or audio setup may work, but it depends on the computers' ports, switching hardware, display behavior, and simultaneous-use requirements. Do not buy a switch until you list every relevant connector and decide whether one or both computers must remain active.
Work Plus Console Arrangement
For a desk setup for work and gaming devices, keep work in the center and give the console a reachable side zone. The console should remain accessible without putting its cables across the main keyboard area or foot space.
- Console zone: Side or rear area with a clear route to its display and power.
- Ventilation check: Keep the console's openings unobstructed according to its documentation; do not enclose it simply to reclaim surface space.
- Accessory storage: Give controllers, headsets, and chargers a fixed home in a drawer, shelf, or organizer.
- Mode switch: Confirm that the work keyboard, notebook, and mouse can return to the center without moving the console or pulling its cables.
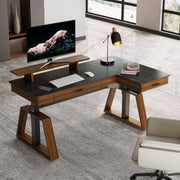
An L-shaped surface can create useful separation between work and entertainment zones. If that shape matches your room and reach pattern, browse L-shaped desk options as a category rather than assuming a particular desk will fit your equipment.
Where Should a PC Case Go With a Standing Desk?
There is no universal answer to where to put a PC case with a standing desk. Compare under-desk, floor, mobile-cart, and desktop placement against the case's dimensions, ventilation requirements, desk clearance, movement range, access needs, and cable path. Treat each option as a candidate until the case and placement documentation match.
| Location | Space effect | Movement check | Access and ventilation check | Not a fit when… |
|---|---|---|---|---|
| Under-desk mount | Frees floor and desktop space | Confirm the case and mount clear the frame at the lowest and highest positions | Verify case attachment, airflow, ports, and model-specific support limits | The mount or case lacks documented fit, or cables become taut during travel |
| Floor stand | Keeps the tower off the active desktop | Check that the desk can move without contacting or dragging the case | Use a stable, accessible location with the case's required airflow | Feet, chair movement, dust exposure, or cable reach make access impractical |
| Mobile CPU cart | Can reposition the tower when the route is clear | Roll or reposition it only on a suitable path; test connected cables | Verify cart dimensions, capacity, case fit, and ventilation | The case exceeds the listed limits or the route has obstructions |
| Desktop | Provides easy port access | The case moves with the desk only if the surface and cables support it | Keep vents and task space clear | The tower removes the open writing, typing, or gaming area |
For a model-specific example, the height-adjustable CPU cart is listed with a height range of 22 9/16 to 32 11/16 inches, support for most cases including full-tower ATX cases, and a stated 100-pound maximum capacity. Those are product-specific details, not a universal standard. Verify your case dimensions, the selected model's current specifications, installation conditions, ventilation needs, and cable reach before relying on them.
After connecting the cables, cycle the desk slowly at its lowest and highest positions. Stop if the case, cart, cable bundle, or frame contacts another object. A CPU mount versus floor stand comparison can help frame the choice, but the final decision still depends on your measured setup.
Plan Power and Cable Paths Around Desk Movement
Power and data routing should be planned before cables are bundled. Map each device to its destination, keep adapters and switches accessible, test the desk's complete travel range, and secure only the routing that remains clear. There is no reliable universal cable-slack length for every standing desk.
- Route: Map each device to its outlet, adapter area, and destination port. Run cables toward their endpoints before adding sleeves or ties.
- Cycle: Test the desk slowly at its lowest and highest positions. Watch for tension, pinching, dragging, frame contact, foot-space intrusion, and plugs pulled at an angle.
- Adjust: Add only the controlled loop needed for each fixed-to-moving path. More slack is not automatically better if it can catch on a mechanism or enter the chair and foot area.
- Secure and inspect: Once the path works at both extremes, secure it away from moving hardware. Check for crushing, exposed wiring, fraying, or damaging bends before regular use.
Power Distribution for Several Devices
Group devices by location and function, then assign each group an outlet, adapter area, and accessible switch point.
- Map the outlets: Note which computer, display, dock, console, and charger use each receptacle or power strip.
- Keep access: Do not bury power switches, plugs, or adapters behind a tower or fixed panel where inspection and troubleshooting become difficult.
- Use power products as labeled: Follow the product's rating and manufacturer instructions. Connect a power strip directly to a fixed receptacle and avoid series-connecting power strips or using an extension cord as permanent wiring.
- Check the finished path: Confirm that plugs are fully seated, adapters are not crushed, and the route does not enter a footpath or moving mechanism. If the electrical load is unclear for your equipment, check the device and power-product documentation or consult a qualified electrician.
Label both ends of grouped cables, especially when a dual-PC desk setup includes similar display or USB leads. Labels reduce the time needed to identify a connection after switching modes.
Cable Routing That Survives Sitting and Standing
Repeat the route-cycle-adjust sequence after moving a monitor, adding a dock, or changing the CPU-case location. A cable route that worked before a device was repositioned may no longer have the same endpoints. Keep cords inspectable and accessible throughout the final check.
Match Accessories to the Space They Actually Solve
Accessories should solve a measured constraint, not compensate for an unplanned layout. Use this condition-to-category matrix before browsing:
| Measured constraint | Category to consider | Verify before buying |
|---|---|---|
| The tower occupies the active surface or needs repositioning | CPU cart or mount | Case dimensions, stated capacity, attachment method, ventilation, desk clearance, and cable path |
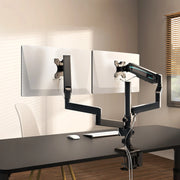
| Monitor stands consume the center | Monitor arm | Monitor weight and size, VESA pattern, table thickness, attachment limits, and clearance |
| Controllers, chargers, or small tools spread across the desk | Pegboard or accessory storage | Mounting thickness range, included storage, reach, and whether it stays outside the primary zone |
| The keyboard blocks writing space | Keyboard tray | Desk attachment method, tray dimensions, keyboard fit, movement range, and leg clearance; compare keyboard tray options |
| Documents and occasional accessories occupy the work surface | File cabinet or storage | Footprint, drawer access, and whether the storage location preserves chair and leg movement; browse space-saving file cabinets |
For example, our listed dual monitor arm supports monitors only within its stated model specifications, including the listed size, weight, VESA, and table-fit requirements. Our desk-mounted pegboard is another conditional option for moving accessories off the surface, but its mounting range and fixed design still need to match your desk. No accessory is necessary for every setup.
Run a Final Open-Space and Access Check
A multi-device desk is ready only when it remains usable in every normal mode. Run this five-point check before securing the final bundle or placing an order:
- Open surface: Keep a clear primary area for the main keyboard, mouse, notebook, controller, or other high-frequency task.
- Primary controls: Confirm that the display and controls can be reached without repeatedly reaching over another device. Keep the main keyboard and mouse together in the primary operating position.
- Accessory homes: Put chargers, controllers, headsets, docks, and documents in defined locations. Occasional-use items should not live permanently in the active center.
- Mode reset: Switch between work, gaming, and personal modes. Each change should have a predictable place for the laptop, console controls, or second-PC inputs.
- Movement and snag test: Raise and lower the desk, inspect every cable, and check the case, monitor arms, outlets, and storage. OSHA cord-inspection guidance supports keeping cords accessible and checking them for damage.
If the desk cannot preserve the primary task zone after every device is assigned a home, the current layout is not a fit. Measure again, move occasional-use equipment off the surface, or consider a different desk shape before adding more organizers.
FAQs
Use these checks for exceptions that the main setup process does not fully resolve.
Can two computers share one monitor and keyboard?
Sometimes, but connector compatibility is only the first check. List each computer's video outputs, the monitor's inputs, keyboard and mouse connections, switching hardware requirements, and whether both computers need simultaneous access. Confirm the switch's documented behavior before buying it.
What should I measure before choosing a desk for multiple monitors and a laptop?
Measure the monitor stand or arm footprint, laptop clearance, keyboard and mouse area, and the open writing zone you actually need. Then check reach and legroom with the chair in its normal position. If the open zone disappears, that arrangement is not a fit.
How do I check cable slack on a standing desk?
No universal slack length is supported. With the final endpoints fixed, measure the path at the lowest and highest desk positions, create only the controlled loop needed for that route, and test it while watching the frame, feet, and connectors.
Can a PC case go inside a desk cabinet?
Only after the case and cabinet documentation confirm airflow, clearance, access, heat management, and cable routing. If either set of specifications is unavailable, treat the cabinet as unverified; physical fit alone does not confirm usable ventilation or port access.
How should I store chargers on a shared desk?
Assign each charger to a device zone and route it near that device's normal power point. Label interchangeable adapters and store occasional-use chargers outside the active surface. Keep only the chargers needed in the current mode within reach.
Leave a comment