

A successful small room desk setup starts with the room, not the desk listing. Measure the usable walls, depth, doors, closets, outlets, chair pull-back, under-desk area, and walking routes. Then test the complete footprint of the desk, monitors, supports, storage, and chair with painter’s tape or a scaled floor plan. This approach helps you compare a two- or three-monitor layout without relying on a universal room-size or desk-size promise.

Measure the Room for a Small Room Desk Setup
Measure the usable room envelope and every fixed obstruction before comparing desks. A complete floor plan should show the desk, chair, monitors, supports, storage, doors, outlets, and walking routes together; OSHA’s desk guidance also supports checking the space beneath the work surface, not just the desktop. Oregon State’s ergonomics reference guide provides additional general planning context without establishing a universal residential clearance rule.
Use this sequence for your small room workstation planning:

- Sketch the room from above. Record wall length and usable depth after accounting for baseboards, windows, vents, doors, closet openings, and furniture that must stay.
- Mark access points. Draw the swing of each door and closet door. Note the route you use to enter, reach storage, open a window, or move around the room.
- Locate outlets and cable paths. Mark outlets behind or beside the proposed desk and identify where power and display cables would need to run. A desk that fits but leaves no rear access can be difficult to install or adjust.
- Measure the occupied footprint. Include the chair pulled back, legroom beneath the desk, monitor stands or clamps, keyboard, mouse, computer, and any storage that sits beside or under the surface.
- Tape the proposed layout. Use painter’s tape or cardboard to outline the desk and chair. Test the door and closet fully open, sit in the chair, and walk the normal route through the room.
- Compare the actual outline with the product listing. Advertised desktop width is only one input. Overhangs, supports, stands, return sections, and cable access can change the usable footprint.
A scaled workstation plan is a useful comparison method, but treat it as a fit test rather than proof that the final arrangement will work perfectly. If the taped outline blocks a required route or access point, change the layout before shopping.
Compare Two- and Three-Monitor Layouts
The right monitor count is the one that fits the measured equipment footprint while preserving a usable chair position, daily work surface, and room route. Two monitors are often a simpler starting point, but neither two nor three screens has a universal wall-width or desk-depth requirement.
| Arrangement | Support footprint | Desk-depth pressure | Chair alignment | Circulation risk | Best fit condition |
|---|---|---|---|---|---|
| Two-monitor side-by-side | Moderate; depends on stands or mounts | Moderate | Usually straightforward if the primary screen is centered | Lower when the desk is on a clear wall | The taped setup leaves usable surface and an open chair route |
| Two-monitor angled | Moderate; screens may project differently | Moderate to higher, depending on angle | Primary screen can stay centered | Varies with screen corners and nearby furniture | Angling solves a measured wall or viewing constraint |
| Three-monitor side-by-side | Higher; three supports or a compatible mounting system | Higher | Outer screens may pull the useful viewing area away from center | Higher near doors, closets, and storage | The full screen-and-support outline clears access points |
| Stacked or hybrid | Depends heavily on the mount and screen arrangement | Can reduce surface pressure, but may add height or rear-clearance needs | Must be tested from the seated position | Varies with mount reach and desk location | A measured constraint is solved and every mount is compatible |
This is a qualitative comparison, not a room-size calculator. Actual monitor dimensions, stand depth, mounting hardware, desk depth, and chair position determine the result.
Two Monitors: A Flexible Starting Layout
For two screens, measure the assembled arrangement rather than adding the screen widths together. Include each stand or arm, the keyboard and mouse area, the computer, chair position, and the space needed to reach nearby outlets or storage.
- Side-by-side: Usually the most direct arrangement when the desk surface and wall allow both screens to remain visible without pushing the chair off center.
- Angled: Useful when turning the secondary screen reduces wall pressure or lets the primary screen stay aligned with the seated position. Confirm that the angle does not consume more depth than the straight arrangement.
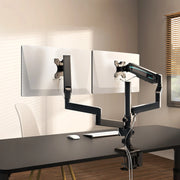
- Stand versus arm: A stand may be the more dependable choice when the desk edge, rear access, or mounting position is uncertain. An arm is worth testing only when its exact compatibility is known.
Use the measured result as a conditional starting point, not as a promise that every compact desk supports two monitors. For additional positioning ideas, see this guide to multi-monitor screen arrangement.
Three Monitors: Check the Full Footprint
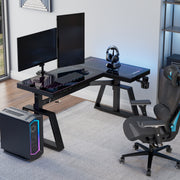
Three screens add more than one extra panel. They can increase support demands, depth pressure, cable complexity, and the chance that the outer screens interfere with chair alignment, storage, or a nearby door.
Bedroom and Shared-Room Placement
A wall-facing position can simplify cables and preserve a predictable chair route, but check whether it conflicts with a closet, window, or door. A corner can consolidate equipment only when both walls and the chair position remain accessible. A window-adjacent setup may need a different orientation if glare, privacy, outlet access, or the walking route becomes a problem.
In a shared room, favor the least disruptive tested footprint rather than the largest monitor count. Test the arrangement with the chair occupied and access points open; a layout that dominates the room or narrows another person’s route is a poor fit even when the desktop technically fits.
Match Desk Shape to the Room
Desk shape should follow the tested room layout. A straight desk suits a clean one-wall arrangement, an L-shaped desk needs a genuinely usable corner and room for its return, and a standing or specialty shape must clear fixed obstacles through its full range of movement.
Compact Straight Desks for One-Wall Setups
A straight desk is a sensible choice when one wall provides the cleanest fit and the chair can pull back without interfering with a door, closet, or walking route. Check the usable surface after placing the monitors, stands or arms, keyboard, mouse, computer, and cable path.
Favor this shape when:
- One wall can hold the equipment without forcing the chair into a route.
- The primary screen can align with the seated position.
- Storage can remain reachable without widening the occupied footprint.
- You want the simplest orientation to measure, assemble, and change later.
Browse office desk options only after the taped outline shows that a straight configuration preserves access.
L-Shaped Desks for Corner Workstations
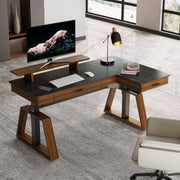
An L-shaped desk makes sense when two usable walls create a real corner workstation, not merely because the shape appears space-efficient. Account for both surfaces, the return, the chair position, and the space needed to enter or leave the corner.
| Check | What to compare | When the shape fails |
|---|---|---|
| Corner availability | Both walls, baseboards, windows, and vents | One wall is interrupted or the return cannot sit flush enough for the planned layout |
| Circulation | Chair movement and the route past the corner | The return narrows a door, closet, or normal walking path |
| Monitor placement | Which surface holds the primary and secondary screens | Screens force the chair away from the usable center |
| Storage and outlets | Reachable storage, power location, and rear access | Cables or storage require blocked access behind the desk |
| Orientation | Left/right return and the configured outer dimensions | The available orientation does not match the room |
For example, the GTG-L60 is listed at 60 inches deep by 40.25 inches wide by 30 inches high and is described as reversible. Those are product dimensions to compare with your own plan, not a guarantee of room fit. A corner-fit L-shaped desk should be rejected if its configured footprint blocks access.
Standing and Specialty Shapes
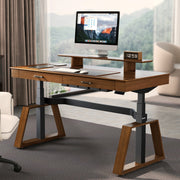
Standing, wing-shaped, or wraparound desks need a moving-footprint test. Mark the outline at each relevant desk position and check cable slack, monitor movement, chair clearance, and fixed obstacles. A shape that adds surface can still make a small room harder to use if its return, supports, or moving parts occupy the walking route.
Use Aero Series standing desks as a category-browsing path after your measurements identify a compatible shape. Do not assume a standing or specialty desk solves a crowded room by itself.
Free Surface Area With Monitor Arms and Storage
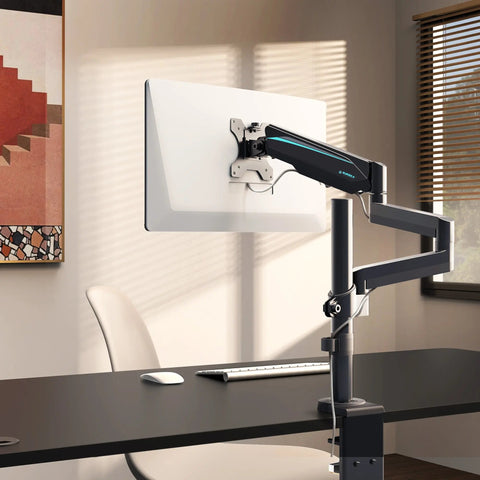
Reclaim surface only after checking accessory compatibility. A monitor arm or organizer should refine a workable layout, not rescue one that already blocks a chair, route, outlet, or access point.
Follow this order:
- Reduce stand clutter. Measure the footprint of the existing stands and identify which items actually need to remain on the desktop.
- Check the mount. Confirm desk-edge thickness, clamp or grommet position, rear clearance, and whether the mounting point is reachable after the desk is placed.
- Check the monitors. Verify the VESA pattern, screen size, weight, and the arm’s current limits for the exact screens. Do not assume one arm fits every monitor.
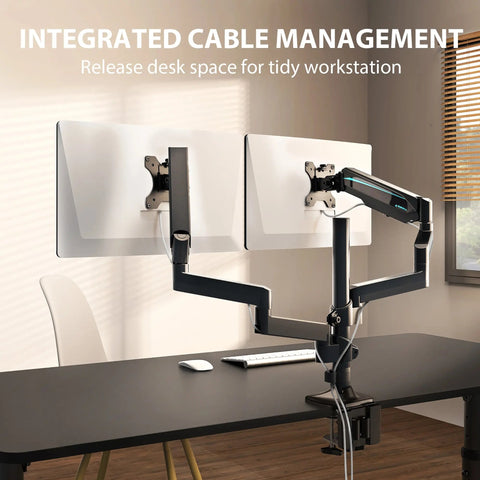
- Check cable slack. The screens must still reach power and display connections through the full range of adjustment without pulling the desk or mount.
- Move small items off the surface. Use reachable storage for accessories while preserving the primary keyboard and mouse area.
- Retest the room. Add the clamp, shelf, basket, or cable hardware to the taped outline and repeat the chair, door, closet, outlet, and walking checks.
For a conditional example, the current Aegispeg Board listing specifies desks from 0.59 to 1.57 inches thick, dual VESA mounts, screens up to 32 inches per bracket, and up to 17.6 pounds per monitor arm. Those details apply to that product only; compare them with your desk and monitors before using desk-mounted monitor organization as a solution. Avoid relying on unresolved compatibility details for other monitor arms.
Make the Final Choice From Your Measurements
Approve a layout only when it clears fixed obstacles, preserves chair and walking access, supports the chosen monitor count, and passes current desk and accessory checks. For a small room desk setup, if the taped arrangement fails any of those tests, change the layout before choosing a product.
- Clear the room’s fixed features. Reject any option that blocks a door, closet, outlet, window, vent, or required walking route.
- Confirm the complete monitor footprint. Choose two or three screens from the measured equipment, support, peripheral, and chair arrangement—not from wall width alone.
- Select the desk shape. Use a straight, corner, standing, or specialty shape only when its full outline matches the room and the intended chair position.
- Add accessories conditionally. Use an arm, shelf, or storage system only after checking mounting, screen, rear-access, and cable requirements.
- Verify the current listing. Before ordering, check configured dimensions, reversible orientation, accessory compatibility, returns, delivery conditions, and any assembly constraints.
- Protect future flexibility. Leave practical room for cleaning, cable access, a storage change, or a possible third monitor. If expansion is likely, tape that future footprint now.
Once the plan passes, use it to choose between fixed-height desk browsing, standing desks, corner desks, or accessory categories. We recommend comparing the current dimensions and configuration against your own floor plan rather than treating any category or named desk as a guaranteed fit.
FAQs
These questions cover details that can change a small-room layout after the main floor-plan test is complete.
How Much Space Do I Need for Two Monitors?
Measure the assembled pair, including stands or an arm, keyboard, mouse, desk depth, chair position, and the route to nearby storage or outlets. Screen widths alone can understate the footprint, especially when stands project forward or the secondary display is angled.
What Desk Size Fits a Small Bedroom?
Use the desk’s verified outer dimensions only after checking door swing, closet access, chair pull-back, outlets, walking routes, and delivery or assembly access. A candidate that fits the wall may still fail if it cannot enter the room or leaves the chair trapped behind a door.
Should I Use a Monitor Arm or Monitor Stands in a Small Room?
Choose an arm only when the desk thickness, clamp or grommet position, VESA pattern, screen weight, rear access, and cable slack all pass. If one condition fails, stands may be the more reliable choice—even if they use more desktop surface—because they avoid an incompatible mounting point.
Can I Add a Third Monitor Later Without Replacing the Desk?
Plan the third screen as a future footprint before buying the two-monitor desk. Mark its likely support or mount, cable route, outlet demand, and effect on chair centering; if the expanded outline blocks access or consumes the primary work area, plan for a different desk or mounting approach now.
Where Should a Multi-Monitor Desk Face in a Bedroom?
Compare wall-facing, corner, and window-adjacent positions using door and closet access, lighting or glare, privacy, outlet location, and the least disruptive walking route. The best orientation is the one that preserves the room’s required functions after the chair is occupied, not simply the one with the widest wall.
Leave a comment