

Put the tools you use throughout the current task in your primary reach zone. Move items you touch a few times a day into secondary reach. Push occasional or bulky items into tertiary reach, off to the side or under the desk, as long as you can still get to them without twisting or straining. This reach-zone framework turns desk organization for productivity into a simple task-frequency test, and it covers monitors, keyboards, mice, phones, CPUs, and storage alike. Knowing where to place desk accessories ergonomically matters more than how a desk looks. When you shop for ergonomic desk accessories, use this framework first and buy only after you can name the specific reach or clearance problem an item solves.

Start with the Frequency Rule: Your Three Reach Zones
How often you touch an item decides its zone, not how it looks on the desk. OSHA's workstation guidance backs this up: OSHA recommends placing frequently accessed items within easy reach, generally with your elbows close to your body, while occasional items can sit farther out, near full arm's reach.

These three labels are an editorial framework derived from OSHA's guidance, not formal OSHA categories. Use them to sort tools by how often your current task needs them, while keeping posture, access, and clearance practical.
Primary: This is the active work area for tools used throughout the current task, such as the keyboard, mouse, and main monitor. Keep the zone organized around your actual working position, not the desk's visual center. If you have to lean or twist to grab something during normal work, move it closer.
Secondary: This nearby area holds items you use regularly but not constantly, such as a notepad, headset, or reference monitor. Place them where you can grab them without derailing the main task. A phone that runs your workday belongs closer than one you check twice a day.
Tertiary: This farther or off-surface area is for occasional-use or bulky items, as long as they remain practical to reach. CPUs, extra storage, and rarely used equipment may fit here. Farther placement only works if it does not cause awkward reaching, block needed access, or reduce under-desk clearance.
Map Each Accessory to a Reach Zone
This table is your single placement decision aid. Match each accessory below to its default zone, then adjust when your setup calls for it.
| Accessory | Default reach zone | Placement rationale | Move it when... |
|---|---|---|---|
| Primary monitor | Primary | Sits directly in front of you for the main task, as reflected in OSHA's workstation evaluation guidance | You use a laptop screen more than the external display |
| Secondary monitor | Secondary | Supports reference tasks without displacing the main screen | It becomes your dominant task screen |
| Keyboard | Primary | Used continuously during computer work | A task shifts to phone or paperwork for extended periods |
| Mouse | Primary | Works next to the keyboard for the same task, consistent with OSHA's easy-reach guidance | You switch to a trackpad or tablet workflow |
| Phone | Secondary | Used often but not throughout every task, so keep it close to the work area as OSHA's evaluation guidance recommends for frequently accessed items | It becomes your main work device, moving it to primary |
| CPU | Tertiary | Bulky and touched only for ports or power | You need frequent front-panel access, keeping it closer |
| Storage | Tertiary | Occasional access fits farther placement | Items inside are used daily, pulling that storage inward |
Keep the primary monitor, keyboard, and mouse as your core primary-zone cluster. Move the CPU and occasional storage outward once access and clearance allow it.
Adapt the Layout to Your Desk and Task
Protect the dominant task's primary zone, then adapt placement to your posture, equipment, and clearance. NIOSH recommends evaluating tasks, equipment, and workplace layout together rather than applying one universal desk map.
Seated Desks: Anchor the Active Position
For a seated setup, anchor the primary zone to your normal seated work position and keep the active computer controls together. Place the main screen in front of you, with the keyboard and mouse organized around that position.
Sit-Stand Desks: Recheck Both Working Positions
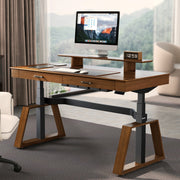
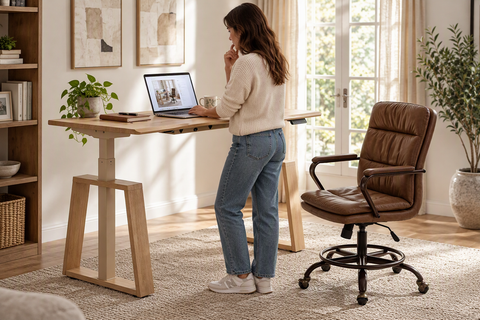
Recheck the monitor, keyboard, mouse, and phone at both your normal seated and standing heights, since the primary zone is position-dependent. Adjust the layout if an accessory or its cable leaves practical reach or if clearance shrinks at either height.
Small Desks: Protect the Primary Zone First
Reserve the active keyboard, mouse, and primary monitor area before placing anything else on the desktop. Move occasional items off the surface entirely when they stay accessible elsewhere. Treat lost legroom or elbow room as a placement failure, not a storage win.
Mixed Workflows: Let the Dominant Task Set the Center
Identify whichever task you perform most during a normal work block and give it the primary zone. Keep task-specific tools in secondary reach without displacing the dominant task's controls. Reassign zones when your work pattern changes for a new project or role.
Single and Multi-Monitor Setups: Keep the Main Task Centered
With one monitor, keep the primary screen aligned with the dominant task and directly in front of you. With multiple monitors, the primary screen should own the central sightline, while secondary screens support reference work without forcing the main task out of position. If another screen becomes the main task display, reassess which screen belongs in the primary position.
Run a Five-Step Reach-Zone Test
Start with a task inventory, not a decluttering pass. Work through these five steps in order, then correct and retest.
- List every task from a normal work block and mark each tool as continuous, regular, or occasional use.
- Reserve the primary zone for your dominant task's monitor, keyboard, mouse, and any other continuously used tool.
- Place regular-use tools in secondary reach, then move occasional or bulky items to tertiary reach or off the desktop if that stays practical.
- Perform the actual task and check your OSHA's neutral computer-workstation position: head forward, shoulders relaxed, elbows close to your body, and feet supported, plus enough clearance underneath.
- Make one targeted correction, such as moving an item, pulling it off the surface, or adding a supported accessory, then retest the task.
Stop the current layout and reposition items if normal work produces discomfort, awkward reaching, or lost clearance. Fix that specific issue before adding another accessory, and remember that changing position periodically is part of a workable setup, not a sign something is wrong.
Use Accessories to Free the Right Zone
Once you know how to organize a desk for frequent tasks, ergonomic desk accessories can solve specific reach or clearance problems. Introduce each one only after you have named the problem it should fix.
When the Monitor Owns Too Much Primary Surface
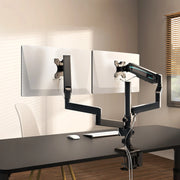
If a monitor stand crowds your active work area, or your screen needs to move between seated and standing positions, our Dual Monitor Arm offers 360-degree positioning and fits most 17- to 32-inch monitors with 75 x 75 mm or 100 x 100 mm VESA patterns, up to 17.6 pounds. Check your monitor's weight, VESA pattern, and desk thickness first. The arm is listed for table thicknesses from 0.4 to 3.5 inches, so fit depends on both the monitor and mounting surface.
When the Keyboard and Mouse Consume the Work Surface
If your keyboard and mouse take up the surface your other frequent-use tools need, or sit too far forward for a comfortable primary zone, our Adjustable Keyboard Tray provides 360-degree swivel, 15-degree tilt, and a 28.35-by-10.24-inch board sized for both a keyboard and a mouse. It is listed as compatible with wood or MDF-engineered desks, so confirm your desktop material before you buy.
When the CPU Competes with Legroom or Surface Space
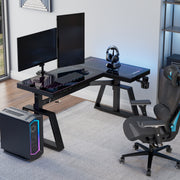
If a desktop tower eats into your legroom or the active desktop, our Knob-operated Adjustable CPU Holder mounts under the desk, adjusts from 6.3 to 10.2 inches wide and 5.1 to 20.8 inches high, supports up to 44 pounds, and swivels 360 degrees for cable access. Check your desk's mounting area and thickness, along with your case dimensions, before mounting. The listed recommended desk thickness is greater than 5/8 inch, so this option is not a universal fit.
The best ergonomic desk accessories support a clear placement decision rather than adding more equipment by default. Assign tools to primary, secondary, or tertiary reach by task frequency, then retest the arrangement in your normal posture and at every working height. Keep an item closer whenever moving it outward harms access, posture, or clearance.
FAQs
Where should frequently used items go on a desk?
Anything you use throughout the current task belongs in the primary, easy-reach zone. Items you use less often can move to secondary or tertiary reach, as long as posture and clearance stay workable.
How do I organize a desk without reaching constantly?
Keep the active keyboard, mouse, and primary monitor organized around your working position first. Then move occasional items outward or off the desktop instead of reaching across them repeatedly.
How should reach zones work on a sit-stand desk?
Check your primary zone in both seated and standing positions, since a sit-stand setup makes reach distance position-dependent. Adjust the layout if any accessory shifts out of practical reach or clearance shrinks at either height.
Where should a CPU and storage go when desk space is limited?
CPUs, storage, and other bulky or occasional items can sit in tertiary reach or move off the desktop entirely. That only works as long as the placement protects your active work area and still lets you reach them when a task actually needs them.
Leave a comment