

Desk depth alone does not determine monitor arm compatibility. Before you buy or mount an arm, measure the usable front-to-back space, exact mounting point, rear gap, desktop thickness, edge and underside condition, monitor position, VESA pattern, mounted monitor weight, and the arm's movement range. A clamp that physically attaches can still leave the monitor too close to your eyes, off-center, or blocked by a wall or shelf.

There is no universal minimum desk depth for every arm and setup. Use the checklist below to compare your desk, monitor, and selected model as one system.
Measure for Monitor Arm Compatibility: Desk, Mount, Monitor, and Movement Zone
The right desk depth for a monitor arm is the usable space left after accounting for the rear obstruction, mount hardware, monitor depth, intended viewing distance, and arm travel. Measure the actual mounting location rather than relying on the desk's advertised dimensions.
- Measure usable depth. Measure from the front edge to the wall, rear frame, hutch, cable tray, or other obstruction behind the intended mounting point. Record the result in inches.
- Mark the mount location. Note the exact left-to-right position, usable width, desktop thickness, and any drawer, rail, apron, lip, or cable-management hardware underneath.
- Map the monitor position. Mark where the screen should sit when centered and in use. Include the monitor's own front-to-back depth, not just the arm's position.
- Sketch the movement zone. Account for forward, rearward, lateral, height, and tilt movement. Include a wall, shelves, speakers, lamps, a second monitor, and cable slack in the sketch.
- Compare the result with the selected model. Use the current product page and installation instructions for the arm's reach, mount requirements, and load limits. Do not substitute a generic depth rule.
As a workstation-positioning reference, OSHA's guidance describes a generally preferred monitor viewing distance of 20–40 inches and says the desk should accommodate at least 20 inches. That is viewing-distance guidance, not a structural requirement for a desk or monitor arm. Independent testing can offer background on how desk space affects monitor-arm selection, but review guidance from Wirecutter does not replace the selected model's documentation.

Fit Check Decision Aid
Use this qualitative check after measuring. It is a decision aid, not a universal clearance chart.
| Measured condition | What to compare | Decision signal |
|---|---|---|
| Usable depth | Mounting point, monitor depth, desired viewing position, and arm travel | Proceed only if the screen can reach the intended position without being forced too close or too far away |
| Rear clearance | Wall gap, clamp hardware, cable tray, apron, drawers, and rear rails | Pause if any obstruction blocks the full tightening or movement path |
| Mounting surface | Flat top and underside, edge thickness, condition, and support | Pause if the mount cannot sit flush or the surface condition is uncertain |
| Monitor and arm | VESA, mounted weight, adapter needs, load limit, and listed reach | Verify the selected model and monitor documentation before ordering |
| Movement zone | Wall, shelves, accessories, second screen, and cable slack | Treat a collision or off-center final position as a failed practical fit |
For example, a shallow desk may pass the clamp check but fail the setup check if the monitor's depth and rear hardware leave no way to preserve the intended viewing distance. The method also needs extra care for unusually deep monitors, articulated multi-monitor layouts, hidden rear frames, or arms whose travel is not clearly documented. For general dimension terminology, you can review these desk dimension basics, but that guide does not replace the selected arm's installation requirements.
Check Rear Clearance, Edge Shape, and Mount Type
A clamp or grommet must sit flush, use its full tightening path, and make the contact required by the selected model. A deep desktop can still fail when a wall, lip, apron, drawer, bevel, or rear cable channel blocks the mount.
Check Clamp Clearance at the Back Edge
Inspect the exact mounting point in this order:
- Confirm that the top and underside provide reasonably flat contact surfaces.
- Measure desktop thickness at that location; do not assume it is uniform across the desk.
- Check the open space behind the desk for the clamp body, screw, pad, and your hands during installation.
- Look for a wall, raised rear rail, cable tray, apron, drawer, or lip that could interrupt the clamp path.
- Examine the edge for a bevel, curve, slope, damage, or unsupported overhang.
The required monitor arm rear clearance and table-thickness range are model-specific. The supplied Eureka product information contains an unresolved thickness discrepancy, so check the selected model's current product page and installation guide rather than relying on a single figure. Do not assume a pad automatically makes a glass, hollow, fragile, particleboard, damaged, or unusually shaped surface suitable.
Assess Grommet and Unusual Edge Options
A grommet mount may fit a desk where a rear clamp cannot, but only when the hole and underside match the hardware. Verify the hole diameter and position, reinforcement around the opening, access below the desk, and the cable path against the selected model's documentation.
Rounded, chamfered, sloped, or unusually thick edges can reduce the contact area available to a clamp. Treat the edge profile as a structural fit check, not a cosmetic detail. If the mount cannot sit flat or distribute contact as instructed, pause before purchase or installation.
Verify VESA, Monitor Load, and Arm Reach
Your monitor and arm must match in more than screen size. Confirm the VESA pattern, monitor weight without its original stand, adapter or screw requirements, published load range, and usable reach before calling the setup compatible.
| Check | What to record | Why it changes the decision |
|---|---|---|
| VESA pattern | Hole spacing in millimeters; note recessed holes | A screen may need an adapter or may not match the arm plate |
| Monitor weight | Mounted monitor weight without the stand; include supported adapter hardware when applicable | Boxed weight is not the load the arm carries |
| Adapter and screws | Recess depth, screw size, length, and included or required adapter | Incorrect hardware can prevent a flush, supported attachment |
| Arm load limit | The selected model's stated limit and how it applies to each screen | Stay within the model's published conditions; do not infer a universal rating |
| Listed reach | Model-specific extension or reach | A nominal reach figure does not show whether the screen clears the wall or accessories |
| Collision points | Wall, desk edge, shelves, speakers, lamps, and other monitors | A physically attached screen may still have an unusable movement path |
| Final position | Centering, height, viewing distance, and tilt | The setup must work in the position you intend to use, not only during installation |
The supplied facts for Eureka's named Single Monitor Arm list C-clamp or grommet installation, 75 x 75 mm and 100 x 100 mm VESA patterns, compatibility with most 17–32-inch monitors, support up to 17.6 pounds, and a listed maximum extension of 27.3 inches. Treat those as current model-specific facts to recheck on the live page, not as a promise that every monitor or desk will fit.
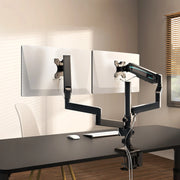
The Dual Monitor Arm facts list C-clamp or grommet installation, 75 x 75 mm and 100 x 100 mm VESA patterns, compatibility with most 17–32-inch monitors, and up to 17.6 pounds of monitor load. Confirm whether the stated load applies to each monitor or to the configuration described in the current documentation before ordering.
Use OSHA's monitor-positioning checklist for the final placement check: the screen should support a centered, neutral viewing position without requiring you to lean forward. OSHA does not establish the arm's VESA, load, clamp, or reach limits.
Choose the Arm Configuration After the Fit Checks
Choose between a single- and dual-monitor arm only after the mounting surface, monitor specifications, and movement zone pass their checks. Screen count changes the width, combined load, alignment, cable routing, and number of possible collisions.
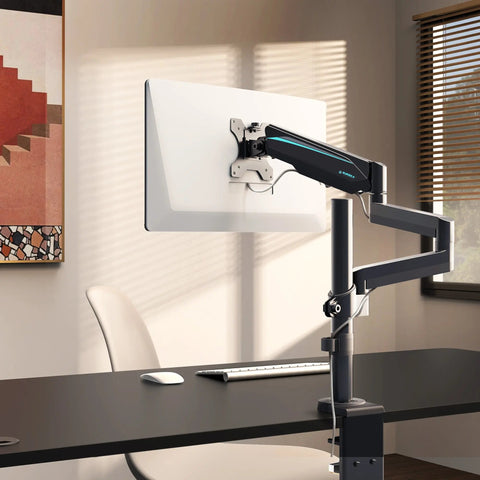
For one display, a single-monitor configuration needs one compatible VESA pattern, one supported monitor load, and a clear path for the screen to move into position. The supplied Eureka Single Monitor Arm facts provide a useful starting point for shoppers whose monitor falls within the listed model conditions; compare your measurements with the current Single Monitor Arm specifications before buying.
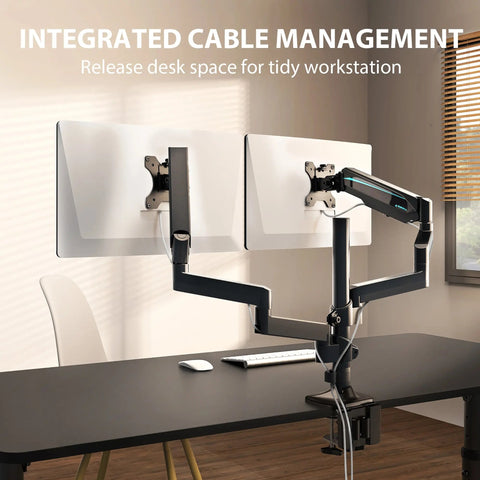
A dual-monitor setup adds screen-width and alignment demands. Two screens can collide with each other, a wall, or desk accessories even when each display is individually within the listed size and load conditions. If your measured layout supports two displays, use the Dual Monitor Arm as a category starting point, then verify the current model documentation for your exact monitors and desk.
These links are product navigation, not a universal fit promise. If the product page and installation guide disagree about table thickness or another mounting limit, use the current installation instructions or contact the manufacturer before proceeding.
Use the Pre-Mount Compatibility Checklist
Proceed only when the exact desk location, mount type, monitor details, arm limits, and complete movement path agree with the selected model's current instructions. This monitor arm compatibility check turns the measurements into a go/no-go decision.
- Measure: Record usable depth, rear gap, desktop thickness, mounting location, usable width, and obstruction points.
- Inspect: Check the flat top and underside, edge profile, surface condition, wall gap, rear hardware, and access for tightening.
- Choose the mount: Confirm that the C-clamp or grommet can sit flush and use the required contact and tightening path.
- Verify the monitor: Record VESA spacing, mounted weight without the stand, recessed-hole details, adapter needs, and screw requirements.
- Compare the arm: Check the selected model's current load, reach, mount, table-thickness, and installation limits. Product documentation controls when supplied facts conflict.
- Map movement: Test the intended forward, rearward, lateral, height, and tilt positions against the wall, shelves, accessories, cables, and any second screen.
- Mount and recheck: Follow the model's instructions. After installation, confirm that the hardware is seated and the monitor remains controlled through its intended adjustment range. Stop if it shifts unexpectedly.
If one required field remains unknown—especially surface construction, table thickness, VESA adapter fit, mounted weight, or rear clearance—pause rather than guessing. Contact the manufacturer or a qualified installer when the desk's structure or the selected model's instructions do not clearly resolve the fit.
FAQs
Use these answers to resolve edge cases that a basic measurement cannot settle. The selected model's current product page and installation guide control when a specification or installation condition is unclear.
Will a Monitor Arm Fit My Desk?
Only if the exact mounting point, desk construction, rear clearance, edge profile, mount type, monitor VESA, mounted load, and arm reach all meet the selected model's conditions. Use your measurement record with the model's current installation guide; a desk that passes one field can still fail because of a wall, rear frame, or movement conflict.
What Desk Depth Do I Need for a Monitor Arm?
There is no universal minimum. Calculate usable depth from the desired viewing position, monitor depth, wall gap, and arm travel, then use OSHA's 20–40-inch range only as workstation viewing context. If those inputs cannot coexist without forcing the screen too close or blocking movement, choose a different mounting position or setup.
How Much Rear Clearance Does a Clamp Need?
The exact amount depends on the selected model and includes more than the gap behind the desktop. Measure the wall or rear frame, cable tray, apron, drawers, lip, edge thickness, underside access, and room for the full tightening path. Use the model's installation dimensions because a universal clearance number has not been established here.
Can a Monitor Arm Damage a Particleboard or Glass Desk?
It depends on the material, thickness, reinforcement, contact area, load, and mount design. A pad or wider plate does not automatically make an unsuitable surface acceptable. Check the manufacturer's stated surface conditions and stop if the desk is fragile, hollow, damaged, unsupported, or otherwise outside the documented installation requirements.
Can I Use a Monitor Arm Without VESA Holes?
Some monitors may work with an adapter, but verify the adapter's fit, screw size and length, recessed-hole clearance, and supported load with both the monitor and arm documentation. Do not remove the stand or hang the display until those details match; adapter hardware can change the carried weight and mounting depth.
Leave a comment