

Center the screen you use most, keep the other display beside it or slightly angled, and arrange the keyboard and mouse around the primary screen. In a monitor-primary laptop and monitor setup, the external monitor sits in front of you while the laptop stays to the side for reference. If the laptop does most of the work, reverse that arrangement. Raise the laptop only when a separate keyboard and mouse keep typing practical.

Treat screen height and viewing distance as adjustable starting points, not universal ergonomic rules. Test the arrangement from your actual chair and standing position, then check readability, reach, glare, camera framing, connections, and cable movement during real work.
Build a Comfortable Laptop and Monitor Setup: Screen Line First
The best screen line begins with work frequency: place the display responsible for most reading, writing, or meetings directly in front of you. Put the secondary screen beside it or at a modest angle so you can reference it without making it the center of your workspace. This practical approach can support a more readable, less awkward working position, but it cannot guarantee comfort or correct posture for every person.
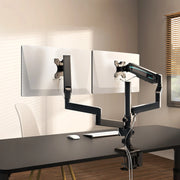
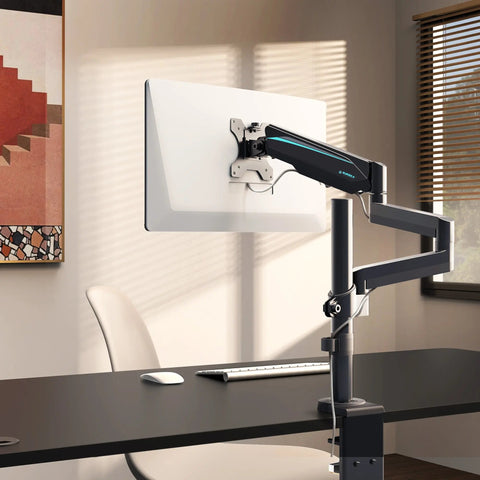
Start with the primary screen's top at or just below eye level, then adapt the laptop and secondary display around it. Matching the top edges is useful when the screens are similar, but it is not a requirement when different screen sizes or a raised laptop make exact alignment impractical. An adjustable monitor arm or monitor stand options may help you change screen height or clear surface space; check the display dimensions, VESA pattern, desk thickness, load, and movement clearance before relying on either option.

For planning, OSHA monitor guidance gives a 20–40 inch viewing-distance reference, while other remote-work guidance uses a narrower range. Treat those figures as references rather than requirements: adjust the screen position, display scaling, and text size until you can read your usual work without leaning forward. A larger display, smaller text, different vision needs, or limited desk depth can change the useful position. Recheck it from the chair and standing height you actually use.
Choose the Laptop's Role and Position
Choose the laptop's role before choosing its position. Center it when it is the primary screen or keyboard; place it beside a centered external monitor when the monitor carries most of the work. A laptop stand can improve screen placement, but sustained laptop typing usually calls for a separate keyboard and mouse rather than continued use of a raised built-in keyboard. Workstation accessories can be a browsing path for stands, organizers, and other layout aids, not proof that a particular accessory fits your equipment.
Stanford's ergonomics guidance supports pairing a raised laptop with separate input devices for extended typing. Virginia's office ergonomics guidance makes the same screen-and-input tradeoff clear: raise the laptop only when the keyboard and mouse can remain usable.
Make the External Monitor the Primary Screen
Center the external monitor when it handles most reading, writing, spreadsheets, or meetings. Keep the laptop close enough for messages, reference, or occasional calls, but do not let its position displace the primary display. Angle the laptop only as much as needed for readable viewing, and keep frequently used controls within easy reach.
Use a Side-by-Side Laptop Layout
A side-by-side laptop-and-monitor layout works best when you make one screen primary instead of forcing both to share equal status. Use this matrix to compare the tradeoffs:
| Work pattern | Centered screen | Laptop position | Keyboard choice | Desk-space tradeoff |
|---|---|---|---|---|
| Monitor-primary | External monitor | Beside the monitor for reference | Separate keyboard and mouse | Needs room for the laptop beside the main display |
| Laptop-primary | Laptop | In front of you; monitor sits beside it | Separate keyboard and mouse if the laptop is raised or separated | Preserves direct laptop viewing but may make the monitor secondary |
| Equal-use | The screen that makes switching easiest | Beside or near the centered screen | External inputs usually simplify switching | Requires enough width to keep both screens readable and accessible |
For a narrow desk, a centered laptop plus a secondary monitor may be easier than trying to keep two large displays equally prominent. If you type on the laptop frequently, do not judge the setup by screen alignment alone; check whether the keyboard, mouse, and charging connection remain usable.
Plan for Laptop-Only Transitions
When switching back to laptop-only work, use the same short sequence each time:
- Disconnect or dock without pulling the laptop, monitor, or power cables across the desk.
- Move the laptop into the centered position if it becomes the primary screen.
- Reposition the keyboard and mouse so they match the laptop's new role.
- Reconnect within reach, then test the camera, display signal, charging, and cable slack.
Do not assume a dock or closed-lid mode is required. Those choices depend on the laptop's ports, operating system, display settings, and work habits.
Place Inputs, Dock, and Cables for Easy Reach
Place the external keyboard in front of the primary screen, keep the mouse close to it, and position the dock where its frequently used connections are accessible. The goal is a clean laptop monitor desk layout that remains usable when devices move—not merely a desk with hidden cables.
- Center the keyboard. Use the primary screen, rather than automatically using the laptop, as the reference point. OSHA guidance supports keeping the keyboard directly in front of you with relaxed shoulders and aligned wrists and forearms; keyboard guidance can help you make that check.
- Place the mouse beside the keyboard. Leave enough clear surface for normal movement instead of pushing it behind the laptop, dock, or monitor base.
- Put the dock within reach. Before buying or routing around one, identify the laptop's video output, charging needs, monitor input, and peripherals. A dock is a convenience, not a universal compatibility solution.
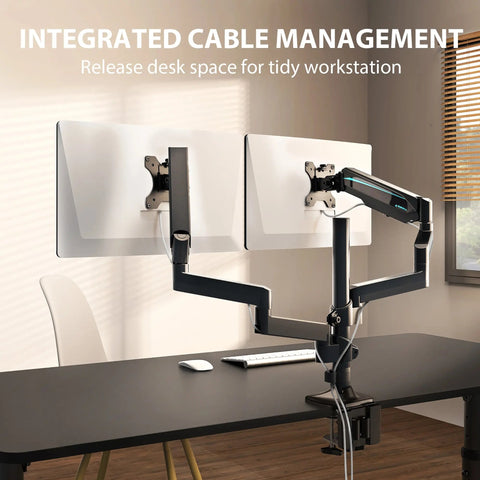
- Separate cable paths where practical. Keep charging, display, and peripheral cables distinguishable so troubleshooting does not require dismantling the entire desk.
- Test movement before securing excess. Move the laptop, adjust the monitor, change the desk height, and reach every connection. Cable slack is successful only when it avoids tension through the full range you actually use; there is no universal slack measurement.
A tidy route that pulls on a connector during a sit-stand transition is not a finished route. Secure only the excess after the movement test, and leave ports accessible for laptop-only work.
Match the Layout to Your Desk and Work Style
The right laptop-and-monitor desk layout depends on usable width and depth after the monitor, keyboard, mouse, laptop, lighting, and everyday work materials have been placed. Laptop frequency determines which screen should be centered, while seated-to-standing work adds a movement test for inputs and cables. OSHA desk guidance supports reserving enough surface and viewing space for the monitor, keyboard, mouse, and items that must remain accessible; it does not establish a universal desk footprint for every two-screen setup.
Fit Two Screens on a Compact Desk
Measure the usable surface, not the desk's advertised outside dimensions. Then:
- Reserve the area needed for the keyboard and mouse first.
- Measure the remaining width and depth for the monitor and open laptop.
- Decide whether the laptop must stay open for its camera, screen, or frequent access.
- Consider off-surface support only after checking the desk edge, display weight, VESA pattern, mounting method, and clearance.
- Keep the laptop accessible without placing it behind the keyboard or blocking the primary display.
For context, the listed Carbon Fiber Dual Monitor Stand is 43.31 inches wide, 7.44 inches high, and 7.88 inches deep, with a stated two-monitor capacity and 66-pound maximum. That makes it a concrete measurement to compare with your desk—not evidence that it will fit your workspace. Product dimensions should always be checked against your available surface and equipment.
Balance Frequent Laptop Use With External Display Work
| Buyer condition | Recommended starting arrangement | What to check first |
|---|---|---|
| Laptop-primary | Center the laptop; place the monitor beside it | Separate inputs if the laptop is raised, plus camera and charging access |
| Monitor-primary | Center the external monitor; place the laptop beside it | Keyboard alignment, laptop reference access, and secondary-screen readability |
| Equal-use | Center whichever screen makes switching easiest | Whether both screens remain readable without repeated repositioning |
| Compact desk | Use the smallest workable secondary position or off-surface support | Remaining mouse space, screen distance, mounting constraints, and glare |
| Seated-only | Finalize the arrangement from the working chair | Screen readability, input reach, and glare at typical times of day |
| Sit-stand | Test the same layout at both intended heights | Screen position, keyboard reach, connection access, and cable movement |
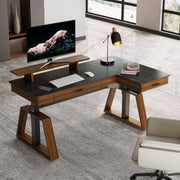
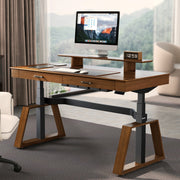
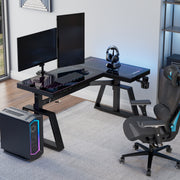
A standing desk with drawers is one navigation option for comparing listed 47- and 55-inch variants, but those dimensions do not confirm room for your screens or accessories. You can also browse home office desks after measuring the footprint you actually need.
Prepare for Seated and Standing Changes
- Set the desk to the seated height you use most and position the primary screen.
- Check keyboard and mouse reach, laptop access, connection visibility, and camera framing.
- Raise the desk to the intended standing height and repeat the same checks.
- Inspect power, display, and peripheral cables through the entire movement range.
- Make the smallest targeted adjustment, then test again rather than rerouting everything at once.
Run a Final Comfort and Compatibility Check
Before treating the setup as finished, run a short real-work test from every position you use. Check one variable at a time so you know whether the change improved readability, reach, access, or movement.
- Confirm that the screen used most is centered and that text is readable without leaning forward.
- Verify that the laptop's position matches its actual role and that the keyboard and mouse are reachable for the work you do most.
- Test charging, display signal, peripherals, dock access, and the connections you use during laptop-only work.
- Move the laptop, monitor, and desk through their normal range; stop if a cable becomes taut or a connection is pulled.
- Reassess glare at different times of day by changing screen or light angles while preserving readable text. Our eye-fatigue setup guidance offers optional follow-up on lighting and monitor arrangement.
- Check camera framing and where you look during calls. If stacked screens are part of your plan, our stacked monitor layout is an optional related guide.
- Repeat the checks at both seated and standing heights, if applicable.
The arrangement is not a fit yet if the desk lacks usable depth, the laptop cannot reach its required connections, the display setup depends on an unverified adapter, or cables remain under tension. If persistent pain, numbness, vision changes, or other symptoms continue, stop treating accessory changes as a complete solution and seek appropriate qualified advice.
FAQs
These questions cover device and room conditions that a general layout cannot answer universally. Check the relevant documentation and test the arrangement before fixing cables permanently.
Can I use a laptop and monitor without a dock?
Possibly. Compare the laptop output, monitor input, charging method, and required display settings before deciding whether an adapter or dock is needed.
Should I close the laptop lid?
Check the laptop maker's instructions and operating-system settings first. Test power, display output, camera access, and meeting needs before using closed-lid mode.
Where should a webcam go?
Test camera height, framing, and your line of sight during a real call. Keep the laptop open if its camera is the one you use.
What if the laptop and monitor use different connections?
Confirm the laptop output, monitor input, resolution, refresh rate, charging requirement, and adapter support in the device documentation. Connector shape alone is not enough.
How can I reduce glare?
Change screen and light angles, then check the laptop-and-monitor setup in morning, afternoon, and evening light. Keep text readable while adjusting brightness.
Leave a comment